


How to build a sturdy, critter-proof chicken coop?
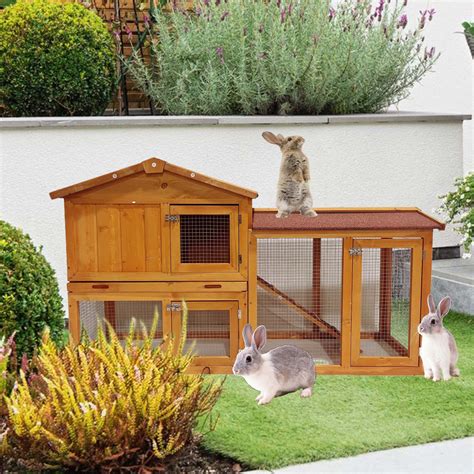
Owning backyard chickens is a rewarding experience, offering fresh eggs and delightful companionship. However, ensuring their safety is paramount, and that starts with a well-built, critter-proof chicken coop. A flimsy coop is an open invitation for predators, turning your flock into an easy target. This guide will walk you through the process of building a robust structure that stands up to the elements and thwarts even the most determined intruders.

1. Why Critter-Proofing is Non-Negotiable
Many common predators view a chicken coop as a convenient buffet. Raccoons, foxes, weasels, opossums, coyotes, snakes, and even rats can pose significant threats. These animals are often intelligent, persistent, and surprisingly agile. A coop that isn’t properly secured can lead to devastating losses for your flock, causing stress for both you and your birds.
Critter-proofing goes beyond just keeping predators out; it also involves protecting your chickens from harsh weather conditions, ensuring proper ventilation, and providing adequate space for their health and happiness. A sturdy coop is an investment in the longevity and well-being of your flock.
2. Essential Design Principles for a Sturdy Coop
2.1. Foundation and Structure
A solid foundation is the bedrock of a sturdy coop. Consider elevating the coop off the ground to deter burrowing predators and improve airflow. Use pressure-treated lumber for the base to resist rot and insects. The framing should be robust, using 2x4s or larger, securely joined to withstand strong winds and predator attempts to break in.
2.2. Size and Space
Adequate space is crucial. A general rule of thumb is 3-4 square feet per bird inside the coop and 8-10 square feet per bird in an enclosed run. Ensure there’s enough roosting bar space (at least 8-12 inches per bird) and enough nesting boxes (one box for every 3-4 hens) for comfort and to prevent squabbles.
2.3. Ventilation and Lighting
Good ventilation is key to preventing respiratory issues and regulating temperature. Install vents near the roofline, covered with 1/2-inch hardware cloth to prevent entry. Windows are great for natural light and additional airflow but must also be securely covered with hardware cloth.
2.4. Access Points
Both human and chicken doors must be incredibly secure. Human doors should be robust, fit snugly, and open outwards to prevent animals from pushing them open. Chicken doors should also be solid and capable of being securely latched, preferably from the outside, at night.
3. Critter-Proofing Materials: What You Need
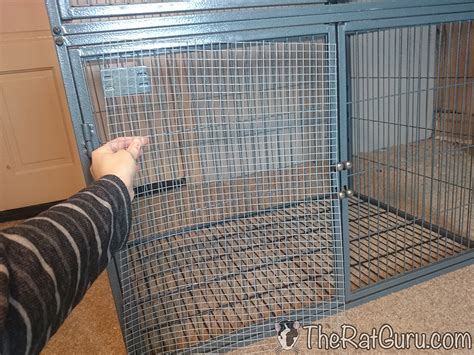
3.1. Hardware Cloth (Not Chicken Wire!)
This is arguably the most critical material. Chicken wire is designed to keep chickens in, not predators out. It’s easily torn and chewed through. Instead, use 1/2-inch or 1/4-inch galvanized hardware cloth. It’s strong, rigid, and predators cannot chew through or squeeze through its small openings. It should be used for all windows, vents, and the entire run enclosure.
3.2. Sturdy Lumber and Paneling
Use good quality, thick plywood or OSB for walls, then cover with siding for weather protection. Avoid thin, flimsy materials that can be easily chewed or torn apart.
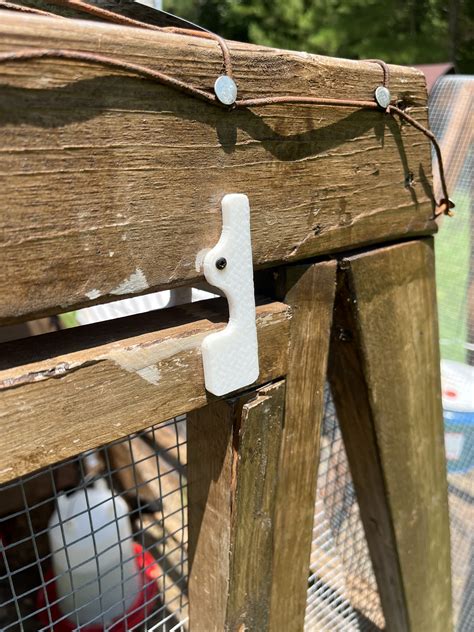
3.3. Secure Latches and Locks
Invest in heavy-duty latches. Barrel bolts, slide bolts with a padlock, or combination locks are excellent choices. Raccoons are notorious for figuring out simple latches, so opt for multi-step locking mechanisms if possible.
3.4. Roofing Materials
Asphalt shingles, metal roofing, or corrugated polycarbonate panels are good options. Ensure the roof is securely fastened and free of gaps where predators might squeeze in or rain might leak.
4. Step-by-Step Construction for Ultimate Security
4.1. Planning and Site Preparation
Before building, finalize your design, gather all materials, and prepare your site. Level the ground where the coop will sit and consider its orientation for sun and wind protection.
4.2. Building a Solid Foundation
If building on skids, ensure they are pressure-treated and stable. For a more permanent structure, consider concrete piers or even a concrete slab. Dig a trench around the perimeter, at least 12-18 inches deep and 12 inches wide, which will house your predator apron.

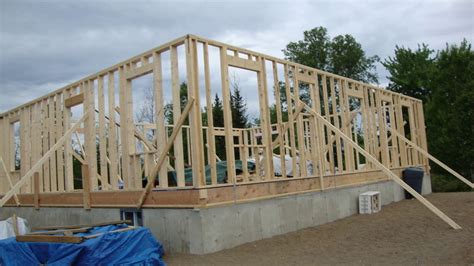
4.3. Framing the Structure
Construct the wall frames, ensuring they are square and plumb. Build a sturdy roof frame with an appropriate pitch for drainage. Attach the frames securely to your foundation.
4.4. Installing Walls and Critter Barriers
First, secure hardware cloth to the inside of your wall frames, stapling it every few inches to ensure no gaps. Extend this hardware cloth into the trench you dug. Bend it outwards at a 90-degree angle, forming a ‘predator apron’ that lies flat in the trench, extending out about 12 inches. Fill the trench with dirt and rocks. This apron deters burrowing animals who will hit the wire and give up. Then, attach your exterior siding over the hardware cloth, sandwiching it securely.
4.5. Securing Windows and Vents
Any opening, no matter how small, is a potential entry point. Cover all windows, vents, and any other openings with 1/2-inch or 1/4-inch hardware cloth, fastened firmly with heavy-duty staples or screws and washers.
4.6. Attaching the Roof
Install your chosen roofing material. Ensure it overlaps edges sufficiently and is securely fastened to prevent leaks and discourage predators from prying it open. Close off any attic or eaves spaces with hardware cloth.
4.7. Installing Doors and Locks
Hang your human and chicken doors, ensuring they fit tightly within their frames. Install robust, predator-proof latches. For the human door, consider a two-step latching system (e.g., a barrel bolt and a separate padlock). For the chicken door, a sliding door that drops into a track, secured with a heavy-duty bolt, works well. Raccoons can open many types of latches, so test your chosen mechanism’s resistance to manipulation.
5. Final Checks and Maintenance
Once construction is complete, perform a thorough inspection. Look for any gaps, weak spots, or unsecured areas. Walk around the coop at different times of day, imagining yourself as a predator trying to get in. Regularly check your coop for wear and tear, especially after storms. Reinforce any loose hardware cloth, repair damaged wood, and ensure all latches are functioning correctly. Keeping the area around the coop clear of debris and overgrown vegetation can also deter predators.
Building a sturdy, critter-proof chicken coop requires careful planning and robust materials, but the peace of mind knowing your flock is safe is priceless. By following these guidelines, you’ll create a secure haven for your chickens, allowing them to thrive and provide you with fresh eggs for years to come.