How do you capture natural light for authentic homemade food photos?

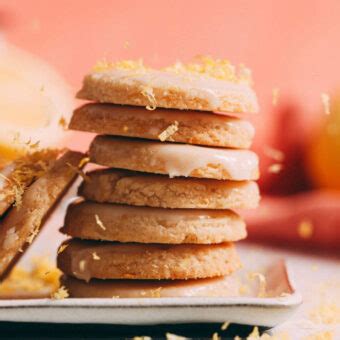
An authentic food photograph doesn’t just showcase a delicious dish; it tells a story, evokes emotion, and often, it glows with the soft, inviting quality of natural light. For home cooks and aspiring food photographers, mastering natural light is the most impactful and accessible way to elevate their homemade food photos from good to absolutely mouth-watering. Forget expensive studio setups; your kitchen window is your best friend.
Understanding the Nature of Light
The first step to harnessing natural light is to understand its characteristics. Not all natural light is created equal. Soft, diffused light, often found on overcast days or in the shade, is ideal for food photography as it creates gentle shadows and highlights, enhancing texture without being harsh. Direct sunlight, while powerful, can create strong, unflattering shadows and blown-out highlights, making your food look less appealing. Aim for light that is indirect and consistent.
The direction of light also plays a crucial role. Side lighting (light coming from the side of your dish) is often preferred as it highlights textures and creates depth. Backlighting (light coming from behind the dish) can create beautiful rim lighting and a sense of drama, but requires careful exposure to avoid silhouetting your subject. Front lighting (light coming from directly in front) tends to flatten the image, making it less interesting.
Finding Your Optimal Light Source
Your home is full of potential light sources. Windows are the primary tool for natural light food photography. Look for large windows that offer ample indirect light. North-facing windows often provide the most consistent and soft light throughout the day, while east and west-facing windows can offer beautiful morning or late afternoon light, but might require more diffusing.
Avoid placing your food directly in harsh, direct sunlight. If your only option is a sunny window, use a sheer curtain or a diffusion panel (even a white bedsheet can work in a pinch) to soften the light. This will transform harsh rays into a gentle glow, perfect for showcasing your culinary creations.
Controlling and Modifying Light with Simple Tools
Once you’ve found your light source, you’ll want to control it. You don’t need fancy photography equipment for this.
- Reflectors: These bounce light back onto your subject, filling in shadows and adding brightness. A simple white foam board, a piece of white cardstock, or even aluminum foil (crinkled and then smoothed out for a more diffused reflection) can act as an effective reflector. Place it opposite your light source to bounce light back onto the darker side of your dish.
- Diffusers: As mentioned, sheer curtains or thin white fabrics can diffuse harsh light, turning it soft and even. You can also buy collapsible diffusers relatively inexpensively.
- Flags (or Dark Cards): Sometimes you need to block light or deepen shadows to create more mood and dimension. A black foam board or a dark piece of fabric can absorb light, adding more contrast and drama to specific areas of your photo.
Setting the Scene: Backgrounds and Composition
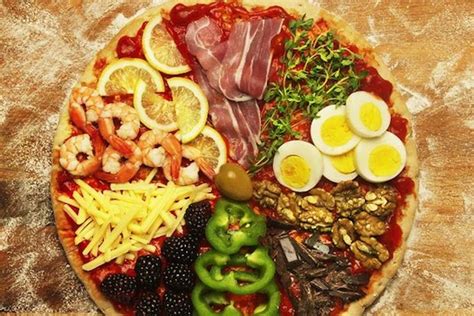
The light is only part of the equation; what surrounds your food also matters. Use simple, uncluttered backgrounds that won’t distract from your dish. Wooden boards, linen napkins, simple ceramic plates, or even a plain countertop can serve as excellent backdrops. Think about textures and colors that complement your food without overpowering it.
Composition involves how you arrange elements within your frame. The rule of thirds is a great starting point, placing your main subject off-center. Consider adding props like cutlery, ingredients, or a glass of water to tell a more complete story, but always ensure they support the main subject, not compete with it.

Camera Settings and Post-Processing Considerations
While natural light is key, knowing a few camera basics helps.
- ISO: Keep your ISO as low as possible (100-400) to minimize grain, especially if you have ample light.
- Aperture: For that pleasing blurred background (bokeh), use a wider aperture (smaller f-number, e.g., f/1.8 to f/4). For sharp focus across the entire dish, use a narrower aperture (larger f-number, e.g., f/5.6 to f/8).
- Shutter Speed: Adjust this to ensure proper exposure based on your ISO and aperture. If shooting handheld, aim for at least 1/60th of a second to avoid blur.
Even with perfect natural light, a little post-processing can enhance your photos. Adjusting white balance to ensure accurate colors, boosting contrast, or slightly increasing exposure can make your food truly pop.

Embrace the Imperfections, Master the Light
Capturing authentic homemade food photos with natural light is an art that requires practice and observation. Experiment with different window locations, times of day, and simple modifiers. Don’t be afraid to embrace the occasional shadow or highlight that adds character. The goal is to make your food look delicious, inviting, and real. With a bit of patience and these simple techniques, you’ll be creating stunning, authentic food photography right from your own home.