


How to build a sturdy, pest-proof raised garden bed cheaply?

A raised garden bed offers numerous advantages, from improved soil drainage and aeration to easier access and extended growing seasons. However, the cost of materials and the ongoing battle against garden pests can deter many aspiring gardeners. The good news is that building a sturdy, pest-proof raised bed doesn’t have to be expensive. With a bit of planning, smart material choices, and DIY ingenuity, you can create a durable and productive garden space on a budget.
The Benefits of Raised Beds and Why Build Your Own
Raised beds elevate your gardening game by providing better control over soil quality, reducing compaction, and allowing for earlier spring planting as the soil warms up faster. They also minimize bending and kneeling, making gardening more accessible. While pre-made kits are convenient, building your own allows for customization in size and shape, and, crucially, lets you implement specific pest-proofing measures from the ground up, all while saving money.

Strategic Material Choices for Budget & Durability
The key to a cheap yet sturdy raised bed lies in selecting cost-effective materials that can withstand the elements and the test of time. New lumber, especially rot-resistant varieties like cedar, can be pricey. Consider these alternatives:
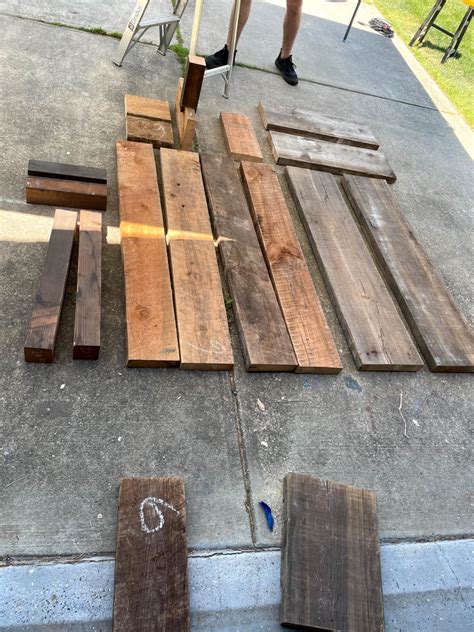
- Reclaimed or Scrap Lumber: Check local sawmills, construction sites (ask permission!), or even online marketplaces for free or low-cost lumber. Pallet wood can also be used, but ensure it’s heat-treated (HT stamped) and not chemically treated (MB stamped) for food safety. Hardwoods like oak, black locust, or juniper are naturally rot-resistant and can be sourced affordably.
- Concrete Blocks or Bricks: Often available for free or cheap from demolition sites or classifieds, these can be dry-stacked or mortared for a very sturdy and long-lasting bed. They retain heat well and are completely rot-proof.
- Galvanized Metal (Corrugated Steel): New sheets can be costly, but look for surplus or used panels from agricultural suppliers or scrap yards. They offer a modern aesthetic, are incredibly durable, and don’t leach chemicals. Ensure it’s galvanized for rust resistance.
- Composite Decking or Plastic Lumber: While often more expensive upfront than reclaimed wood, these materials are virtually maintenance-free and impervious to rot, insects, and decay, offering excellent long-term value. Look for sales or scrap pieces.
To keep costs down, always prioritize sourcing materials locally and exploring options like community free-cycle groups or negotiating with local businesses for discarded materials.
Designing for Ultimate Pest Protection
Pest-proofing is best integrated during the construction phase. Thinking ahead can save you headaches later:
- Bottom Barrier (Rodents & Voles): Line the bottom of your raised bed with heavy-gauge hardware cloth (¼-inch or ½-inch mesh). Extend it up the interior sides by a few inches and secure it with staples. This creates an impenetrable barrier against burrowing pests like gophers, moles, and voles.
- Side Barriers (Slugs & Snails): If using wood, consider burying a strip of flashing or sheet metal around the exterior base of the bed. For an elevated barrier, attach copper tape or a small lip that makes it difficult for slugs and snails to crawl over.
- Height & Depth: A bed that’s at least 12-18 inches deep provides ample soil for most vegetables and makes it harder for some ground-dwelling pests to enter. Taller beds also deter rabbits and other small critters.
- Vertical Protection (Birds & Larger Animals): Incorporate simple PVC or rebar hoops into your design, allowing you to easily drape netting or row covers over your plants when needed. This protects against birds, rabbits, deer, and even some insects.

Step-by-Step Construction Guide
1. Site Selection and Preparation
Choose a level spot that receives at least 6-8 hours of direct sunlight daily. Clear the area of weeds and debris. If you’re concerned about weeds growing into the bed from below, lay down a layer of cardboard or weed barrier fabric before construction.
2. Gathering and Cutting Materials
Based on your chosen dimensions, cut your lumber, metal, or other materials to size. Remember to factor in any corner bracing or internal supports you might need for stability. For a standard 4×8 foot bed, you’ll need two 8-foot pieces and two 4-foot pieces for the long and short sides, respectively, plus any corner posts if using a butt joint method.
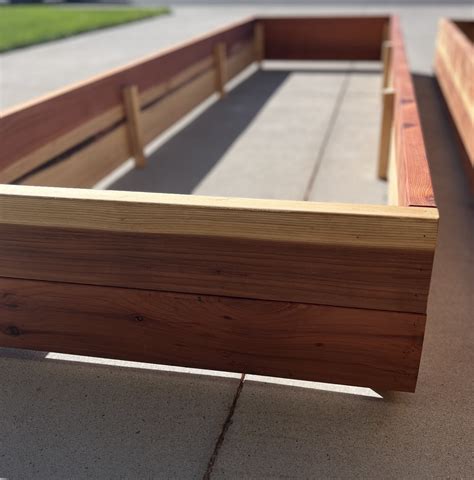
3. Assembling the Frame
Assemble the frame of your raised bed. For wooden beds, overlap the ends and screw them together, or use L-brackets for extra strength. For concrete blocks, simply stack them in your desired shape. For metal, rivet or screw the panels together, ensuring all edges are safe and not sharp.
4. Installing Pest Barriers and Liners
Once the frame is assembled and in its final position, lay down your hardware cloth at the bottom, extending it a few inches up the inside walls. Secure it firmly with staples or screws. For wooden beds, consider lining the interior walls with a breathable landscape fabric or pond liner (punched with drainage holes) to extend the life of the wood by preventing direct soil contact.
5. Filling Your Raised Bed
Start with a base layer of coarse organic materials like logs, branches, or straw (this is known as hugelkultur and helps with drainage and retains moisture). Follow with a mix of compost, topsoil, and other amendments. Aim for a rich, well-draining soil mix that will nourish your plants for seasons to come.
Maintenance Tips for Lasting Success
To ensure your inexpensive raised bed lasts for years, consider these maintenance tips: regularly check for loose fasteners and tighten them. If using wood, apply a non-toxic, food-safe sealant to the exterior every few years. Keep the area around the bed clear of weeds and debris to discourage pests. Finally, practice good crop rotation to maintain soil health and reduce pest pressure naturally.

Conclusion
Building a sturdy, pest-proof raised garden bed on a budget is an achievable and rewarding DIY project. By opting for reclaimed or cost-effective materials and integrating smart pest-proofing measures from the outset, you can create a beautiful and highly functional gardening space without a significant financial outlay. Embrace the challenge, get creative with your resources, and enjoy the bountiful harvest from your custom-built raised bed for years to come.


