


How to build a simple, effective DIY root cellar for preserving garden harvests?
Unlock the Secret to Year-Round Harvests
For centuries, root cellars have been the unsung heroes of food preservation, allowing families to enjoy their garden’s bounty long after the last frost. In today’s world of rising food costs and a growing desire for self-sufficiency, building your own simple, effective DIY root cellar is a practical and rewarding project. It’s an eco-friendly way to store produce, reduce waste, and ensure a steady supply of nutritious food without relying on energy-intensive refrigeration.
Why Build a DIY Root Cellar?
Beyond the satisfaction of self-reliance, a root cellar offers numerous benefits. It provides a cool, humid environment ideal for storing a wide range of fruits and vegetables, often for several months. This means fewer trips to the grocery store, savings on your food budget, and the peace of mind knowing your produce is stored naturally, free from chemicals or excessive energy consumption. From potatoes and carrots to apples and cabbages, a well-designed root cellar can significantly extend the usability of your harvest.
Essential Principles of a Root Cellar
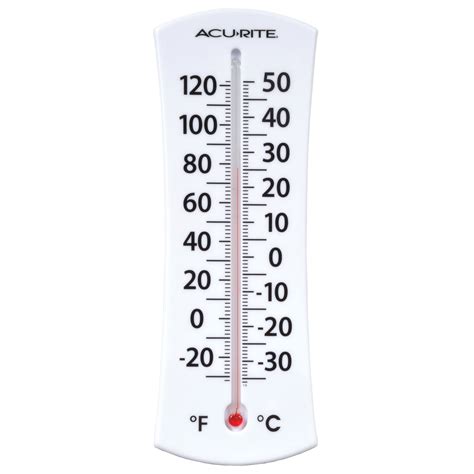
Understanding the core requirements for a successful root cellar is crucial, regardless of the design you choose. The goal is to mimic the cool, stable conditions found naturally underground:
- Cool Temperature: Ideally between 35-50°F (1-10°C) – consistently cool, but above freezing.
- High Humidity: Around 85-95% humidity prevents produce from drying out.
- Darkness: Exposure to light can cause sprouting and reduce quality, especially for potatoes.
- Ventilation: Proper airflow prevents the buildup of ethylene gas (emitted by ripening fruits and some vegetables), which can accelerate spoilage.
Choosing the Right Location
The best location for your root cellar will be naturally cool and offer some insulation. Consider:
- Underground: The earth provides excellent insulation. This could be a purpose-built pit, a buried container, or even a corner of an unheated basement.
- North Side of a Building: This area typically receives the least direct sunlight, keeping temperatures cooler.
- Shady, Well-Drained Spot: Avoid areas prone to standing water or excessive dampness.
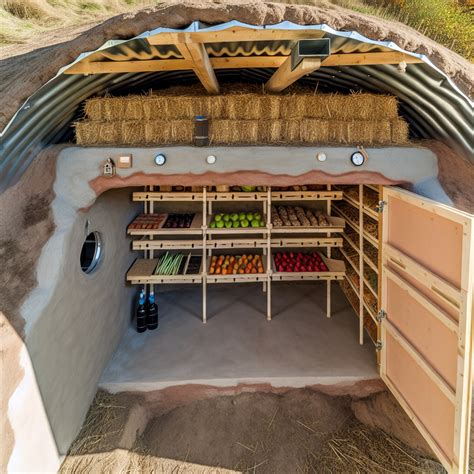
Simple DIY Root Cellar Ideas
1. The Buried Trash Can/Storage Bin Cellar
This is one of the simplest and most cost-effective options for smaller harvests. Dig a hole in a well-drained, shady spot large enough to accommodate a heavy-duty plastic trash can or a large, food-grade storage bin (50+ gallons).
- Preparation: Drill several small holes in the bottom of the bin for drainage. Add a layer of gravel to the bottom of the pit.
- Placement: Place the bin in the hole. You can insulate the sides further by lining the pit with straw bales before inserting the bin.
- Ventilation: For airflow, you can use a perforated lid, or run a PVC pipe from the bottom of the bin up above ground level and another from the top of the bin. Cover openings with screens to keep pests out.
- Covering: Bury the bin, leaving the top accessible. Cover the lid with a thick layer of straw, old blankets, or soil for insulation.
2. The Modified Unheated Basement Corner
If you have an unheated section of your basement, you can easily convert a corner into a root cellar. This method leverages existing insulation and structure.
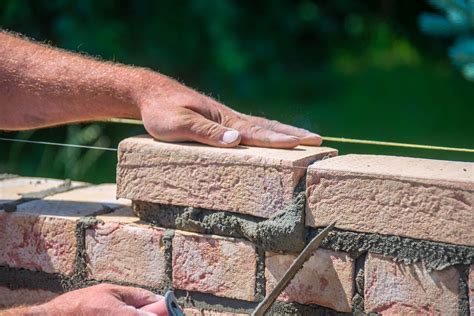
- Partitioning: Use insulated walls (e.g., 2×4 framing with rigid foam insulation or straw bales) to create a small, enclosed room within the basement. Ensure the partition extends to the ceiling.
- Door: Install an insulated door to seal the space.
- Ventilation: If possible, install two small vents through an exterior wall – one near the floor for cold air intake and one near the ceiling for warm air exhaust. Screen both ends to prevent pests. If no exterior wall access, a simple fan can circulate air within the basement.
- Humidity: Place a tray of water or a bucket with wet sand on the floor to maintain humidity.
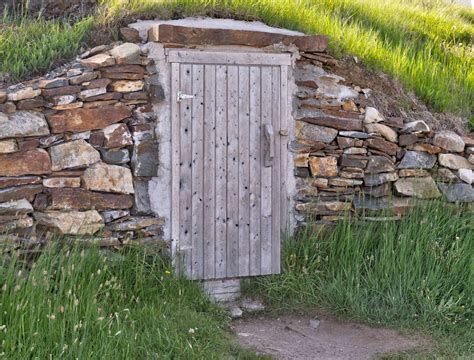
3. The Earth Mound Cellar (簡易型)
For a truly rustic and simple approach, you can create an earth mound cellar. This often involves a wooden crate or small structure covered with layers of insulating materials.
- Base: Start with a sturdy wooden crate, pallet box, or even a stack of concrete blocks forming a small chamber.
- Insulation Layers: Place your produce inside, then cover the structure with a thick layer of straw, then a layer of plastic sheeting (for moisture barrier), and finally, a thick mound of soil.
- Ventilation: Embed a couple of PVC pipes through the layers to allow for air exchange.
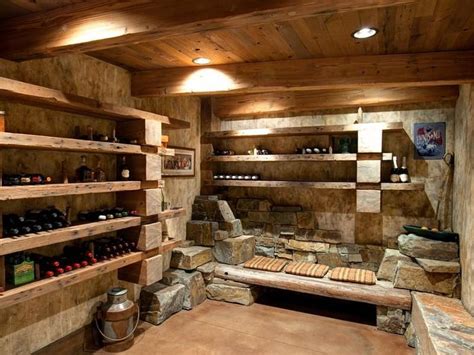
Key Elements for Success
- Insulation is Key: Whether it’s earth, straw, rigid foam, or old blankets, good insulation helps maintain a stable temperature.
- Ventilation System: Essential for preventing stale air and gas buildup. Two pipes (one intake, one exhaust) are ideal, especially for larger setups.
- Humidity Management: Monitor humidity with a hygrometer. If too dry, sprinkle the floor with water, add a bucket of water, or incorporate damp sand/sawdust.
- Proper Shelving: Use slatted shelves or pallets to allow for air circulation around stored produce. Avoid stacking directly on the floor.
- Pest Control: Ensure all openings are screened and the structure is secure against rodents and insects.
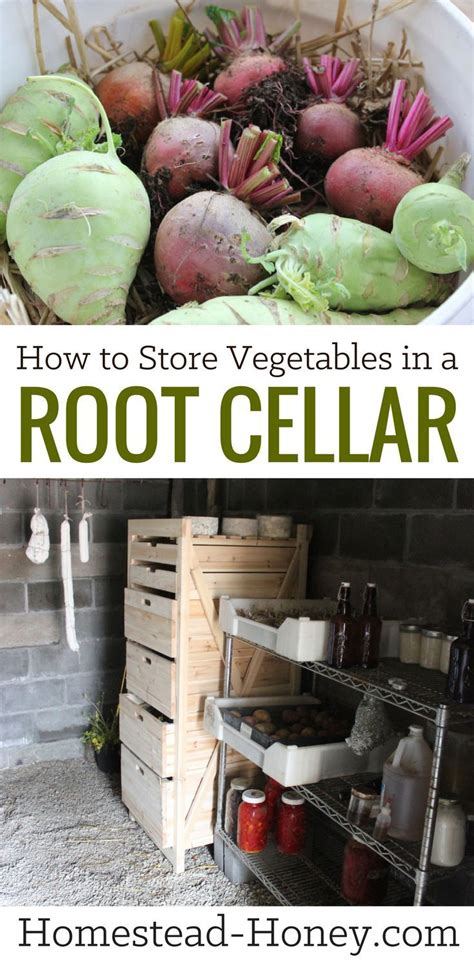
What to Store and How
Different produce items have different storage needs, but most root cellar candidates thrive in cool, dark, and humid conditions.
- Root Vegetables (Potatoes, Carrots, Beets, Parsnips, Turnips, Rutabagas): Store unwashed (brush off excess dirt) in bins, crates, or layered in damp sand/sawdust. Potatoes should be cured for a week in a cool, dark place before storing.
- Winter Squash & Pumpkins: Store at slightly warmer temperatures (50-55°F / 10-13°C) and lower humidity than root vegetables. Cure for 1-2 weeks in a warm, sunny spot before moving to the cellar.
- Apples & Pears: Store carefully wrapped in newspaper or separated to prevent ethylene gas from affecting other produce. Check regularly for spoilage.
- Cabbage: Can be stored whole on shelves or even with roots intact, replanted in damp sand.
- Onions & Garlic: Prefer cool, dry conditions, so they might do better in a slightly drier, well-ventilated section of the cellar, or even hung in braids.
Always inspect produce before storing, removing any damaged or diseased items, as one bad apple can indeed spoil the bunch.
Conclusion
Building a DIY root cellar is an empowering step towards greater food independence and sustainability. With a little planning and effort, you can create an efficient, energy-free storage solution that will keep your garden’s bounty fresh and delicious for months. Enjoy the fruits (and vegetables!) of your labor, all year long.