


How to build a simple root cellar for preserving garden harvests?
As backyard gardens flourish and yield abundant harvests, many find themselves facing a delightful challenge: how to preserve this bounty for enjoyment throughout the year. While canning, freezing, and dehydrating are popular methods, the humble root cellar offers a remarkably simple, energy-efficient, and effective way to store certain produce for months. Building a basic root cellar doesn’t require extensive construction skills or a large budget; it’s a quintessential DIY project that reconnects you with traditional food preservation.
The Timeless Appeal of Root Cellars
Root cellars are natural refrigeration units, relying on the earth’s stable temperatures and humidity to create ideal storage conditions. Long before modern appliances, they were essential for survival, keeping vegetables and fruits fresh through winter. A well-designed simple root cellar can drastically extend the shelf life of items like potatoes, carrots, apples, and onions, reducing food waste and ensuring a supply of homegrown goodness.

Understanding the Basics: What Makes a Root Cellar Work?
The success of a root cellar hinges on three main factors: cool temperatures, high humidity, and darkness. The earth naturally insulates, keeping the interior cool (ideally 35-50°F or 2-10°C) and stable. Sufficient humidity (around 85-95%) prevents produce from drying out, while darkness inhibits sprouting and spoilage. Good ventilation is also crucial to circulate air and prevent the build-up of ethylene gas, which can accelerate ripening and decay.
Planning Your Simple Root Cellar Project
Location, Location, Location
Choosing the right spot is paramount. Look for a naturally cool, shaded area that drains well. Avoid areas prone to flooding. Consider proximity to your home for convenience, but also ensure it’s not too close to heat sources. A north-facing slope is often ideal.
Design Type and Materials
For a simple root cellar, you have a few options:
- Modified Container: An old chest freezer (unplugged and modified for ventilation), a large plastic barrel, or even a sturdy wooden crate buried partially or fully in the ground.
- In-Ground Pit/Buried Bin: Digging a hole and lining it with wood, concrete blocks, or heavy-duty plastic sheeting.
- Simple Corner/Crawl Space: Utilizing an existing cool, damp corner of a basement or crawl space, if available and suitable.
For this guide, we’ll focus on a buried bin/pit method, as it’s accessible for most DIYers.
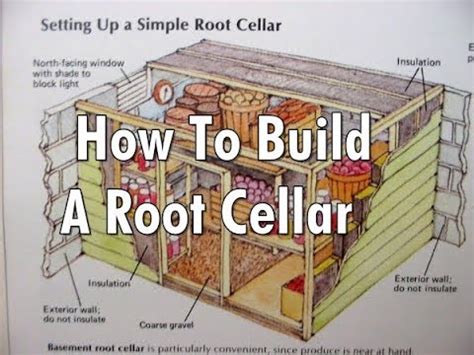
Step-by-Step: Building a Buried Bin Root Cellar
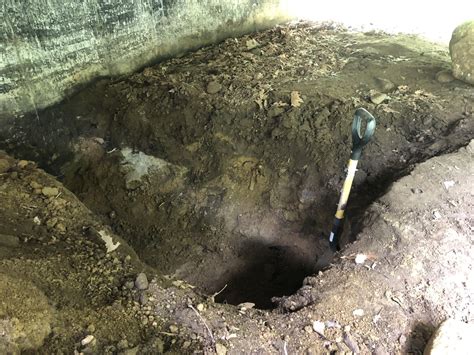
1. Site Selection and Preparation
Identify a suitable, well-draining spot. Mark out the dimensions for your pit. A good size for a beginner might be 3x3x3 feet (approximately 1x1x1 meter), but adjust based on your harvest volume. Clear away any vegetation.
2. Digging the Pit
Excavate the hole to your desired depth and width. As you dig, save the removed soil, as it will be used for insulation later. Ensure the bottom is relatively level.
3. Constructing the Storage Structure
Line your pit. This could be:
- Wooden Frame: Build a sturdy box from rot-resistant lumber (cedar, treated lumber, or naturally durable wood).
- Concrete Blocks: Lay blocks without mortar for a breathable structure, or with mortar for more durability.
- Heavy-Duty Plastic/Metal Container: If using a large barrel or tote, ensure it’s food-grade and has a sealable lid.
Whatever method you choose, ensure there’s a base that allows for drainage or a gravel layer beneath to prevent standing water.
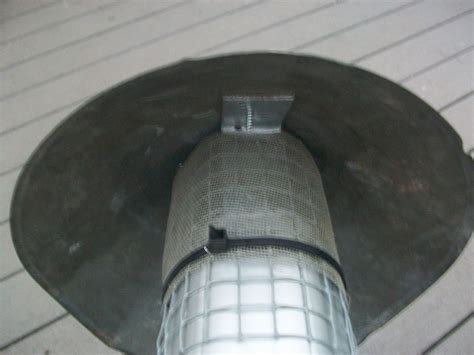
4. Adding Ventilation
Ventilation is crucial. For a buried pit, you’ll need at least two pipes: an intake pipe near the bottom and an exhaust pipe near the top. These can be PVC pipes (3-4 inches in diameter). Extend them above ground and cap them with screens to prevent pests and debris from entering. Position them on opposite sides of the cellar to encourage cross-ventilation.
5. Creating a Secure Entrance and Insulation
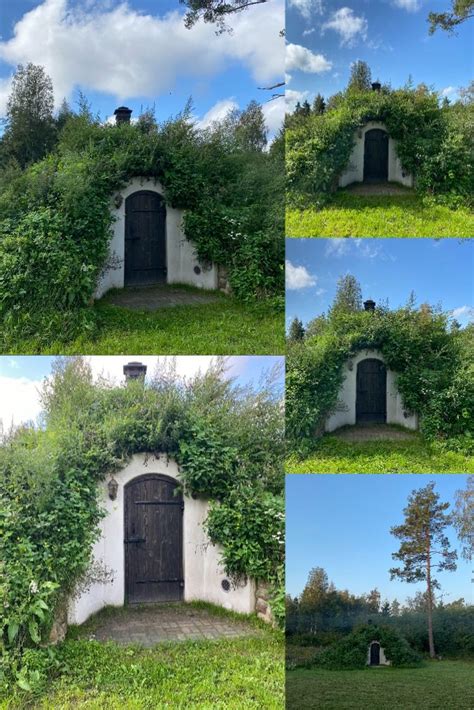
The top of your cellar needs a secure, insulated cover. This could be a sturdy wooden lid, perhaps hinged, that is then covered with a thick layer of straw, leaves, or the excavated soil. The goal is to keep the interior dark and maintain a stable temperature. If using soil, mound it over the lid and edges to provide further insulation and camouflage.
6. Interior Setup: Shelving and Storage
Once the structure is complete, consider interior organization. Simple wooden shelves, crates, or even sturdy plastic bins can be used to store produce. Avoid direct contact with the ground for most items. Ensure air can circulate around the produce.
Tips for Root Cellar Success
- Monitor Conditions: Periodically check the temperature and humidity. You might need to adjust ventilation or add a bucket of water to increase humidity if it’s too dry.
- Inspect Produce: Before storing, ensure produce is clean, dry, and free of blemishes. A single spoiled item can quickly contaminate others.
- Proper Storage: Store items appropriately. Root vegetables often do well in damp sand or sawdust. Apples and potatoes should generally be stored separately as apples emit ethylene gas, which can cause potatoes to sprout.
- Keep it Dark: Minimize light exposure to prevent sprouting and greening of potatoes.
What to Store in Your Root Cellar
Ideal candidates for root cellar storage include:
- Root Vegetables: Potatoes, carrots, beets, parsnips, turnips, rutabagas, celeriac.
- Winter Squash & Pumpkins: Cure them first!
- Cabbage: Can be stored whole or in layers.
- Apples & Pears: Store carefully, away from other produce if possible.
- Onions & Garlic: Require cooler, drier conditions than most, so place them near the entrance or in a slightly less humid spot.
Embrace Self-Sufficiency
Building a simple root cellar is a rewarding project that extends your garden’s bounty and reduces reliance on modern refrigeration. It’s an empowering step towards greater food security and a more sustainable lifestyle. Enjoy the satisfaction of pulling fresh, crisp vegetables from your own homemade cellar in the depths of winter!


