


Secret for consistently flaky homemade pie crust with real butter?
For many home bakers, the quest for a consistently flaky, golden-brown pie crust made with real butter feels like an elusive culinary holy grail. While shortening might offer an easier path to flakiness, nothing compares to the rich flavor and tender texture that pure butter imparts. The good news? It’s not magic, but rather a combination of precise techniques and understanding the science behind the perfect pastry.
The Absolute Necessity of Cold Ingredients
The single most crucial factor in achieving a truly flaky pie crust is keeping your butter and water ice-cold. Cold butter creates pockets of steam during baking, which separate the layers of dough, resulting in that coveted flakiness. If your butter is too warm, it melts into the flour prematurely, leading to a tough, dense crust rather than a light, airy one.

To ensure success, cube your butter and chill it in the freezer for at least 15-20 minutes before use. Even better, use ice water (keep a bowl of water with ice cubes handy and measure from that) and consider chilling your flour in the freezer for a short while too, especially on a warm day. Every touch, every moment, contributes to the butter warming up, so work quickly.
Minimal Water, Maximum Flavor
While water is essential for bringing the dough together and creating steam, too much can develop gluten excessively, resulting in a tough crust. The key is to add just enough ice water, a tablespoon at a time, until the dough barely comes together. It should still look a little shaggy and crumbly, not smooth and uniform.
Resist the urge to add more water than necessary. A slightly dry dough is easier to handle and less prone to toughness than an overly wet one. Use your hands minimally to avoid transferring body heat; a pastry blender or food processor (pulsing carefully) can be invaluable here.
Handle with Care: Avoid Overworking the Dough
The enemy of a tender, flaky pie crust is overworking the dough. When you knead or mix dough too much, you develop gluten, which is great for bread, but detrimental to pie crust. Developed gluten makes the crust elastic and tough. Aim to mix until the ingredients are just combined and the butter pieces are still visible – varying in size from pea to almond sliver.

Once you’ve formed your dough into a disc, wrap it tightly in plastic wrap and refrigerate it for at least 30 minutes, or preferably an hour or two. This chilling period allows the gluten to relax, making the dough easier to roll, and re-chills the butter, preparing it for baking.
The Art of Rolling and Fluting
When it’s time to roll, work on a lightly floured surface, using gentle, even pressure. Roll from the center outwards, rotating the dough frequently to prevent sticking and ensure an even thickness. Aim for about 1/8 to 1/4 inch thick. Uneven thickness can lead to uneven baking.

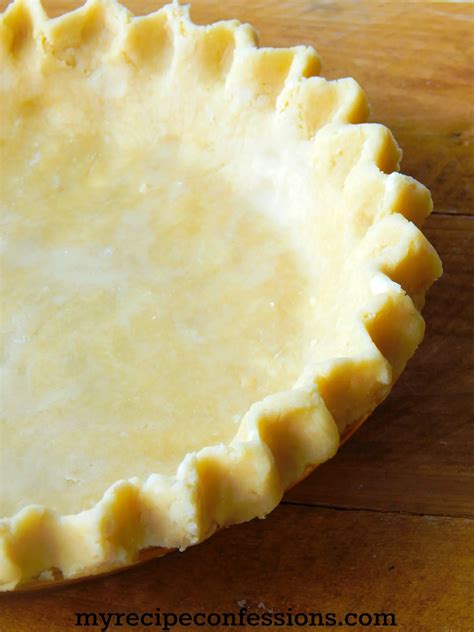
Transfer the rolled dough carefully to your pie plate. Don’t stretch it; let it gently fall into place. Trim the edges and crimp or flute them creatively. For single-crust pies, blind baking (pre-baking the crust) is often recommended to prevent a soggy bottom, especially with wetter fillings. Use pie weights or dried beans to hold the crust in place during blind baking.
Baking to Golden Perfection
Bake your pie crust in a hot oven (usually 400-425°F or 200-220°C) initially to set the butter and create steam quickly. If baking a full pie, you might lower the temperature after the first 15-20 minutes. Keep an eye on the edges; they tend to brown faster. Use foil or a pie shield to prevent over-browning if needed.

The secret to a consistently flaky homemade pie crust with real butter isn’t a single magic trick, but a harmonious blend of temperature control, gentle handling, and patience. Embrace the process, don’t fear the butter, and with each attempt, you’ll get closer to mastering this essential baking skill, yielding pastries that are truly a cut above.