


How to safely water bath can excess summer garden produce?
Embrace the Bounty: Why Water Bath Canning?
As summer peaks, gardens often overflow with ripe tomatoes, juicy berries, crisp pickles, and flavorful fruit. While fresh enjoyment is paramount, preserving this seasonal abundance allows you to savor the taste of summer long after the growing season ends. Water bath canning is a time-tested, safe, and relatively simple method for preserving high-acid foods, transforming your excess produce into delicious jams, jellies, pickles, and sauces.
It’s an economical and rewarding skill, perfectly aligned with country living values, minimizing waste, and maximizing self-sufficiency. But like any food preservation method, safety is paramount. Understanding the science and following tested guidelines is crucial for shelf-stable, safe results.

Understanding Water Bath Canning: The Basics
Water bath canning is suitable only for high-acid foods, or foods to which acid has been added. This includes most fruits, fruit juices, jams, jellies, marmalades, fruit butters, tomatoes with added acid (lemon juice or citric acid), pickles, relishes, and chutneys. The high acidity prevents the growth of harmful bacteria, especially Clostridium botulinum, which thrives in low-acid, oxygen-free environments.
The process involves immersing sealed jars of food in boiling water for a specific period. This heat processing serves two critical functions: it heats the food to a temperature that destroys spoilage microorganisms and molds, and it creates a vacuum seal as the jars cool, preventing recontamination.
Essential Equipment for Safe Canning
Before you begin, gather all necessary equipment. Having everything ready streamlines the process and ensures safety.
- Water Bath Canner: A large pot with a lid and a rack to keep jars off the bottom. It must be deep enough to cover jars with at least 1-2 inches of water.
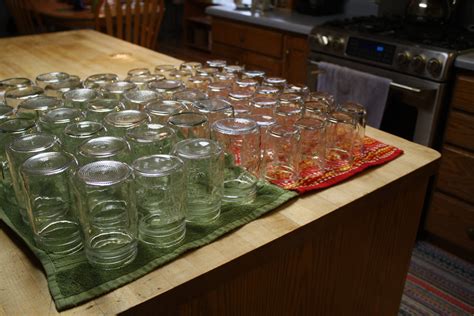
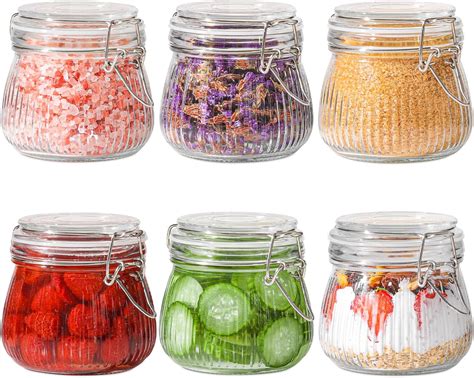
- Canning Jars: Mason-style glass jars (pint, quart, half-pint) specifically designed for canning. Inspect them for chips or cracks.
- New Lids and Bands: Use new flat metal lids each time for proper sealing. Bands can be reused if not rusted or warped.
- Canning Tools: Jar lifter, canning funnel, bubble remover/headspace tool, lid wand (magnetic).
- Large Pot or Stockpot: For preparing your produce (e.g., making jam or blanching).
- Basic Kitchen Tools: Knives, cutting boards, measuring cups, spoons, timers.
- Clean Towels: For wiping jar rims and drying.
Step-by-Step Guide to Water Bath Canning
1. Prepare Your Produce
Wash and prepare your fruits or vegetables according to your chosen tested recipe. This might involve peeling, chopping, slicing, or pureeing. For tomatoes and some fruits, adding bottled lemon juice or citric acid is essential to ensure adequate acidity.
2. Sanitize Jars and Prepare Lids
Wash jars in hot soapy water and rinse well. Keep them hot (in simmering water in the canner or a separate pot) until ready to fill to prevent thermal shock. Place new lids in a small saucepan with simmering (not boiling) water to soften the sealing compound.
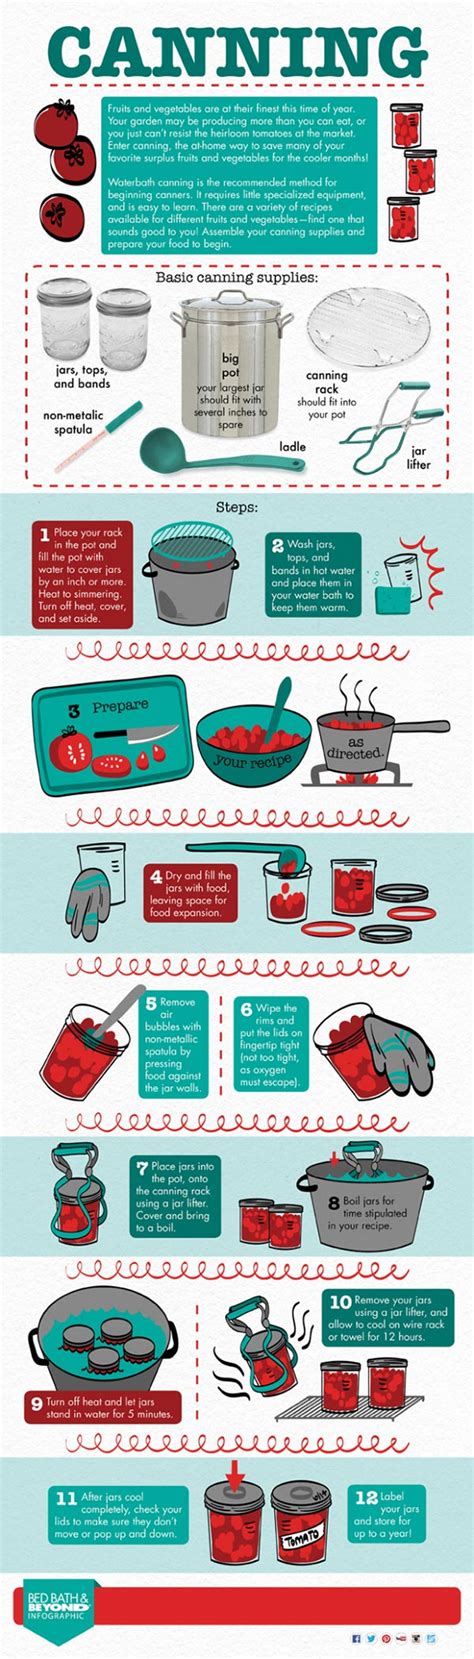
3. Fill Jars Properly
Using a canning funnel, carefully fill hot jars with your hot prepared food. Leave the specified headspace (the empty space between the food and the rim of the jar), typically ¼ inch for jams/jellies, ½ inch for fruits/tomatoes, and up to 1 inch for some pickles. Remove air bubbles by gently running a plastic utensil around the inside of the jar. Wipe jar rims clean with a damp cloth.
4. Apply Lids and Bands
Place a hot, softened lid centered on each jar. Screw on the bands finger-tight – just until resistance is met. Do not overtighten, as this can prevent air from escaping during processing and interfere with sealing.
5. Process in the Water Bath Canner
Place filled, lidded jars onto the rack in the canner. Ensure jars are not touching each other. Carefully lower the rack into the canner. Add more boiling water if needed to cover jars by at least 1-2 inches. Bring the water to a rolling boil, then cover the canner and begin timing according to your recipe (adjusting for altitude if necessary). Maintain a steady, rolling boil for the entire processing time.
6. Cool and Check Seals
Once processing time is complete, turn off the heat and carefully remove the canner lid. Let jars rest in the canner for 5 minutes before carefully lifting them out with a jar lifter. Place hot jars upright on a folded towel or cooling rack in a draft-free area, leaving space between them. Do not retighten bands. Let them cool undisturbed for 12-24 hours.
After cooling, check for seals. A properly sealed lid will be concave (curved inward) and won’t flex when pressed. Remove bands, wipe jars clean, label with contents and date, and store in a cool, dark, dry place. Any jars that didn’t seal should be refrigerated and consumed within a few days.

Key Safety Considerations
- Use Tested Recipes: Always use current, tested recipes from reputable sources like the National Center for Home Food Preservation (NCHFP), university extension offices, or USDA guidelines. Do not rely on old family recipes that may not meet modern safety standards.
- Altitude Adjustments: Water boils at a lower temperature at higher altitudes, meaning you need to increase processing times to ensure food reaches the necessary temperature for safety. Consult NCHFP or your local extension for specific adjustments.
- Don’t Skimp on Acid: When canning tomatoes or other borderline-acid foods, always add the recommended amount of bottled lemon juice or citric acid.
- Proper Headspace: Too much or too little headspace can lead to sealing failures or spoilage.
- Never Re-can: If a jar fails to seal, don’t reprocess it in a water bath canner. Refrigerate and consume quickly.
- Inspect Jars Before Use: Check for chips, cracks, or rust. Discard damaged jars.
- Label and Store: Properly label and store jars in a cool, dark place. Consume within one year for best quality.
Conclusion: Enjoying Your Preserved Harvest
Water bath canning is a gratifying way to preserve the bounty of your summer garden, ensuring a pantry stocked with wholesome, homemade goodness. By diligently following tested recipes and adhering to essential safety guidelines, you can confidently turn fresh produce into shelf-stable treasures, bringing the taste of your country garden to your table year-round. Happy canning!