


Simple DIY root cellar alternatives for garden harvest without digging deep?

Why Consider No-Dig Root Cellar Alternatives?
Traditional root cellars, while highly effective, often require significant excavation, specialized construction, and suitable land. For many home gardeners, especially those with smaller plots, challenging soil conditions, or limited budgets, digging deep isn’t a viable option. Fortunately, preserving your bountiful harvest through the winter doesn’t have to be a monumental task. There are numerous simple, DIY alternatives that leverage natural cooling, insulation, and humidity to create ideal storage conditions without a single shovel breaking deep ground.
These methods focus on mimicking the cool, dark, and humid environment of a traditional root cellar, often using readily available materials. The goal is to keep produce dormant, preventing spoilage, sprouting, and dehydration. Let’s explore some of the most accessible and effective no-dig solutions.
1. The Straw Bale Method (Clamp Storage)
One of the most rustic and effective no-dig solutions is a straw bale clamp. This method works by using straw as an insulating layer to protect root crops from freezing temperatures and light, while allowing for some air circulation. It’s particularly good for potatoes, carrots, beets, and apples.
How to build a straw bale clamp:
- Choose a site: Select a well-drained spot, perhaps against a north-facing wall or under a tree for consistent shade.
- Prepare the base: Lay down a thick layer of straw (6-12 inches) directly on the ground. You might also add a layer of hardware cloth to deter rodents.
- Stack your produce: Pile your sorted produce (ensure it’s dry and free of blemishes) onto the straw base. Keep different types of produce separate if possible.
- Insulate with straw: Cover the produce completely with another thick layer of straw, forming a mound. The thicker the layer, the better the insulation.
- Add a protective cover: Place a waterproof tarp or sheet of plastic over the straw, but leave the ends slightly open for ventilation to prevent condensation and rot. Secure the tarp with rocks or bricks.
2. Buried Containers: Garbage Cans, Barrels, or Coolers
Utilizing the earth’s natural insulation by burying containers partially or fully is another excellent strategy. This method creates a stable temperature and humidity environment similar to a traditional cellar.
Steps for buried container storage:
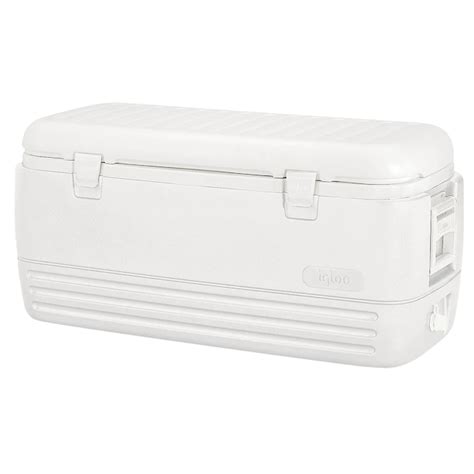
- Select a container: An old metal or plastic garbage can with a lid, a large food-grade plastic barrel, or even an unused cooler can work. Ensure it’s clean.
- Dig a hole: Dig a hole deep enough to bury most of the container, leaving just the rim or a few inches exposed. Choose a well-drained spot to prevent waterlogging.
- Prepare the container: Drill a few small drainage holes in the bottom if using a non-porous container to prevent water accumulation. Line the bottom with a few inches of moist sand or peat moss for humidity.
- Store your crops: Layer your produce (e.g., carrots, parsnips, turnips) with damp sand, sawdust, or peat moss. This helps maintain humidity and prevents contact between individual items.
- Insulate and cover: Place the lid on your container. For extra insulation, mound soil around the exposed rim and cover with a thick layer of straw or leaves. You can also place a large rock or piece of plywood over the lid to keep it secure and add more insulation.
3. Root Clamps or Mounds (Miniature Earth Cellars)
Similar to the straw bale method but relying more on soil for insulation, a root clamp is essentially a small, insulated mound of produce directly on the ground.
Building a root clamp:
- Choose a dry, elevated spot: Good drainage is crucial.
- Prepare the base: Lay down a layer of straw or sand.
- Pile your produce: Create a conical or elongated pile of root vegetables.
- Cover with straw: Add a generous layer of straw over the produce.
- Cover with soil: Shovel a layer of soil (6-12 inches thick, depending on your climate) over the straw, effectively creating a small hill.
- Add ventilation (optional): For larger clamps, you might insert a PVC pipe or a bundle of straw vertically through the center of the mound before adding the soil layer, to provide a vent.

4. Insulated Storage Boxes (Above-Ground)
For those who prefer not to disturb their yard, an insulated storage box can be a fantastic above-ground alternative. These can be placed in an unheated garage, shed, or even a porch.
Creating an insulated box:
- Use an old chest or build one: A wooden chest, an old freezer (unplugged and cleaned), or a custom-built plywood box can serve as the primary container.
- Insulate thoroughly: Line the inside of the box with rigid foam insulation (e.g., polystyrene or polyisocyanurate sheets) on all sides, the bottom, and the lid. Ensure tight seams.
- Add moisture: Place a tray of damp sand or peat moss at the bottom, or layer produce directly in damp sand/sawdust.
- Ventilation: Drill a few small holes near the top and bottom of the box for minimal air exchange, but avoid creating drafts.
- Placement: Position the box in the coolest, darkest part of your unheated space.
5. Cool Pantry or Closet Storage with Humidity Control
Sometimes, the simplest solution is right inside your home. An unheated pantry, a cool closet, or even a corner of a basement can be adapted for root crop storage.
Tips for in-home storage:
- Find the coolest spot: Identify the area in your home that stays consistently cool and dark, ideally between 35-50°F (2-10°C). Basements are often ideal.
- Increase humidity: Place trays of water or damp sand/peat moss near your produce to raise the ambient humidity. Root crops shrivel in dry air.
- Use appropriate containers: Store root vegetables in slatted crates, bushel baskets, or even cardboard boxes lined with newspaper. Layer them with damp sand, sawdust, or peat moss to maintain moisture and prevent contact rot.
- Air circulation: Ensure good air circulation around containers to prevent mold and mildew.
- Avoid ethylene producers: Keep apples and other ethylene-producing fruits away from root vegetables, as ethylene can cause premature sprouting or spoilage.

General Tips for Successful No-Dig Storage
- Harvest carefully: Handle crops gently to avoid bruising, which can lead to rot.
- Cure appropriately: Some crops like potatoes, sweet potatoes, and winter squash benefit from a curing period before storage.
- Clean and dry: Brush off excess dirt but do not wash most root vegetables before storage. Ensure they are completely dry to prevent mold.
- Inspect regularly: Check your stored produce every few weeks and remove any items showing signs of spoilage to prevent it from spreading.
- Know your crops: Different vegetables have different ideal storage conditions. Research the specific needs of your harvest.

With a little creativity and effort, you can enjoy your garden’s bounty long after the growing season ends, even without digging a deep root cellar. These simple DIY alternatives offer practical, sustainable ways to extend your harvest and reduce food waste.


