Easiest way to water bath can garden tomatoes for beginners?
Harvesting Your Bounty: Easy Water Bath Canning for Beginners
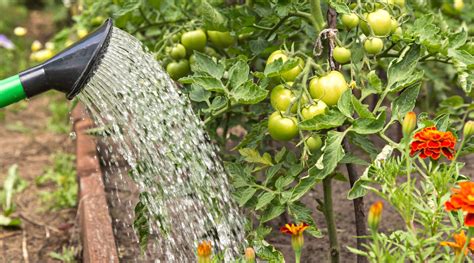
There’s nothing quite like the taste of homegrown tomatoes, and preserving that fresh flavor means you can enjoy them long after the summer sun fades. Water bath canning is a fantastic and accessible method for beginners to preserve high-acid foods like tomatoes. It’s not as daunting as it sounds, and with a few simple steps, you’ll be enjoying your garden’s bounty all year round. This guide will walk you through the easiest way to safely can your garden tomatoes.

Essential Equipment You’ll Need
Before you begin, gather your tools. Having everything ready makes the process smooth and enjoyable:
- Canning Pot: A large pot with a lid and a rack at the bottom (to keep jars off the direct heat).
- Canning Jars: Mason jars (pint or quart size) with new lids and rings. Ensure they are specifically designed for canning.
- Jar Lifter: Essential for safely placing and removing hot jars from the canner.
- Funnel: A wide-mouth funnel helps prevent spills when filling jars.
- Ladle: For scooping tomatoes into jars.
- Bubble Remover/Headspace Tool: A non-metallic utensil (or plastic knife) to remove air bubbles and measure headspace.
- Clean Towels: For wiping jar rims and general cleanup.
- Large Bowls: For washing tomatoes and holding prepared tomatoes.
Step 1: Preparing Your Tomatoes
The quality of your canned tomatoes starts with the fresh produce.
- Select & Wash: Choose firm, ripe tomatoes free from blemishes. Wash them thoroughly under cool running water.
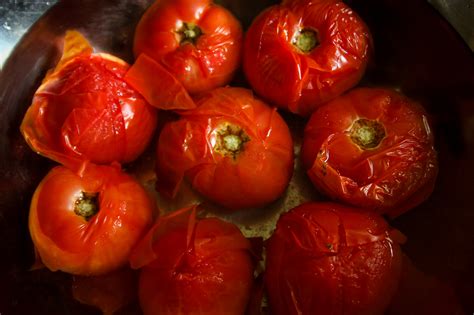
- Remove Skins (Optional but Recommended for Beginners): This makes for a smoother product.
- Bring a large pot of water to a boil.
- Score a small ‘X’ on the bottom of each tomato.
- Blanch tomatoes in boiling water for 30-60 seconds, or until skins start to crack.
- Immediately transfer them to an ice bath to stop cooking.
- The skins should now peel off easily.
- Chop & Core: Remove the core from each tomato. You can crush them, chop them into desired pieces, or leave them whole if they are small enough. You can also cook them down slightly at this stage to remove excess water, but for simplicity, we’ll focus on a raw pack method.
Step 2: Sterilizing Jars and Lids
Cleanliness is paramount in canning to prevent spoilage.
- Wash Jars: Wash jars thoroughly in hot soapy water, rinse well, or run them through a dishwasher. Keep them hot until filling.
- Prepare Lids: Place new lids in a small saucepan with simmering (not boiling) water. This softens the sealing compound. Keep rings clean and at hand.
Step 3: Filling the Jars Safely
This is where you bring everything together.
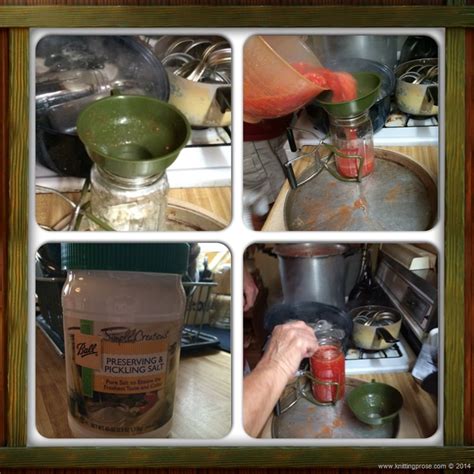
- Add Acid: Tomatoes require added acid for safe water bath canning. For pint jars, add 1 tablespoon of bottled lemon juice or 1/4 teaspoon of citric acid. For quart jars, use 2 tablespoons of bottled lemon juice or 1/2 teaspoon of citric acid. Do NOT use fresh lemon juice as its acidity can vary.
- Fill Jars: Using your funnel and ladle, pack the prepared tomatoes into the hot jars. If using whole or chopped tomatoes, gently press them down to release liquid and fill spaces. You can also add hot water or tomato juice if needed to cover them.
- Remove Air Bubbles: Slide your bubble remover around the inside of the jar to release trapped air bubbles.
- Check Headspace: Ensure you have 1/2 inch of headspace (the space between the top of the food and the rim of the jar). This is crucial for proper sealing.
- Wipe Rims: Carefully wipe the jar rims clean with a damp, clean cloth. Any food residue can prevent a proper seal.
- Apply Lids and Rings: Center a new, softened lid on each jar. Screw on the band finger-tight – don’t overtighten, as air needs to escape during processing.
Step 4: The Water Bath Canning Process
Now it’s time for the actual “canning.”
- Load Canner: Carefully place the filled jars into your canning pot using the jar lifter. Ensure the rack is at the bottom. Jars should not touch each other or the sides of the pot.
- Add Water: Fill the canner with hot water, ensuring the water level covers the tops of the jars by at least 1-2 inches.
- Boil: Cover the canner with its lid. Bring the water to a full, rolling boil.
- Process: Once boiling, start your timer.
- Pint jars: Process for 35 minutes.
- Quart jars: Process for 45 minutes.
Adjust processing time for altitude if you live above 1,000 feet. Consult a reliable canning guide for specific altitude adjustments.
- Cool Down: Once the processing time is complete, turn off the heat. Remove the canner lid and let the jars sit in the hot water for 5 minutes. This helps prevent “siphoning” (loss of liquid from the jars).
Step 5: Cooling, Sealing, and Storing
The final steps require patience.
- Remove Jars: Using your jar lifter, carefully remove the hot jars from the canner and place them on a clean towel on your countertop, spaced a few inches apart. Do not tip or disturb them.
- Cool: Let the jars cool undisturbed for 12-24 hours. As they cool, you’ll hear the satisfying “ping!” sound as the lids seal.
- Check Seals: After cooling, check each jar’s seal. Press down on the center of the lid; if it doesn’t flex, it’s sealed. Remove the rings and try to lift the jar by the lid – if it holds, it’s sealed.
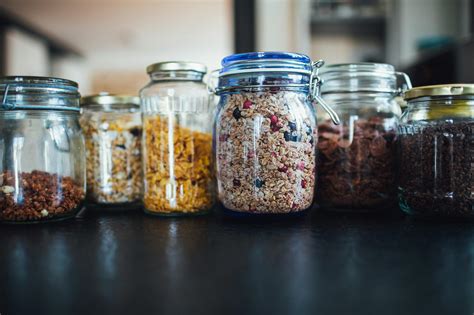
- Store: Wipe sealed jars clean. Label them with the contents and date. Store in a cool, dark, dry place. Any unsealed jars should be refrigerated and consumed within a week.

Key Safety Tips for Canning
- Always use fresh, high-quality produce.
- Strictly follow tested recipes and processing times. Do not guess.
- Use only bottled lemon juice or citric acid for acidity, not fresh lemon juice.
- Never reuse old canning lids; new lids are essential for a proper seal.
- Ensure proper headspace.
- If a jar doesn’t seal, refrigerate and consume promptly.
- Before consuming, inspect jars for any signs of spoilage (mold, unusual odors, bubbling). When in doubt, throw it out!
Enjoy Your Preserved Harvest!
Canning your own tomatoes is an incredibly rewarding experience that brings the taste of summer to your winter meals. While it might seem like a lot of steps, once you do it a few times, it becomes second nature. Enjoy the satisfaction of knowing exactly what’s in your food and savoring your garden’s goodness year-round!