


DIY root cellar ventilation: How to prevent spoilage for homestead harvests?

For homesteaders and avid gardeners, a root cellar is an invaluable asset for preserving the bounty of their harvest through the colder months. However, simply having a cool, dark space isn’t enough. Without proper ventilation, your carefully stored vegetables, fruits, and other perishables can quickly succumb to mold, rot, and premature spoilage. This guide will walk you through the essential principles and practical steps for setting up effective DIY ventilation in your root cellar, ensuring your hard work in the garden pays off with long-lasting food stores.
Why Root Cellar Ventilation is Non-Negotiable
The primary enemies of stored produce are excessive heat, humidity, and stagnant air. A well-ventilated root cellar addresses all three:
- Temperature Regulation: While a root cellar naturally stays cool, good airflow helps equalize temperatures and prevent pockets of warmer, stale air from forming, which can accelerate ripening and decay.
- Humidity Control: Many root vegetables thrive in high humidity, but too much stagnant moisture leads to condensation, which promotes mold and bacterial growth. Ventilation allows moist air to escape and drier air to enter, maintaining an ideal balance.
- Gas Exchange: Stored produce respires, releasing ethylene gas, which can accelerate ripening and spoilage of other items. Fresh air circulation removes these harmful gases, keeping your harvest fresher for longer.

Understanding Basic Ventilation Principles
Effective root cellar ventilation typically relies on one of two main approaches: passive or active, often with elements of both.
Passive Ventilation: Natural Airflow
Passive ventilation harnesses natural air pressure differences. It generally involves:
- Intake Vent: Located low to the ground, drawing in cooler, denser fresh air.
- Exhaust Vent: Positioned high up, allowing warmer, lighter stale air (and moisture) to escape.
This creates a natural convection current, circulating air through the cellar without mechanical assistance. It’s energy-efficient and often sufficient for smaller cellars or those built into the earth.
Active Ventilation: Boosted Air Movement
For larger cellars, those with less natural airflow, or in climates where passive methods are insufficient, active ventilation might be necessary. This involves using fans (typically exhaust fans) to actively pull stale air out, which in turn draws fresh air in through intake vents. Active systems offer more precise control over airflow and can be crucial for maintaining optimal conditions in challenging environments.
Components of a DIY Ventilation System
1. Intake and Exhaust Vents
You’ll need at least two openings. For passive systems, these can be simple pipes (PVC, metal, or even ceramic drainage pipes) of at least 4-6 inches in diameter to allow for good airflow. Size them appropriately for your cellar’s volume. A general rule of thumb is one square foot of vent opening for every 1000 cubic feet of cellar space, split between intake and exhaust.
- Placement: Intake vents should be low (within 6-12 inches of the floor), and exhaust vents high (within 6-12 inches of the ceiling), ideally on opposing walls for cross-ventilation.
- Screens: Essential to prevent rodents, insects, and other pests from entering. Use fine-mesh hardware cloth.
- Dampers/Covers: Crucial for controlling airflow and preventing freezing in winter. Simple sliding covers, hinged flaps, or adjustable blast gates can work.
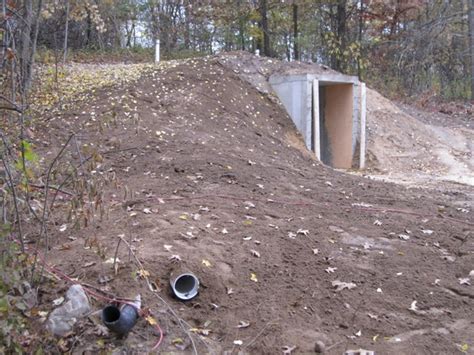
![How to Build a Root Cellar Cheap [But Effective] - Outdoor Happens](/images/aHR0cHM6Ly90czQubW0uYmluZy5uZXQvdGg/aWQ9T0lQLi1VOHZUY1QyWUFneTN4SkZjSUxjaVFIYUUtJnBpZD0xNS4x.webp)
2. Fan (for Active Systems)
If opting for active ventilation, a small, energy-efficient exhaust fan (like a bathroom fan or inline duct fan) can be installed in the exhaust vent. Consider a timer or thermostat/humidistat control for automation, running the fan only when necessary.
3. Monitoring Tools
A good thermometer and hygrometer are your best friends. These tools allow you to monitor temperature and humidity levels, helping you fine-tune your ventilation strategy. Aim for temperatures between 35-50°F (2-10°C) and relative humidity of 85-95% for most root crops.

Step-by-Step DIY Installation Tips
- Plan Your Layout: Sketch out your cellar and decide on the best locations for intake and exhaust vents to maximize airflow. Consider prevailing winds if placing exterior openings.
- Drill/Cut Openings: Create openings in your cellar walls or ceiling for the vent pipes. Ensure they are properly sealed around the pipes to prevent air leaks and moisture intrusion.
- Install Vent Pipes: Securely place your chosen pipes. Extend them sufficiently outside to prevent water ingress and inside to optimize air drawing/expelling.
- Add Screens and Dampers: Attach hardware cloth over all exterior openings. Install your chosen dampers or covers both inside and outside the pipes to allow for seasonal adjustments and pest control.
- Install Fan (if active): Wire and install your exhaust fan securely within the exhaust duct, following manufacturer instructions.
- Seal and Insulate: Ensure all penetrations are well-sealed with caulk or expanding foam. Insulate the exposed portions of your vent pipes, especially in colder climates, to prevent condensation and heat loss/gain.
Maintenance and Fine-Tuning
Once installed, your ventilation system isn’t a “set it and forget it” solution. Regularly:
- Monitor Conditions: Check your thermometer and hygrometer daily, especially when outdoor conditions change significantly.
- Adjust Dampers: Open dampers more on cool, dry days to bring in fresh air. Close them partially or fully during extremely cold periods or hot, humid spells to maintain internal conditions.
- Clean Screens: Ensure vent screens are free of debris, cobwebs, or insect nests that can obstruct airflow.
- Inspect Produce: Periodically check your stored harvests for any signs of spoilage, which might indicate a need to adjust ventilation.
Conclusion
A properly ventilated root cellar is a cornerstone of successful homestead food preservation. By understanding the principles of airflow, carefully selecting and installing your components, and committing to regular monitoring and adjustment, you can drastically reduce spoilage and enjoy your homegrown bounty for months longer. Investing a little time in a robust DIY ventilation system will yield significant returns in the form of fresh, wholesome food throughout the year.


