Ideal time to harvest & cure garlic for long-term homestead storage?

The Secret to Year-Round Garlic: Timely Harvest & Proper Cure
For many homesteaders and home gardeners, growing garlic is a rewarding endeavor, offering a staple ingredient that elevates countless dishes. However, the true secret to enjoying your homegrown bounty year-round lies not just in successful cultivation, but in knowing the ideal time to harvest and how to properly cure it for long-term storage. Get it wrong, and your precious cloves might sprout prematurely, rot, or lose their pungent flavor, making all your hard work in the garden futile.
Signs Your Garlic is Ready for Harvest
The most critical factor in successful garlic storage is harvesting at the right moment. Patience is key, but so is attentiveness. Wait too long, and the bulbs will begin to split in the ground, reducing their storage life and inviting pests and diseases. Harvest too early, and the bulbs will be underdeveloped, shriveled, and lack the robust flavor you desire. The trick is to find that sweet spot.
For softneck varieties, look for the lower 3-4 leaves to turn yellow or brown, while the upper leaves are still vibrant green. For hardneck varieties, the primary indicator is usually after the scape (the flower stalk) has emerged and curled. Once the scape has been removed (typically when it makes a full curl or two), wait approximately 3-4 weeks. Simultaneously, the lower 3-4 leaves should also start to yellow and brown. A general rule of thumb is to harvest when about 50-75% of the leaves have started to yellow, but before all the leaves are completely brown and dried out. It’s often better to harvest a little early than too late.
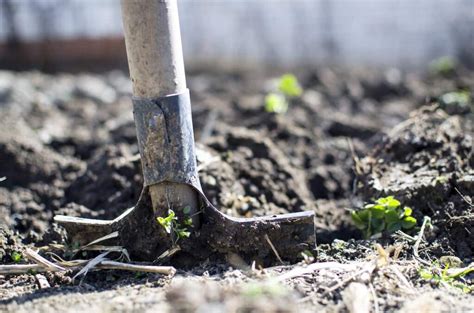
The Gentle Art of Harvesting Garlic
Once you’ve determined your garlic is ready, choose a dry day for harvesting. Soil that is too wet can make harvesting difficult and increase the risk of fungal issues during curing. Gently loosen the soil around the bulbs with a garden fork or spade, working carefully to avoid puncturing or bruising the garlic bulbs. Bruised garlic will not store well and is prone to early spoilage.
Pull the plants carefully from the ground, shaking off any excess soil. It’s crucial not to wash the bulbs, as adding moisture can encourage mold and disease during the critical curing stage. Leave the entire plant — leaves, stem, and roots — intact. This is fundamental for the curing process, as the remaining nutrients in the leaves will continue to feed the bulb, allowing it to fully develop its papery outer layers and enhance its storage potential.
The Crucial Curing Phase for Longevity
Curing is the process of drying the outer wrappers of the garlic, sealing in its flavor, and preparing it for long-term storage. This step is absolutely non-negotiable for anyone aiming for homestead self-sufficiency with garlic. Skipping this phase will drastically shorten your garlic’s shelf life.

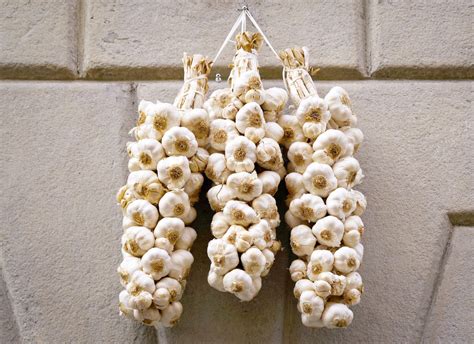
Find a cool (60-80°F or 15-27°C), dark, dry, and exceptionally well-ventilated area for curing. A garage, shed, barn loft, or even a shaded porch can work well, as long as it’s protected from rain and direct sunlight, which can cook the bulbs and impair their quality. You can hang the garlic in small bundles (4-6 plants) or spread them out in a single layer on screens or racks. The key is to ensure excellent air circulation around each bulb and stem. Curing typically takes 3-6 weeks, depending on your climate, humidity levels, and the size of your garlic. You’ll know it’s done when the wrappers are papery dry, the neck is constricted and completely dry, and the roots are brittle.
Preparing Garlic for Long-Term Storage
Once fully cured, it’s time to prepare your garlic for its long winter nap. Trim the roots close to the bulb and cut the stems back to about 1-2 inches above the bulb for hardneck varieties. For softneck varieties, you can leave 6-8 inches of stem if you plan to braid them, or trim them similarly to hardnecks. Gently brush off any remaining loose soil, but do not peel the protective outer wrappers; these are vital for preservation.
Store cured garlic in a cool (45-60°F or 7-15°C), dark, and dry place with good air circulation. Ideal humidity is around 50-70%. Avoid refrigeration, as the cold can cause garlic to sprout prematurely. Mesh bags, paper bags, or open-weave baskets are excellent choices for storage, as they allow air to circulate freely around the bulbs. Hardneck varieties typically store for 4-6 months, while softneck varieties can last 6-9 months or even longer under ideal conditions. Regularly check your stored garlic and promptly remove any bulbs that show signs of softening, sprouting, or mold to prevent spoilage from spreading to others.
Conclusion: A Harvest Well Worth the Effort
Mastering the timing of garlic harvest and the art of curing is paramount for a successful, year-round supply of homegrown garlic. By paying close attention to your plants’ signals and providing the right post-harvest environment, you can enjoy the robust, irreplaceable flavor of your garlic well into the next growing season. This commitment to proper care not only yields a bountiful harvest but truly embodies the spirit of homesteading self-sufficiency, bringing fresh, quality produce from your garden to your table all year long.