DIY advice for canning excess garden tomatoes safely?
Turning Garden Bounty into Pantry Staples
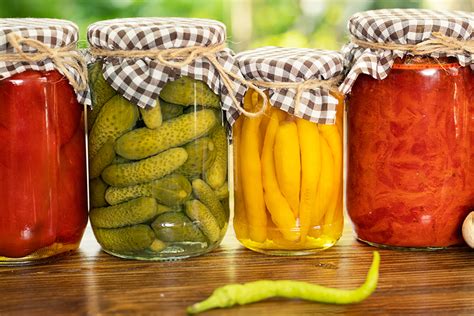
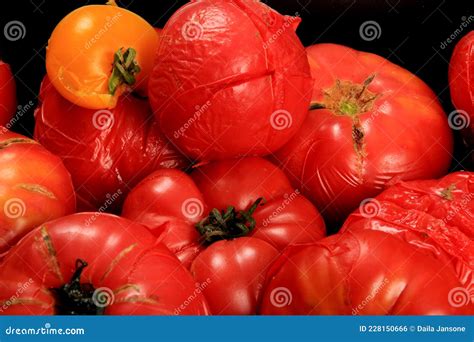
The joy of a thriving tomato garden often culminates in an abundant harvest, leaving you with more ripe, juicy tomatoes than you can possibly consume fresh. Canning is a fantastic DIY project that allows you to capture that peak-season flavor and enjoy your garden’s bounty all year long. However, canning tomatoes safely requires adherence to specific guidelines to prevent spoilage and foodborne illness. This guide will walk you through the essential steps for successful and safe home canning of your excess garden tomatoes.
Understanding Tomato Acidity and Canning Methods
Tomatoes are a borderline acidic food, meaning their pH can vary significantly, sometimes falling into the range where Clostridium botulinum (the bacteria causing botulism) can thrive in anaerobic canning environments. To ensure safety, all home-canned tomatoes must be acidified. This is typically done by adding bottled lemon juice, citric acid, or vinegar.
For most tomato products with added acid, a water bath canner is sufficient. For low-acid tomato products (like some tomato sauces without enough added acid) or if you’re unsure about the acidity, a pressure canner is required. Always follow tested recipes from reliable sources like the USDA Complete Guide to Home Canning.

Gathering Your Essential Canning Equipment
Before you begin, ensure you have all the necessary tools for a smooth and safe canning process. Having everything ready minimizes stress and potential errors.
- Canning Jars: Mason-style jars with two-piece lids (new lids are crucial for a proper seal). Inspect jars for chips or cracks.
- Water Bath Canner: A large pot with a lid and a rack to keep jars off the bottom.
- Jar Lifter: For safely placing and removing hot jars from the canner.
- Canning Funnel: To neatly fill jars without spilling.
- Headspace Tool/Ruler: To measure the correct space between the food and the jar rim.
- Bubble Remover Tool: A non-metallic utensil to remove air bubbles from jars.
- Clean Cloths: For wiping jar rims.
- Large Stockpot: For blanching tomatoes and making sauces.
- Spoons, Ladle, Knives.
Preparing Your Tomatoes for Canning
The quality of your canned tomatoes starts with proper preparation.
- Select Ripe Tomatoes: Choose firm, ripe, unblemished tomatoes. Discard any bruised, diseased, or overripe ones.
- Wash Thoroughly: Wash tomatoes under cool running water.
- Blanch and Peel: Bring a large pot of water to a boil. Immerse tomatoes, a few at a time, for 30-60 seconds until skins crack. Immediately transfer to an ice bath to stop cooking. The skins should then slip off easily. Remove cores.
- Prepare as Desired: You can can whole peeled tomatoes, diced tomatoes, or crushed tomatoes. For crushed or diced, remove seeds if desired.
The Canning Process: Step-by-Step for Water Bath
This method is suitable for most tomato products when proper acidification is applied.
1. Sterilize Jars and Prepare Lids
Wash jars in hot, soapy water and rinse well. Keep them hot (in simmering water or a dishwasher) until ready to fill. Prepare lids according to manufacturer’s instructions; typically, rings are washed, and new lids are simmered in hot water (not boiling) to soften the sealing compound.
2. Add Acid to Jars
This is a critical safety step! For pint jars, add 1 tablespoon of bottled lemon juice or ¼ teaspoon of citric acid. For quart jars, add 2 tablespoons of bottled lemon juice or ½ teaspoon of citric acid. You can also use 4 tablespoons of 5% acidity vinegar per quart, though it may alter flavor.
3. Fill Jars with Tomatoes
Pack your prepared tomatoes into the hot jars. If canning whole or diced tomatoes, you can add water, tomato juice, or pack them without liquid (raw pack or hot pack). For hot pack, heat tomatoes gently before filling jars to expel air. Leave the recommended headspace (usually ½ inch for tomatoes).
4. Remove Air Bubbles and Wipe Rims
Using your bubble remover tool, gently slide it around the inside of the jar to release trapped air bubbles. Adjust headspace if necessary. Wipe the jar rims clean with a damp cloth to ensure a good seal.
5. Apply Lids and Rings
Center a hot, clean lid on each jar. Screw on the metal band fingertip-tight (just until you feel resistance, then a tiny bit more). Do not overtighten, as this can prevent air from escaping and hinder sealing.
6. Process in Water Bath Canner
Carefully lower the filled jars onto the rack in your canner. Ensure water covers jars by at least 1-2 inches. Bring water to a rolling boil. Start timing the processing once the water reaches a full boil. Processing times vary by recipe, tomato type, and altitude, so consult a reliable canning guide.
7. Cool and Check Seals
Once processing is complete, turn off the heat and let jars sit in the canner for 5 minutes before carefully removing them with a jar lifter. Place jars on a towel-lined counter, spaced apart, to cool undisturbed for 12-24 hours. Do not retighten rings.
After cooling, check seals: the lid should be concave (curved inward) and not flex when pressed. Remove rings, wipe down jars, label with contents and date, and store in a cool, dark, dry place. If any jar did not seal, refrigerate and consume within a week, or reprocess within 24 hours with a new lid.

Enjoying Your Hard Work
Canning your own garden tomatoes is a rewarding DIY project that brings fresh, wholesome flavor to your table year-round. By following these safety guidelines and a tested recipe, you can confidently preserve your summer harvest and enjoy the fruits of your labor long after the gardening season ends. Happy canning!