When to harvest and how to properly cure winter squash for long storage?
The Secret to Year-Round Winter Squash: Harvest and Curing
Winter squash varieties, with their robust flavors and versatile culinary uses, are a beloved staple for many home gardeners. The joy of harvesting your own bounty in autumn is immense, but the true magic lies in preserving that harvest to enjoy throughout the colder months. Achieving long storage life for winter squash isn’t just about picking them off the vine; it hinges critically on knowing precisely when to harvest and, more importantly, how to properly cure them.
This guide will walk you through the essential steps to ensure your winter squash not only tastes incredible but also lasts for months, sometimes even a year, in proper storage.
Knowing When Your Winter Squash is Ready for Harvest
Timing is everything when it comes to harvesting winter squash. Picking too early can result in watery, flavorless squash with poor storage potential, while leaving them on the vine too long risks damage from frost. Look for these key indicators of maturity:
- Hard Rind: The most crucial sign. The skin should be tough and impenetrable to a thumbnail. If you can easily pierce the skin, it’s not ready.
- Dull Skin: Most winter squash varieties lose their glossy sheen and develop a dull, matte finish when ripe.
- Dry, Shriveled Stem: The stem connecting the squash to the vine should be dry, hard, and ideally beginning to shrivel or turn tan/brown. It should not be green and supple.
- Deep, Rich Color: The squash should have developed its full, characteristic color for the variety (e.g., deep orange for butternut, dark green for acorn). Any green streaks often indicate immaturity.
- Harvest Before Hard Frost: While a light, temporary frost might not harm them, a hard frost (temperatures significantly below freezing for several hours) can severely damage squash, reducing their storage life. Aim to harvest before this occurs.
The Art of Harvesting Winter Squash
Once you’ve determined your squash is ripe, the harvesting process itself is simple but requires care to prevent damage that can lead to spoilage.
- Use Sharp Tools: Always use sharp pruning shears or a sturdy knife to cut the stem. Do not twist or break the stem off, as this can create an open wound on the squash.
- Leave a Generous Stem: This is critical for good storage! Aim to leave 2-4 inches of stem attached to the squash. A missing or damaged stem is an open invitation for bacteria and fungi to enter, drastically reducing storage life. Never carry the squash by its stem.
- Handle Gently: Winter squash, despite its hard exterior, can bruise internally if handled roughly. Bruises are entry points for pathogens.
Why Curing is Crucial for Long-Term Storage
Curing is a non-negotiable step for almost all winter squash varieties (acorn squash being a notable exception, as it often stores better without prolonged curing). It’s a short period of post-harvest treatment that achieves several vital things:
- Hardens the Skin: The rind toughens further, making it more resistant to damage and disease.
- Heals Minor Wounds: Small nicks or scratches acquired during harvest or transport will ‘scab over,’ sealing them off from decay organisms.
- Concentrates Sugars: The starches within the squash convert to sugars, enhancing flavor and sweetness.
The Curing Process: Step-by-Step
To properly cure your winter squash, you need specific environmental conditions:
- Temperature: Ideally, 75-85°F (24-29°C). This warmth is crucial for the chemical changes and wound healing.
- Humidity: A moderate humidity level of 60-70% is beneficial. Too dry, and the squash can shrivel; too moist, and mold can develop.
- Duration: Most winter squash varieties benefit from 10-14 days of curing. Acorn squash, as mentioned, is an exception; it can be stored directly after harvest or cured for only a few days if desired, but longer curing can degrade its quality.
- Location: A sunny porch, a warm garage, a greenhouse, or even indoors in a sunny window can work, provided you can maintain the temperature and ensure good air circulation. Lay the squash in a single layer, ensuring they don’t touch each other if possible, or at least have ample space around them.

Optimal Storage Conditions for Winter Squash
After curing, your squash is ready for its long slumber. The right storage environment will significantly impact how long they last:
- Cool Temperatures: Aim for 50-60°F (10-15°C). Cooler than this (e.g., refrigerator temperatures) can cause chilling injury, while warmer temperatures will shorten storage life.
- Dry Environment: Maintain low to moderate humidity (50-70%). Excessive moisture encourages mold and rot.
- Darkness: A dark space helps prevent sprouting and maintains quality.
- Good Air Circulation: Avoid stacking squash directly on top of each other. Place them on shelves, racks, or even cardboard, ensuring air can circulate around each fruit. Avoid direct contact with cold concrete floors.
- Suitable Locations: A cool, dry basement, a spare closet, or a root cellar are ideal.

Tips for Extending Storage Life
- Inspect Regularly: Periodically check your stored squash for any soft spots, mold, or signs of decay. Remove any compromised squash immediately to prevent spoilage from spreading.
- Rotate Your Stock: Use older squash first, especially varieties known for shorter storage times (like acorn or delicate delicata).
- Handle With Care: Even during storage, avoid bruising.
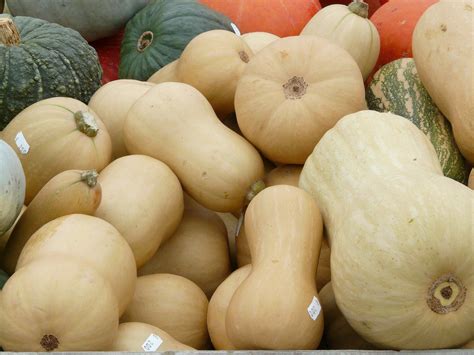
- Know Your Varieties: Some squash types store better than others. Butternut, spaghetti, Hubbard, and kabocha squash are generally excellent for long storage. Acorn and delicata have shorter storage lives, typically 1-3 months.

Enjoying Your Hard-Earned Harvest
By following these guidelines for harvesting and curing, you’ll be able to enjoy the delicious flavors of your homegrown winter squash long after the gardening season has ended. A little extra care in the autumn means a pantry full of wholesome, nutritious food through winter and beyond.