


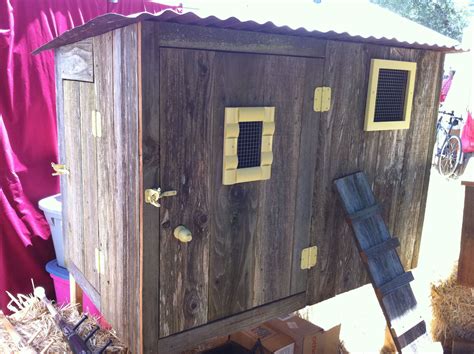
How to build a sturdy, critter-proof chicken coop on a budget?
Introduction: Building a Safe Haven for Your Flock
Owning backyard chickens is a rewarding experience, but providing them with a safe, comfortable, and predator-proof home is paramount. While pre-made coops can be expensive, building your own allows for customization, significant cost savings, and the satisfaction of a job well done. This guide will walk you through creating a sturdy, critter-proof chicken coop designed to protect your flock from common predators, all while keeping a tight rein on your budget.
Strategic Planning and Design
The foundation of any successful DIY project is meticulous planning. Before you even buy your first piece of lumber, consider the following:
- Size Matters: A good rule of thumb is 2-4 square feet per chicken inside the coop and 8-10 square feet per chicken in the attached run. Overcrowding leads to stress and health issues.
- Location, Location, Location: Choose a spot with good drainage, some shade in summer, and protection from prevailing winds in winter. Easy access for cleaning and egg collection is also key.
- Blueprint Your Design: Sketch out your coop, including dimensions, door placements, windows, nesting boxes, and roosting bars. Consider an elevated design to deter ground predators and moisture.

Critter-Proofing: Your Flock’s Security Detail
This is where your budget focus shifts slightly – don’t skimp on security. Predators like raccoons, foxes, possums, and even determined dogs are relentless. Here’s how to fortify your coop:
- Hardware Cloth is Non-Negotiable: Forget chicken wire. It’s too flimsy. Invest in 1/2-inch or 1/4-inch galvanized hardware cloth for all ventilation openings, windows, and the run. Attach it securely with heavy-duty staples and screws.
- The Buried Apron: Predators love to dig. Extend your hardware cloth horizontally outwards from the base of your coop and run, and then bury it 12-18 inches deep. This creates an impenetrable barrier that frustrates diggers.
- Secure Latches: Raccoons are dexterous. Use predator-proof latches that require two motions to open, such as barrel bolts with a padlock or spring-loaded carabiners.
- Close All Gaps: Inspect your coop for any holes or gaps larger than 1/2 inch. Seal them with wood, metal flashing, or hardware cloth.
- Solid Floor and Roof: A sturdy plywood floor (if not elevated) and a robust roof (metal is great) prevent entry from above or below.

Budget-Friendly Material Sourcing
Saving money starts with smart material choices:
- Reclaimed & Recycled: Pallets (ensure they are heat-treated, marked HT, not chemically treated), old fence posts, discarded lumber from construction sites (with permission!), or even old cabinetry for nesting boxes can be goldmines.
- Bargain Hunting: Check local classifieds, Freecycle, Craigslist, or community groups for free or cheap building materials. Lumber yards often have ‘cull’ piles with discounted wood.
- Smart Purchases: Prioritize spending on essential security items like hardware cloth and quality latches. For structural wood, 2x4s are often sufficient and cost-effective. Consider using recycled metal roofing or heavy-duty tarps for roofing to save on expensive shingles.
Construction Steps: From Ground Up
1. The Foundation
Start with a solid base. Skids (treated 4x4s) make the coop portable, while concrete blocks elevate it off the ground, preventing rot and making it harder for diggers. Level the ground thoroughly.
2. Framing the Structure
Use 2x4s for the main frame. Keep the design simple to reduce material waste and complexity. Build the four walls, floor, and roof frame separately, then assemble them. Ensure everything is plumb and square.

3. Walls, Roof, and Flooring
Enclose the coop. Plywood is a common choice for walls and flooring. For the roof, lay down plywood, then add a waterproof layer (roofing felt or heavy tarp) and finish with shingles, corrugated metal, or repurposed tin sheets. Ensure a good overhang to protect walls from rain.
4. Ventilation and Roosts
Ventilation is crucial for chicken health. Install critter-proof vents near the top and bottom of the coop to allow for good airflow without drafts. Roosting bars (2x2s with rounded edges or sturdy branches) should be placed higher than nesting boxes, allowing at least 8-10 inches of roosting space per bird.
5. Nesting Boxes and Run
Provide one nesting box for every 3-4 hens. Repurposed crates or plastic containers can work well. Attach your enclosed run, ensuring it’s completely covered with hardware cloth, including the top. A hardware cloth skirt buried around the perimeter of the run is essential.

Final Touches and Maintenance
Once construction is complete, paint or seal any exposed wood to protect it from the elements. Regularly inspect your coop and run for any signs of wear, loose hardware cloth, or potential weak points that predators could exploit. Keep the coop clean to prevent pest infestations and maintain a healthy environment for your chickens.
Conclusion
Building a sturdy, critter-proof chicken coop on a budget is an achievable and rewarding DIY project. By focusing on smart design, prioritizing security with hardware cloth, and creatively sourcing materials, you can provide your feathered friends with a safe, comfortable, and long-lasting home without overspending. Enjoy the fresh eggs and peace of mind that comes with knowing your flock is secure!


