How to build a durable, critter-proof raised garden bed from salvaged materials?

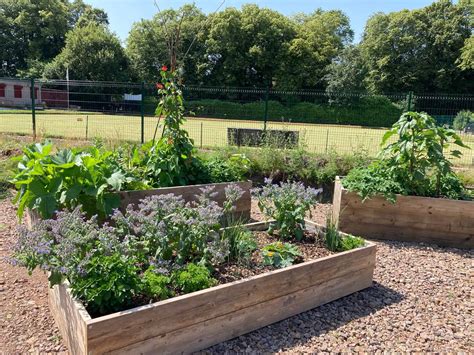
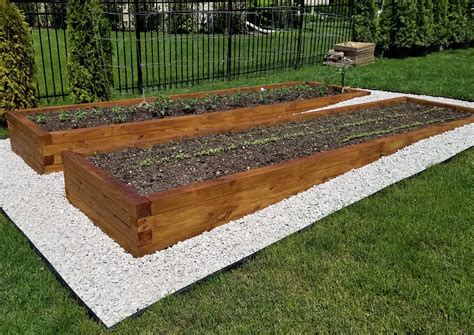
Creating a raised garden bed offers numerous benefits: better soil control, improved drainage, and easier access for planting and harvesting. However, two common challenges often emerge: ensuring the bed’s longevity against the elements and protecting precious plants from hungry critters. This guide will walk you through building a durable, critter-proof raised garden bed, all while leveraging the charm and sustainability of salvaged materials.

The Appeal of Salvaged Materials
Opting for salvaged materials is a win-win for both your wallet and the environment. Not only does it reduce waste by giving new life to discarded items, but it also often results in a unique, character-filled aesthetic that store-bought options can’t replicate. Think reclaimed wood, old metal sheets, or even discarded concrete blocks – the possibilities are vast and often more budget-friendly than new lumber or kits.
Selecting Your Salvaged Treasures
The key to a durable bed is choosing the right materials. Consider what’s available locally and evaluate its condition. Prioritize materials that are rot-resistant, sturdy, and free from harmful chemicals if they will be in direct contact with edibles.
Wood Options
- Reclaimed Lumber: Old fence posts, barn wood, or even sturdy pallets (ensure they are ‘HT’ heat-treated, not chemically treated). Look for rot-resistant species like cedar, redwood, or locust.
- Pallets: A popular free source, but check their treatment codes. ‘MB’ (methyl bromide) treated pallets should be avoided for food gardens.
Metal Sheets
- Corrugated Roofing or Siding: Galvanized steel sheets can make attractive and long-lasting bed walls. Ensure edges are safe and consider rust-resistant coatings.
Stone & Concrete
- Cinder Blocks or Bricks: Excellent for sturdy, permanent beds. They offer great thermal mass and are practically indestructible.
Critter Barrier Essentials
- Hardware Cloth: Essential for preventing burrowing pests. Choose a gauge of 1/4 or 1/2 inch. Chicken wire is generally too flimsy for serious critter proofing.
- Netting or Fencing: For above-ground protection against birds, rabbits, or deer.
Designing for Longevity and Pest Protection
A durable, critter-proof bed isn’t just about the materials; it’s about the design and construction techniques.
Foundation First
Start with a level base. For stability, especially with heavier materials like stone, a compacted gravel base can improve drainage and prevent settling. For wood beds, ensure good contact with the ground or use rot-resistant risers.
Wall Construction
Build strong walls. For wood, use corner bracing, sturdy fasteners (galvanized screws), and ensure joints are tight. For metal, secure sheets to posts or a frame. Stone or concrete blocks should be stacked securely, potentially with mortar for extreme durability, though dry stacking is often sufficient for garden beds.
The Unseen Barrier: Critter-Proofing Below Ground
This is crucial for deterring voles, gophers, and other burrowing pests. Line the entire bottom of your raised bed with heavy-gauge hardware cloth before adding soil. Extend the hardware cloth up the inside walls of the bed by at least 6-12 inches, securing it firmly. This creates an impenetrable barrier.

Above-Ground Defense
For pests like rabbits, squirrels, or deer, you’ll need above-ground protection. This can be achieved by:
- Extending Walls: Build your bed walls high enough (at least 2 feet) to deter smaller jumpers.
- Fencing Attachments: Attach a perimeter of hardware cloth or sturdy wire fencing around the top edge of your bed. For taller animals like deer, consider adding removable netting or a taller fence.
- Removable Covers: Construct simple frames from salvaged lumber or PVC pipes, covered with netting, to create temporary critter cages.
Step-by-Step Construction Guide
1. Gather & Prepare
Collect all your chosen salvaged materials. Clean them thoroughly. Cut wood to length, trim metal sheets, and ensure all pieces are ready for assembly.
2. Site Preparation
Choose a sunny, level spot. Clear any weeds or debris. If necessary, dig a shallow trench for your base or lay down a weed barrier fabric. If using heavy materials like stone, prepare a level gravel base.
3. Build the Frame
Assemble the walls of your raised bed according to your design. Use appropriate fasteners for your materials (screws for wood, bolts/rivets for metal). Ensure corners are square and the structure is stable.
4. Integrate Critter Barriers
Lay the hardware cloth across the bottom of the bed, extending it up the inside walls by 6-12 inches. Secure it tightly to the bed walls using staples, screws with washers, or zip ties. If adding above-ground fencing, attach it securely now.
5. Fill and Plant
With the structure and critter barriers in place, fill your raised bed with a high-quality soil mix. Aim for a blend of compost, topsoil, and amendments suited to your plants. Once filled, you’re ready to plant your chosen vegetables, herbs, or flowers, knowing they are well-protected.
Maintaining Your Sustainable Sanctuary
To ensure your salvaged raised bed lasts for many seasons, perform annual checks. Inspect wooden components for rot, tighten any loose fasteners, and check the critter barriers for any breaches or wear. A fresh coat of non-toxic sealant on wood can also prolong its life.

Conclusion
Building a durable, critter-proof raised garden bed from salvaged materials is a rewarding DIY project that combines environmental consciousness with practical gardening solutions. By carefully selecting your materials, designing for longevity and pest deterrence, and following sound construction techniques, you can create a beautiful and productive garden space that stands the test of time and keeps unwelcome guests out of your harvest.