


Safely water bath can excess summer tomato harvest for winter meals?

Harvesting Abundance: The Joy of Preserving Summer Tomatoes
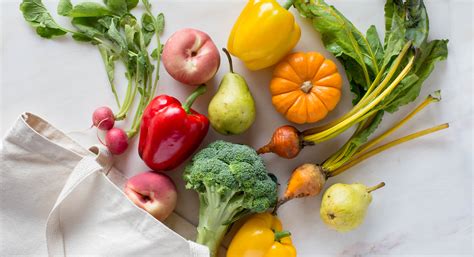
The peak of summer brings with it an undeniable bounty, especially for those with a thriving garden: an abundance of ripe, juicy tomatoes. While fresh tomatoes are a seasonal delight, preserving this harvest means you can enjoy their vibrant flavor long after the growing season ends. Water bath canning is a popular and effective method for safely storing tomatoes, turning your summer surplus into a pantry full of ingredients for hearty winter meals. But how do you ensure safety and success?
Understanding Tomato Acidity and Canning Safety
One of the most critical factors in home canning is understanding food acidity. Tomatoes, while often considered acidic, can sometimes hover on the border between high and low acidity, especially certain varieties or those grown in particular conditions. For safe water bath canning, a pH level of 4.6 or below is essential to prevent the growth of harmful bacteria, like Clostridium botulinum. To ensure your canned tomatoes are safely acidic, it’s a non-negotiable step to add additional acid to each jar.
This acidification is typically achieved by adding bottled lemon juice (not fresh, due to variable acidity), citric acid, or vinegar. Standard recommendations usually call for two tablespoons of bottled lemon juice or half a teaspoon of citric acid per quart jar, or half of those amounts for pint jars. Always follow tested recipes from reliable sources like the National Center for Home Food Preservation (NCHFP) or university extension offices.
Essential Equipment for a Successful Canning Day
Before you even pick your first tomato for canning, ensure you have the right tools on hand. Having everything ready streamlines the process and minimizes stress. Here’s a checklist of what you’ll need:
- Water Bath Canner: A large pot with a lid and a rack to keep jars off the bottom.
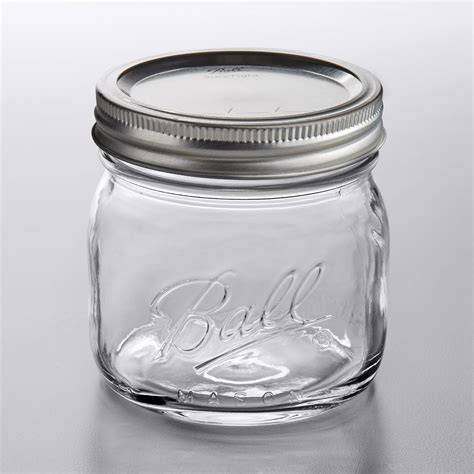
- Canning Jars: Mason jars with two-piece lids (new flat lids, reusable bands).
- Jar Lifter: For safely moving hot jars.
- Canning Funnel: To help fill jars neatly.
- Headspace Tool/Ruler: To measure the space between food and the lid.
- Bubble Remover: A non-metallic utensil to release air bubbles from filled jars.
- Large Pot(s): For blanching tomatoes and heating lids.
- Bowls: For ice baths and prepared tomatoes.
- Clean Towels: For wiping jar rims and general cleanup.
Step-by-Step Guide to Water Bath Canning Tomatoes
1. Preparation is Key
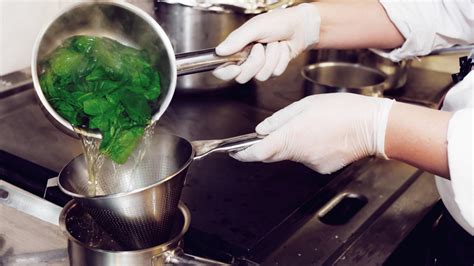
Start by washing your tomatoes thoroughly. For whole or diced tomatoes, you’ll need to blanch and peel them. Score an ‘X’ on the bottom of each tomato, plunge into boiling water for 30-60 seconds, then immediately transfer to an ice bath. The skins should slip off easily. Remove the core. At this stage, you can leave them whole, dice them, or crush them for sauces.
2. Prepare Jars and Lids
Wash jars, bands, and new flat lids in hot, soapy water and rinse well. While sterilization used to be common, if you are processing jars for 10 minutes or more in a boiling water bath, sterilization is generally not required, as the processing itself sterilizes the jars. However, some prefer to heat jars in the canner or a warm oven to keep them hot before filling.
3. Fill and Acidify Jars
Add your chosen acidifier to each empty jar first: 2 tbsp bottled lemon juice OR ½ tsp citric acid per quart; 1 tbsp lemon juice OR ¼ tsp citric acid per pint. Then, pack your prepared tomatoes into the hot jars, leaving appropriate headspace (usually ½ inch for tomatoes). For whole or diced tomatoes, you can add hot water, tomato juice, or pack raw. Remove any air bubbles with your bubble remover tool. Wipe jar rims clean with a damp cloth – any residue can prevent a proper seal. Place a new flat lid on each jar, followed by a screw band, tightened fingertip-tight (just until resistance is met).
4. Process in the Water Bath
Carefully place the filled, sealed jars onto the rack in your water bath canner, ensuring they are not touching each other. The water level should cover the tops of the jars by at least one inch. Bring the water to a rolling boil. Once boiling, start your processing timer according to your recipe and altitude adjustments. For tomatoes, processing times typically range from 35-45 minutes for quarts and 25-30 minutes for pints, but always consult a tested recipe for exact times.
5. Cool and Check Seals
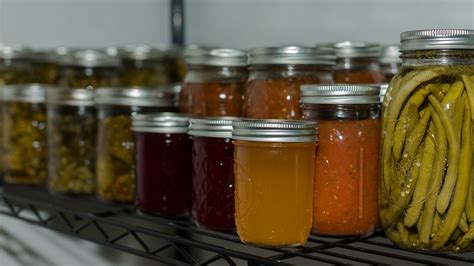
Once the processing time is complete, turn off the heat and let the jars sit in the canner for 5 minutes before carefully removing them with a jar lifter. Place the hot jars on a clean towel on your countertop, ensuring there’s space between them to cool naturally for 12-24 hours. Do not retighten bands. As they cool, you’ll hear the satisfying “pop” of lids sealing. After cooling, check for a proper seal: the center of the lid should be depressed and not flex when pressed. Remove screw bands, wipe jars clean, label with contents and date, and store in a cool, dark place. If a jar hasn’t sealed, refrigerate and consume within a week.

Safety First: Avoiding Common Canning Pitfalls
Adhering to safety guidelines is paramount. Always use tested recipes and never improvise. Do not use cracked or chipped jars. Ensure lids are new for each canning session to guarantee a proper seal. Avoid under-processing, which can lead to unsafe food. If you have any doubt about a jar’s seal or the safety of its contents, it’s always best to discard it.
By following these steps, you can confidently transform your summer tomato bounty into a pantry full of delicious, safe, and homemade goodness, ready to elevate your winter meals with the taste of summer sunshine.