


Best tips for safely canning garden vegetables for winter storage?

There’s immense satisfaction in preserving the bounty of your summer garden, transforming fresh vegetables into wholesome winter provisions. Canning is a time-honored tradition that allows you to enjoy the taste of summer long after the growing season ends. However, to truly benefit from this practice, safety must be the top priority. Incorrect canning can lead to serious foodborne illnesses, including botulism. This guide will walk you through the best tips for safely canning your garden vegetables, ensuring your pantry is stocked with delicious, safe, home-preserved goodness.
Why Safe Canning is Non-Negotiable
The primary concern in home canning, especially with low-acid foods like most garden vegetables (green beans, corn, carrots, peas, potatoes, etc.), is the risk of botulism. Clostridium botulinum, a bacterium that produces a dangerous toxin, thrives in anaerobic (oxygen-free) environments like sealed jars and low-acid conditions. It can only be destroyed at temperatures higher than boiling water, which is why pressure canning is essential for these vegetables. Adhering strictly to tested, up-to-date canning recipes and procedures is the only way to eliminate this risk and ensure your canned goods are safe to eat.
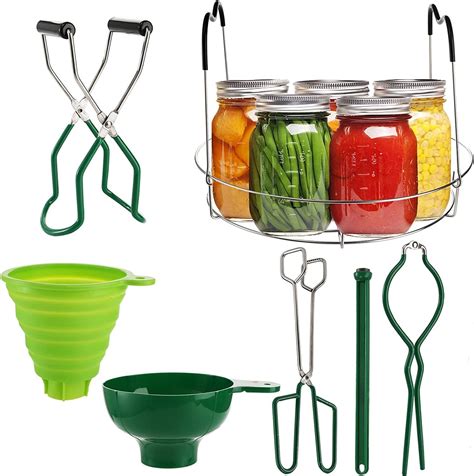
Gather Your Essential Canning Arsenal
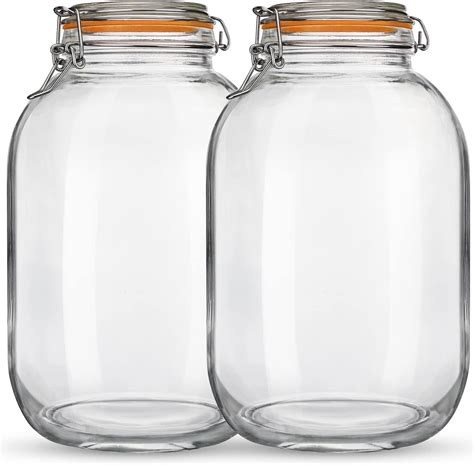
Before you even pick your first vegetable, ensure you have the right equipment. You’ll need a pressure canner (not a pressure cooker, which is different) for low-acid vegetables. For high-acid foods like pickles or acidified tomatoes, a boiling water bath canner is sufficient. Other essentials include standard Mason-type canning jars (pint or quart), new two-piece lids (flats and bands), jar lifters, a wide-mouth funnel, a headspace tool, and a bubble remover. Always inspect jars for cracks or chips before use, and only use new lids for each canning session.
Selecting and Preparing Your Garden Bounty
The quality of your finished product begins with the quality of your raw ingredients. Choose fresh, firm, unblemished vegetables at their peak ripeness. Avoid overripe or damaged produce, as these can affect both flavor and safety. Wash vegetables thoroughly under cool running water, scrubbing if necessary. Peel, trim, and chop according to your recipe’s specifications. Some vegetables, like corn or green beans, may require blanching (briefly scalding in boiling water) before packing to ensure better texture and flavor, and to reduce their volume for optimal packing.
Mastering the Right Canning Method
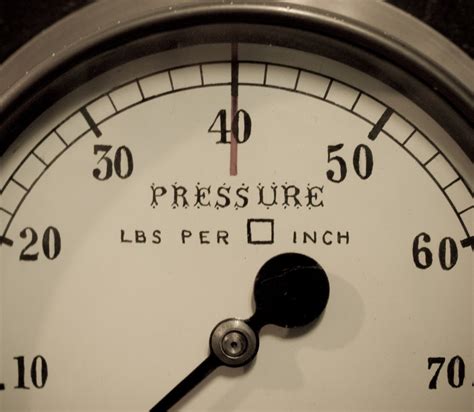
This is arguably the most critical step for safety. For nearly all garden vegetables (e.g., green beans, corn, carrots, potatoes, squash, peas), pressure canning is the only safe method. It reaches temperatures between 240°F and 250°F (116°C and 121°C), which is high enough to destroy botulism spores. Water bath canning, which only reaches 212°F (100°C), is not safe for low-acid vegetables. For high-acid foods like fruits, jams, jellies, and properly acidified tomatoes or pickles, a boiling water bath is appropriate. Always consult USDA-approved canning guides to determine the correct method and processing times for each specific vegetable.
The Step-by-Step Canning Process
Once your vegetables are prepped and your canner is ready, you’ll follow a precise sequence. Heat your clean jars to prevent thermal shock. Pack your prepared vegetables into the hot jars, either raw (raw pack) or pre-cooked (hot pack), leaving the specified headspace (usually ½ to 1 inch, depending on the food). Add boiling water or brine, ensuring air bubbles are removed with a non-metallic tool. Wipe jar rims clean to ensure a good seal, then center new, hot lids on the jars and apply bands finger-tight. Place jars in the canner, ensuring water covers them (for water bath) or proper water level is achieved (for pressure canner). Follow the specific venting and pressure instructions for your canner type, then process for the exact time and pressure recommended by the recipe, adjusting for altitude.
Cooling, Sealing, and Storage
Once processing is complete, turn off the heat and allow the canner to cool naturally according to its instructions (especially critical for pressure canners). Remove jars with a jar lifter, placing them on a towel-lined surface in a draft-free area, leaving space between them to cool for 12-24 hours. Do not retighten bands. After cooling, check seals: the lid should be concave and not flex when pressed. Remove bands, wipe jars clean, label with contents and date, and store in a cool, dark, dry place. Any unsealed jars should be reprocessed immediately (within 24 hours) or refrigerated and consumed promptly.
Crucial Safety Reminders
- Always Use Tested Recipes: Rely only on current, tested recipes from reputable sources like the USDA, National Center for Home Food Preservation (NCHFP), or university extension offices.
- Do Not Deviate: Never alter processing times, pressures, or ingredient amounts. These are calculated for safety.
- Monitor Your Canner: Pay close attention to your pressure gauge or weighted gauge to maintain constant pressure.
- Check All Seals: Before storing and before opening, always verify the seal. If in doubt, throw it out!
- Recognize Spoilage: Never taste food from a jar that shows signs of spoilage (e.g., bulging lids, mold, unusual odor, foamy liquid).

Canning garden vegetables is a rewarding skill that brings self-sufficiency and deliciousness to your table year-round. By diligently following these safety tips and approved guidelines, you can confidently preserve your harvest and enjoy the fruits (and vegetables!) of your labor through the coldest winter months.