
Secrets to a flaky, tender pie crust from scratch?

Mastering the Flaky Pie Crust: Your Ultimate Guide
Many home bakers find the idea of making pie crust from scratch intimidating, often opting for store-bought versions. While convenient, pre-made crusts simply can’t compare to the rich flavor and delicate texture of a homemade one. Achieving that elusive flaky, tender crust isn’t as mysterious as it seems; it hinges on understanding a few fundamental principles and mastering some simple techniques. Let’s unlock the secrets to a pie crust that will elevate any filling to a masterpiece.
The Foundation: Quality, Cold Ingredients
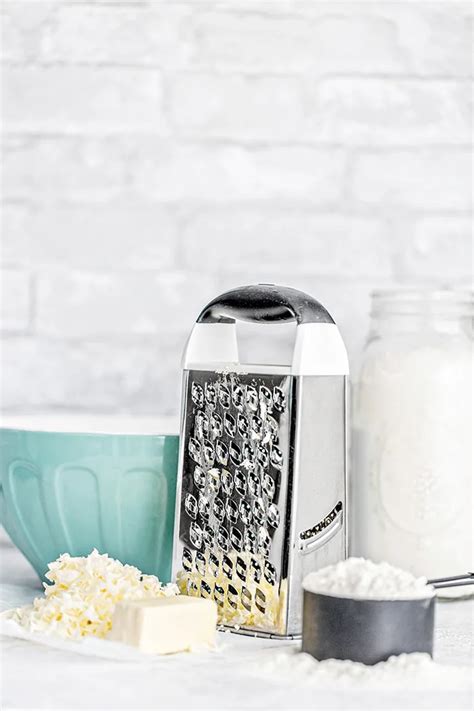
The journey to a perfect pie crust begins with your ingredients, and their temperature. You’ll need all-purpose flour, a pinch of salt, a good quality fat (butter or a combination of butter and shortening), and ice-cold water. The quality of your butter matters; high-fat European-style butters can sometimes yield richer results. Salt is crucial for flavor, balancing the richness of the fat.
The most critical element, however, is the temperature of your fat and water. Both must be as cold as possible. Cold butter or shortening creates pockets of steam in the oven, which separate the layers of dough, resulting in flakiness. If your fat is too warm, it will blend too easily with the flour, leading to a tougher, less flaky crust.

The Art of Mixing: Don’t Overwork It
Once your ingredients are ready, it’s time to combine them. Start by whisking the flour and salt together. Then, add your very cold fat, cut into small cubes (or grated, for even better results). Using a pastry blender, your fingertips, or a food processor on pulse, cut the fat into the flour until it resembles coarse meal with some pea-sized chunks remaining. These larger pieces of fat are key to creating those beautiful flaky layers.
Next, gradually add your ice water, a tablespoon at a time, mixing just until the dough comes together. The exact amount of water can vary based on humidity and flour type, so add it cautiously. Overmixing develops gluten, which leads to a tough crust. The dough should be just moist enough to hold together when squeezed, but not sticky.
Chilling is Crucial for Texture and Manageability
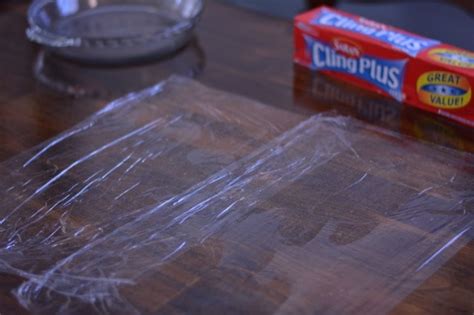
Once your dough is formed, resist the urge to roll it out immediately. Divide the dough into disks (if making a double-crust pie) and flatten slightly. Wrap each disk tightly in plastic wrap and refrigerate for at least 30 minutes, or up to 2 days. This chilling period is vital for several reasons:
- Hydration: It allows the flour to fully hydrate, preventing a crumbly dough.
- Gluten Relaxation: It gives the gluten a chance to relax, making the dough easier to roll out and preventing a tough crust.
- Fat Solidification: It re-chills the fat, ensuring those distinct layers of butter will create maximum flakiness in the oven.
Rolling with Care: Technique for Evenness
When you’re ready to roll, lightly flour your work surface and rolling pin. Work with one disk of dough at a time, keeping the other chilled. Roll from the center outwards, rotating the dough frequently to prevent sticking and to maintain a circular shape. Avoid applying too much pressure, which can warm the dough and overwork the gluten. If the dough starts to crack, gently press it back together.
Aim for an even thickness, typically about 1/8 inch. If the dough becomes too warm or sticky during rolling, return it to the refrigerator for 10-15 minutes. Once rolled, carefully transfer it to your pie plate.

Baking for Perfection: Tips for a Golden Finish
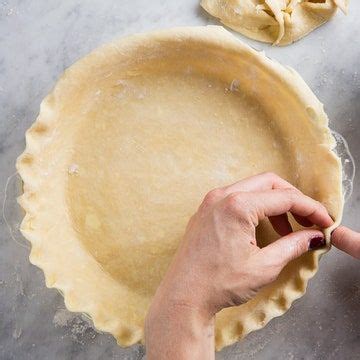
After lining your pie plate, crimp the edges as desired. For most pies, chilling the crust again for 15-30 minutes before baking can help prevent shrinking. If your recipe calls for a pre-baked or blind-baked crust, prick the bottom with a fork, line with parchment paper, and fill with pie weights or dried beans. Bake until lightly golden before adding your filling.
When baking a filled pie, ensure your oven is preheated to the correct temperature. If the crust edges brown too quickly, loosely cover them with foil or a pie shield. A perfectly baked crust will be golden brown and crisp.
Troubleshooting Common Pie Crust Issues
- Tough Crust: Almost always a result of too much gluten development from overworking the dough or adding too much water.
- Crumbly Dough: Not enough water added, or not enough chilling time for hydration.
- Soggy Bottom: Often caused by an underbaked crust, particularly with very moist fillings. Blind baking can help significantly, as can ensuring the pie is baked long enough.
- Shrinking Crust: Not enough chilling time before baking, or the dough was stretched too much when placed in the pie plate.
Your Journey to Pie Perfection
Making pie crust from scratch is a rewarding endeavor that transforms a simple dessert into something truly special. By focusing on cold ingredients, gentle mixing, ample chilling, and careful rolling, you’ll be well on your way to consistently creating a flaky, tender pie crust that earns rave reviews. Don’t be afraid to experiment and practice; each pie brings you closer to perfection!