Best DIY plan for long-lasting, food-safe raised garden beds on a budget?
Why Choose DIY Raised Garden Beds?
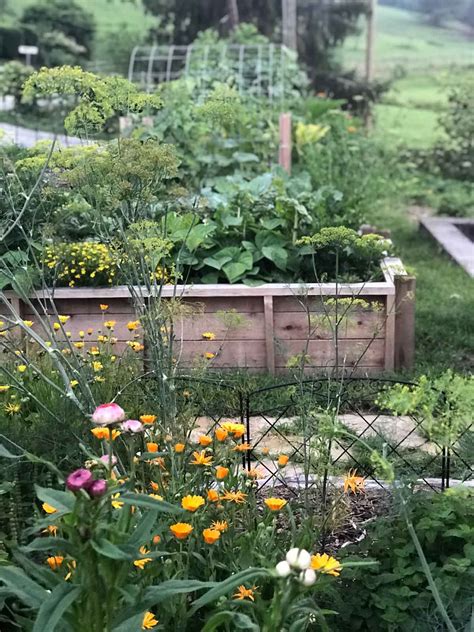
Raised garden beds offer numerous advantages for home gardeners, from better drainage and soil control to reduced weeding and improved accessibility. However, investing in a raised bed project requires careful consideration, especially regarding longevity, food safety, and budget. A well-planned DIY approach can deliver a robust, healthy growing environment for years, ensuring your homegrown produce remains safe for consumption without excessive costs.

Selecting Food-Safe & Budget-Friendly Materials
The foundation of a long-lasting and food-safe raised bed begins with material selection. Avoiding chemicals that could leach into your soil is paramount, as is choosing materials that stand up to the elements.
Wood Options: Balancing Cost and Durability
- Untreated Cedar or Redwood: These are premium choices, naturally resistant to rot and insects due to their oils. While more expensive upfront, their exceptional lifespan (15-20+ years for cedar, 20-30+ for redwood) can make them cost-effective in the long run. They are inherently food-safe.
- Untreated Douglas Fir or Pine: More budget-friendly, these woods are readily available. However, they are less rot-resistant than cedar or redwood, typically lasting 5-10 years. To extend their life, consider natural, food-safe sealants (like raw linseed oil or tung oil) applied to the exterior, or a sacrificial layer of gravel between the wood and soil.
- Avoid: Pressure-treated lumber, especially older types containing CCA (chromated copper arsenate), which can leach toxic chemicals. While newer ACQ (alkaline copper quaternary) treated wood is considered safer for decking, many gardeners still prefer to avoid it for food crops to eliminate any potential risk.
Non-Wood Alternatives
- Galvanized Steel (Corrugated Metal): A durable and increasingly popular option, galvanized steel panels are long-lasting (20+ years), relatively affordable, and pose no food safety concerns once their zinc coating oxidizes. They also absorb and radiate heat, which can be beneficial in cooler climates.
- Composite Decking: Made from recycled plastic and wood fibers, composite lumber is extremely durable, rot-proof, and maintenance-free. It can be a mid-to-high budget option, but its longevity makes it a good investment. Ensure the specific product is free of harmful chemicals.
- Concrete Blocks: Inexpensive and very long-lasting, concrete blocks are generally food-safe once fully cured. For new blocks, some gardeners opt to line the interior with a food-grade pond liner or heavy-duty landscape fabric to prevent any initial mineral leaching into the soil, though this concern is generally minimal once weathered.
Essential Design Principles for Longevity
Beyond materials, smart design significantly contributes to the lifespan of your raised beds.
Optimal Dimensions
- Height: Aim for at least 10-12 inches for most vegetables, allowing sufficient root depth and better drainage. For crops with deep roots or for easier bending, 18-24 inches is ideal.
- Width: Keep beds no wider than 4 feet. This allows you to reach the center easily from either side without stepping on the soil, preventing compaction.
- Length: This is flexible, often dictated by available space and material lengths (e.g., 8-foot or 10-foot lumber).
Drainage and Foundation
Excellent drainage is key to healthy plants and preventing wood rot. Place your raised bed on a level site. If using wood, consider elevating the bottom edges slightly off the ground by placing them on gravel, bricks, or concrete pavers to reduce direct soil-to-wood contact, which accelerates rot. Adding a layer of hardware cloth at the bottom can deter burrowing pests.
Joinery and Fasteners
For wooden beds, use exterior-grade, corrosion-resistant screws (like stainless steel or galvanized) that won’t rust and stain your wood or weaken over time. Corner brackets, either internal or external, can add significant structural integrity. Avoid using nails for primary structural connections, as they tend to pull out over time.
Step-by-Step Construction Plan
1. Site Preparation
Choose a location that receives at least 6-8 hours of direct sunlight daily. Clear the area of weeds and debris. Level the ground as much as possible; this is crucial for structural stability. You may opt to lay down a weed barrier (cardboard or landscape fabric) before placing the bed.
2. Measuring and Cutting Materials
Based on your chosen dimensions, accurately measure and cut your lumber or steel panels. For a simple rectangular bed, you’ll need two pieces for the long sides and two for the short sides. If building a taller bed, you might stack layers, requiring double the number of pieces.
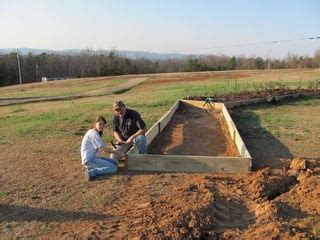
3. Assembling the Frame
Lay out your cut pieces. For wooden beds, join the corners using screws. Overlapping joints (where a long side overlaps the end grain of a short side) are common and sturdy. For taller beds, stack layers and secure them together, offsetting joints for strength. For metal beds, assemble corner brackets and secure panels as per manufacturer instructions.
4. Adding Liners (Optional)
While not always necessary for food-safe wood, a liner can be beneficial if you’re using less durable wood (to prolong its life) or wish to minimize any potential leaching from concrete blocks. Use a heavy-duty, food-grade pond liner or thick landscape fabric. Staple it to the inside walls, allowing for drainage holes at the bottom if using an impermeable liner.
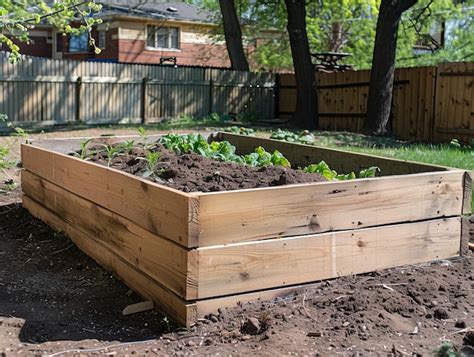
5. Filling with Quality Soil
This is where your budget can truly shine. Instead of buying expensive bagged soil to fill the entire bed, use a layering approach:
- Bottom Layer (1/3): Coarse organic matter like logs, branches, leaves, or wood chips. These decompose slowly, providing nutrients and improving drainage over time.
- Middle Layer (1/3): Partially decomposed organic matter like straw, grass clippings (untreated), unfinished compost, or old potting mix.
- Top Layer (1/3): High-quality potting mix or a blend of topsoil, finished compost, and perlite/vermiculite for optimal growing conditions.
Maximizing Longevity & Food Safety
- Natural Wood Treatment: For untreated wood, applying a food-safe sealant like raw linseed oil (not boiled) or tung oil to the exterior surfaces before assembly can help repel water and extend lifespan. Reapply every few years.
- Preventing Soil-Wood Contact: If not using a liner, consider stapling heavy-duty landscape fabric or even a layer of cardboard on the inside of wooden beds, just where the soil makes contact, to create a barrier and slow down decomposition of the wood.
- Good Drainage: Ensure water can drain freely from the bottom of the bed. Waterlogged soil accelerates wood rot.
- Regular Inspection: Periodically check the bed for signs of wear, rot, or insect damage. Address minor issues promptly to prevent them from escalating.

Budget-Saving Tips
- Source Free or Low-Cost Materials: Look for free lumber on sites like Craigslist or local construction sites (ask permission!). Often, untreated pallet wood can be repurposed if checked for heat treatment (HT stamp).
- Utilize Natural Fillers: As mentioned, filling the bottom layers with free organic matter greatly reduces the amount of expensive bagged soil needed.
- Buy in Bulk: If purchasing soil or compost, buying in bulk from a local landscape supplier is often cheaper than buying individual bags.
- Share Tools: Borrow tools from friends or neighbors instead of buying them.
Conclusion
Building your own long-lasting, food-safe raised garden bed on a budget is an achievable and rewarding DIY project. By making informed choices about materials, prioritizing smart design, and employing efficient construction techniques, you can create a productive and beautiful garden space that serves you well for many seasons to come. Enjoy the bounty of your safe, homegrown produce!