Secrets for a flaky, golden pie crust using real butter for homemade pies?

Unlock the Magic of Butter for Perfect Pie Crust
The quest for the perfect pie crust often feels like a culinary holy grail. We dream of a pastry that shatters with flakiness, melts in the mouth, and boasts a beautiful golden hue. The secret, more often than not, lies in one star ingredient: real butter. While shortening or lard have their place, butter offers an unparalleled richness of flavor and a unique structure that makes for truly exceptional homemade pies.
1. The Power of Cold Butter
This is arguably the most critical secret. Using ice-cold butter is non-negotiable for a flaky crust. When tiny pieces of cold butter are encased in dough and hit the hot oven, the water in the butter rapidly turns to steam, creating pockets of air that separate the layers of dough. This process is what gives pie crust its characteristic flakiness.
- Chop and Chill: Cut your unsalted butter into small cubes (about 1/2 inch) and place them back in the freezer for 10-15 minutes before mixing.
- Handle Minimally: The less you handle the butter, the less it will warm up. Work quickly and efficiently.
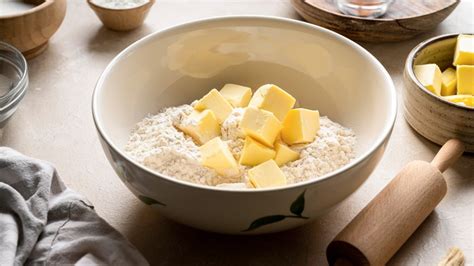
2. Precision in Mixing: Pea-Sized Perfection
Whether you use a food processor, a pastry blender, or your hands, the goal is to incorporate the butter into the flour until it resembles coarse meal with some pea-sized pieces of butter still visible. These pea-sized pieces are vital for flakiness.
- Food Processor Method: Pulse cold butter and flour until just combined, being careful not to overmix.
- Pastry Blender/Hands: Cut the butter into the flour until you achieve the desired texture. Your hands are fine, but ensure they are cold (run them under cold water first).
3. The Right Amount of Ice Water
Water binds the dough, but too much will make it tough, and too little will make it crumbly. Always use ice water to keep the butter cold and prevent gluten from developing too quickly. Add it a tablespoon at a time, just until the dough comes together.
- Slow and Steady: Sprinkle water over the mixture and gently toss with a fork until the dough starts to clump. It should be moist enough to hold together when squeezed, but not sticky.
- No Overworking: Once the dough comes together, stop mixing immediately.
4. The Crucial Chill: Rest and Relaxation
After forming your dough into a disc (or two, for a double-crust pie), wrap it tightly in plastic wrap and refrigerate for at least 30 minutes, or preferably an hour or longer (up to 2 days). This chilling period is essential for several reasons:
- Relaxes Gluten: Prevents the crust from shrinking during baking.
- Re-hardens Butter: Ensures the butter is firm for ultimate flakiness.
- Hydrates Flour: Allows the flour to fully absorb moisture.

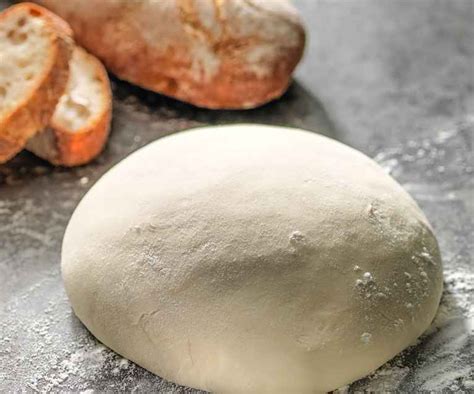
5. Gentle Rolling and Forming
When it’s time to roll, work on a lightly floured surface. Roll from the center outwards, rotating the dough frequently to prevent sticking and ensure even thickness. Avoid stretching the dough, as this can lead to shrinking.
- Even Thickness: Aim for about 1/8 inch thickness for consistent baking.
- Transfer Carefully: Roll the dough onto your rolling pin to transfer it to the pie plate, or gently fold it in quarters.

6. Blind Baking for a Golden Finish
For many pie fillings, blind baking (or pre-baking) your crust is crucial to prevent a soggy bottom and achieve that beautiful golden hue. Line the dough with parchment paper and fill with pie weights or dried beans. Bake until the edges are set and lightly golden, then remove the weights and continue baking until the bottom is golden brown.
- Egg Wash (Optional): For an extra golden shine, brush the edges of your crust with an egg wash (1 egg beaten with a splash of milk or water) before baking.
- High Initial Heat: Starting with a slightly higher oven temperature can help crisp the crust and encourage browning.

Mastering these secrets will transform your homemade pies from good to absolutely legendary. With cold butter, minimal handling, careful chilling, and proper baking, you’ll consistently achieve a flaky, golden pie crust that’s a true testament to the magic of real butter.