Safest DIY method for canning excess garden tomatoes for winter storage?

Harvesting Your Bounty: Why Can Tomatoes?
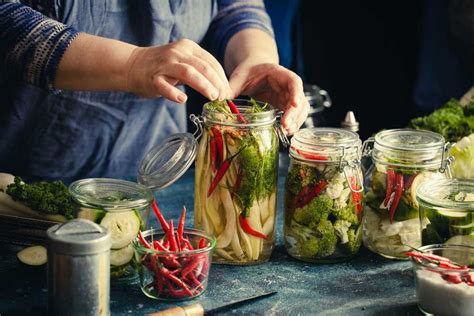
There’s immense satisfaction in harvesting ripe, juicy tomatoes from your garden. However, when the harvest is abundant, the question quickly turns from ‘what should I make tonight?’ to ‘how can I preserve all this goodness?’ Canning is an age-old, highly effective method that allows you to enjoy the fresh taste of summer tomatoes long after the growing season ends. It’s a fantastic way to stock your pantry with healthy, homemade ingredients for sauces, soups, and stews.
Understanding Tomato Acidity: The Golden Rule of Canning Safety
Before you even think about jars and canners, it’s crucial to understand tomato acidity. Tomatoes are a ‘borderline’ acidic food, meaning their pH can vary significantly depending on the variety, growing conditions, and ripeness. For safe water bath canning, foods must be sufficiently acidic (pH 4.6 or lower) to prevent the growth of harmful bacteria, particularly Clostridium botulinum, which causes botulism. To ensure safety, all tested recipes for water bath canning tomatoes require the addition of an acid.

Choosing Your Method: Water Bath vs. Pressure Canning
Water Bath Canning for Acidified Tomatoes
This is generally the safest and most recommended DIY method for preserving tomatoes, provided you properly acidify them. Water bath canning is suitable for high-acid foods. When you add lemon juice or citric acid to your tomatoes, you lower their pH, making them safe for this method. It’s simpler and requires less specialized equipment than pressure canning.
Pressure Canning for Non-Acidified or Mixed Tomato Products
If you prefer not to add extra acid to your plain tomatoes, or if you’re canning tomato products mixed with low-acid vegetables (like onions, peppers, or carrots in a salsa or stew), pressure canning is the only safe method. Pressure canners reach much higher temperatures than water bath canners, which is necessary to kill botulism spores in low-acid environments. While safe, it requires more advanced equipment and careful adherence to instructions.
Essential Equipment for Safe Tomato Canning
Having the right tools is paramount for a safe and efficient canning process:
- Canning Jars: Mason-style jars with two-piece lids (flat lid and screw band). Ensure they are free from chips or cracks.
- New Lids: Always use new flat lids for each canning session to ensure a proper seal. Screw bands can be reused.
- Water Bath Canner with Rack: A large pot with a lid and a rack to keep jars off the bottom and prevent breakage.
- Jar Lifter: For safely moving hot jars in and out of the canner.
- Canning Funnel: To neatly fill jars without spilling.
- Headspace Tool & Bubble Remover: Essential for ensuring proper headspace and eliminating trapped air.
- Large Stockpot & Bowls: For blanching, peeling, and holding prepared tomatoes.
- Sharp Knife & Cutting Board: For coring and chopping tomatoes.
- Measuring Spoons/Cups: For accurate acid measurement.
- Ingredients: Fresh tomatoes, bottled lemon juice or citric acid (DO NOT use fresh lemon juice, as its acidity can vary), canning salt (optional).
Step-by-Step Guide: Water Bath Canning Whole or Crushed Tomatoes
1. Prepare Your Tomatoes
Select firm, ripe, unblemished tomatoes. Wash them thoroughly. To easily remove skins, blanch tomatoes in boiling water for 30-60 seconds, then immediately plunge into ice water. The skins should slip off easily. Core and quarter them, or crush them slightly if desired for crushed tomatoes. You can also prepare them as halves or whole, peeled tomatoes.
2. Prepare Jars and Lids
Wash jars thoroughly in hot, soapy water, rinse well. Keep them hot (in hot water bath, dishwasher, or oven on low) until ready to fill. If your processing time is less than 10 minutes, you must sterilize your jars first. Prepare new flat lids by simmering them in hot water (not boiling) according to manufacturer instructions.
3. Acidify Jars
This is a critical step for safety. For quart jars, add 2 tablespoons of bottled lemon juice or ½ teaspoon of citric acid directly to each jar. For pint jars, add 1 tablespoon of bottled lemon juice or ¼ teaspoon of citric acid. Do not reduce these amounts.
4. Fill Jars
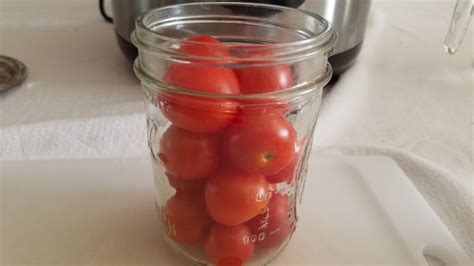
Pack your prepared tomatoes tightly into the hot jars, leaving 1/2 inch of headspace (the space between the food and the rim of the jar). If using whole or halved tomatoes, you can add hot water, tomato juice, or even a light syrup (if making sweet tomatoes) to cover, maintaining the headspace. Run a clean, non-metallic utensil (like a plastic spatula) around the inside of the jar to release any trapped air bubbles. Adjust headspace if necessary.
5. Wipe Rims and Apply Lids
Carefully wipe the jar rims with a clean, damp cloth to remove any food residue. This ensures a proper seal. Center a hot, new lid on each jar, then screw on the band ‘fingertip tight’ – just until you feel resistance, then a tiny bit more. Do not overtighten.
6. Process in Water Bath Canner
Place the filled jars onto the rack in your water bath canner. Ensure there is at least 1 inch of water covering the tops of the jars. Bring the water to a rolling boil. Once boiling vigorously, start your timer. Process for the time recommended by a tested recipe for your specific tomato product and jar size, adjusting for your altitude. (Typical times for acidified plain tomatoes are around 35-45 minutes for quarts, 20-30 minutes for pints, but always consult a reliable source).

7. Cool and Check Seals
Once the processing time is complete, turn off the heat and carefully remove the canner lid. Let the jars sit in the hot water for 5 minutes before carefully removing them with a jar lifter. Place the hot jars on a clean towel or cooling rack, ensuring they are not touching each other, and allow them to cool undisturbed for 12-24 hours. You’ll often hear a ‘ping’ sound as the lids seal. After cooling, check seals by pressing the center of each lid; it should be concave and not flex when pressed. If a jar hasn’t sealed, refrigerate it and consume it within a few days, or re-process with a new lid within 24 hours.

Important Safety Considerations
- Always Use Tested Recipes: Rely on reputable sources like the USDA National Center for Home Food Preservation, university extension offices (e.g., Cooperative Extension), or trusted canning cookbooks.
- Do Not Alter Recipes: Especially important for acid amounts, processing times, and ingredient proportions in salsas or sauces.
- Inspect Jars and Lids: Never use chipped jars or old flat lids.
- Check Seals: A proper seal is your best indicator of safety. If in doubt, discard.
- Storage: Store sealed jars without rings in a cool, dark, dry place. Remove rings to prevent false seals and allow for easier detection of spoilage.
- Signs of Spoilage: Never taste food from a jar if the lid is bulging, there’s mold, an off-odor, or liquid seeping. When in doubt, throw it out!
Enjoy Your Winter Bounty!
With careful attention to detail and adherence to tested safety guidelines, canning your excess garden tomatoes is a rewarding and delicious way to ensure a taste of summer brightens your winter meals. Enjoy the satisfaction of a well-stocked pantry and the wholesome flavor of your homemade preserves!