


Extend harvest: Best cold frame DIY for fall greens?
As autumn leaves begin to fall and the crispness of the air signals the approach of winter, many gardeners feel a pang of sadness at the thought of their bountiful harvests coming to an end. But what if you could defy the calendar and keep fresh, delicious greens on your table for weeks, or even months, longer? The secret lies in a simple, age-old gardening tool: the cold frame. This miniature greenhouse creates a microclimate, protecting plants from frost and chilling winds, making it possible to enjoy a continuous supply of cool-weather crops.

Why a Cold Frame is Your Fall Garden’s Best Friend
A cold frame is essentially a bottomless box with a transparent lid, designed to capture solar energy and retain heat. It’s a game-changer for extending the growing season in several ways:
- Frost Protection: Shields plants from killing frosts, allowing tender greens to thrive.
- Heat Retention: Warms the soil and air inside, encouraging growth even on chilly days.
- Wind Break: Protects plants from harsh winds that can desiccate leaves and stunt growth.
- Seed Starting: Ideal for hardening off seedlings in spring, and for sowing late-season crops.
Key Considerations for Your DIY Cold Frame
Before you grab your tools, think about these crucial elements for your DIY cold frame:
- Location: Choose a spot that receives at least 6 hours of sunlight daily, preferably facing south to maximize sun exposure. Ensure good drainage.
- Size: Determine the dimensions based on the space you have and the quantity of greens you wish to grow. Common sizes range from 3×3 to 4×8 feet.
- Materials: You can use new or repurposed materials. Common options include lumber, straw bales, concrete blocks, old windows, polycarbonate sheets, or even rigid plastic.
- Lid: The lid is critical for light and heat retention. Old windows (single or double pane), clear polycarbonate sheets, or reinforced plastic sheeting stapled to a frame are excellent choices. Ensure it can be easily opened for ventilation.

Popular DIY Cold Frame Designs
1. The Repurposed Window Cold Frame
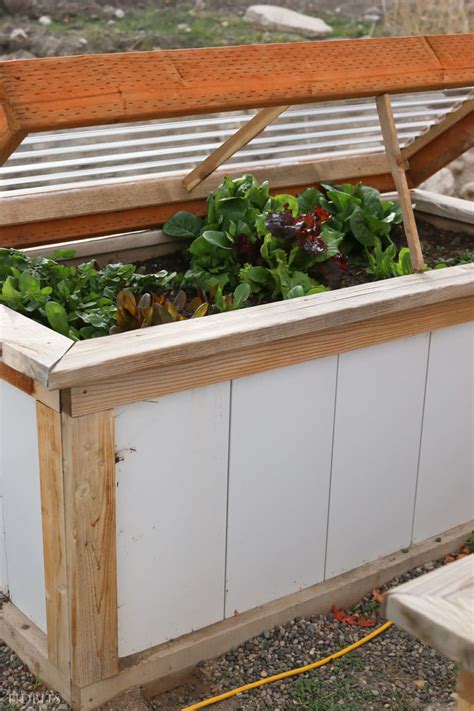
This is arguably the most classic and sustainable DIY cold frame. Salvaged windows make excellent lids. For the base, you can use untreated lumber (like cedar or redwood for longevity, or treated lumber if painted to prevent leaching), bricks, or concrete blocks. Construct a simple bottomless box, angling the back wall slightly higher than the front to allow for better light penetration and water runoff from the window lid. Attach the window with hinges to the top edge of the higher back wall.
2. Straw Bale Cold Frame
For a quick and inexpensive solution, straw bales make an excellent insulating base. Arrange three sides with bales, leaving the front open. For the lid, create a simple frame from 2x2s and staple clear plastic sheeting or an old window onto it. This type is great for temporary use and offers fantastic insulation.
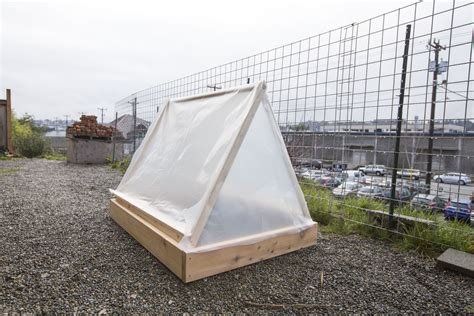
3. Polycarbonate or Plastic Sheet Cold Frame
If you prefer lightweight and modern materials, build a simple wooden frame and cover the sides and lid with clear twin-wall polycarbonate sheets or heavy-duty greenhouse plastic. This provides excellent light diffusion and insulation.
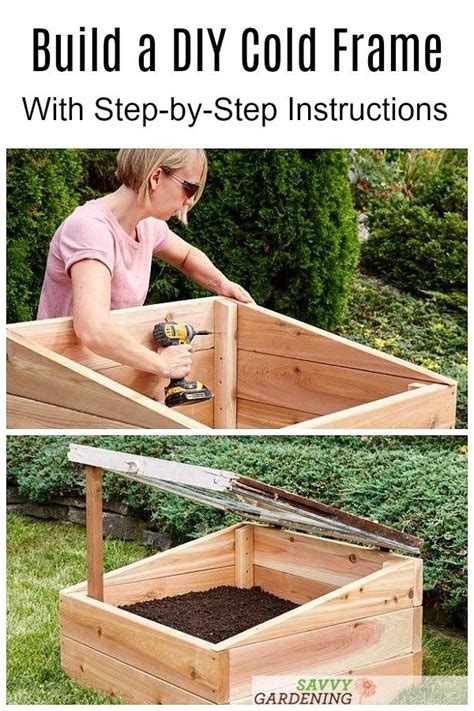
Step-by-Step: Building a Simple Wooden Cold Frame
- Gather Materials: You’ll need lumber (e.g., 2x10s for sides), an old window or polycarbonate sheet for the lid, hinges, screws, and a drill.
- Cut Boards: Cut two longer boards for the front and back, and two shorter boards for the sides. For optimal sun exposure and drainage, make the back board 4-6 inches taller than the front.
- Assemble the Box: Screw the boards together to form a bottomless rectangle. Reinforce corners if needed.
- Attach the Lid: Place your window or custom-built lid frame on top. Attach hinges to the upper edge of the taller back wall and the lid, allowing it to open easily for ventilation. Add a prop stick to hold the lid open.
- Site and Fill: Place your cold frame in its sunny location. Fill with good quality soil or compost.

Best Fall Greens for Cold Frame Cultivation
Not all plants thrive in a cold frame, but many cool-season crops absolutely love it:
- Spinach: A classic for cold frames, offering multiple harvests.
- Lettuce: Loose-leaf varieties like ‘Black Seeded Simpson’ or ‘Buttercrunch’ do well.
- Mâche (Corn Salad): Extremely cold-hardy and delicious.
- Arugula: Grows quickly and tolerates cool temperatures.
- Kale: Especially ‘Red Russian’ or ‘Winterbor’, which become sweeter after a touch of frost.
- Swiss Chard: Provides colorful and nutritious leaves.
- Radishes: Quick-growing and satisfying.
Tips for Cold Frame Success
- Ventilation is Key: On sunny days, even in winter, the interior can overheat. Prop open the lid during the warmest part of the day to prevent cooking your plants. Close it before temperatures drop in the late afternoon.
- Water Sparingly: Plants in a cold frame don’t need as much water as outdoor plants. Check the soil moisture regularly and water only when the top inch or two is dry.
- Monitor Temperature: A small thermometer inside can help you understand your cold frame’s microclimate.
- Insulate Further: For very harsh winters, you can place straw bales or insulation around the exterior of your cold frame for added protection.
Building a DIY cold frame is a rewarding project that extends your gardening season and provides fresh, healthy produce long after your outdoor garden has gone dormant. With a little effort, you can enjoy crisp salads and hardy greens well into the colder months, making your fall garden dreams a reality. Happy growing!
