


DIY methods to build durable, rustic shelving for pantry food storage?

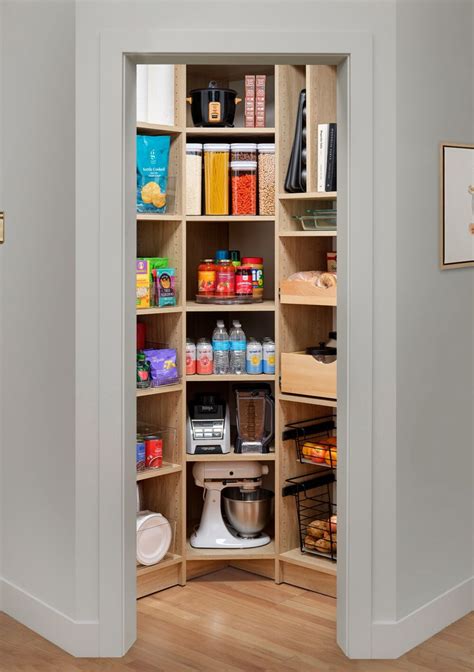
Dreaming of a perfectly organized pantry with shelves that not only hold your provisions but also add character to your home? DIY rustic shelving is an excellent solution, offering both robust storage and charming aesthetics. This guide will walk you through building durable, rustic shelves perfect for any pantry, transforming a functional space into a beautiful focal point.
Planning Your Rustic Pantry Shelves
Before grabbing your tools, thoughtful planning is key. Start by accurately measuring your pantry space. Consider the height, width, and depth required for your items – from tall cereal boxes to bulky appliances. Think about the weight your shelves will bear; this dictates material choice and construction method for durability.
Decide on the style. Rustic can range from rough-hewn farmhouse to slightly more refined reclaimed wood. Sketch out a design, including the number of shelves, their spacing, and how they will be supported (e.g., wall-mounted brackets, freestanding units). A good plan ensures your project runs smoothly and your finished shelves meet your needs.
Selecting Durable & Rustic Materials
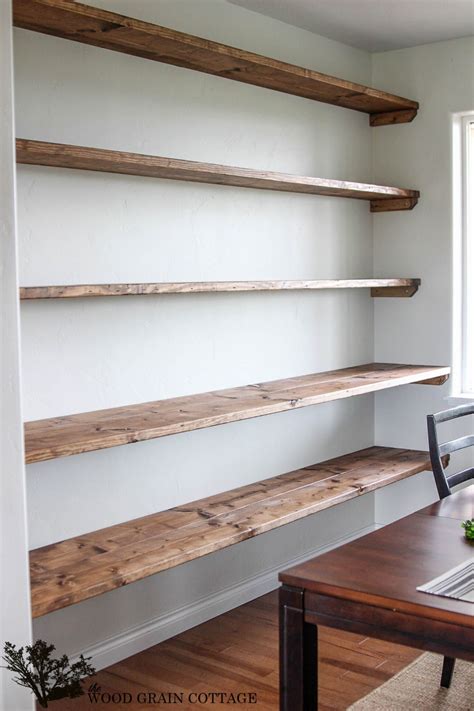
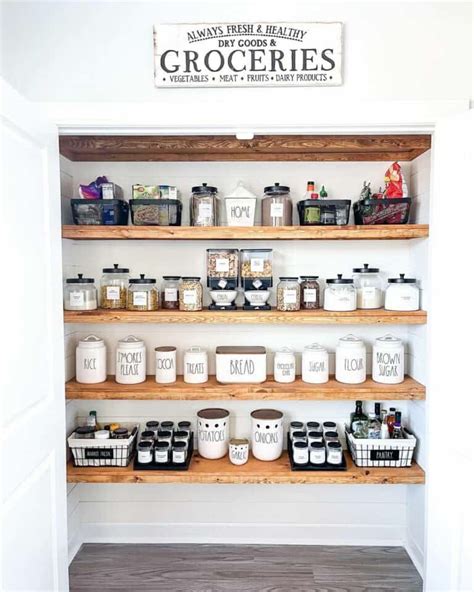
The heart of durable, rustic shelving lies in your material choices. For wood, consider reclaimed lumber for instant character and sustainability – old barn wood, pallet wood (ensure it’s safe and untreated), or discarded construction timbers. New lumber like pine, fir, or oak can also achieve a rustic look with proper finishing. Opt for thicker boards (e.g., 1x10s or 2x10s) for enhanced weight bearing and longevity.
For supports, heavy-duty metal brackets (black iron pipe, wrought iron) or sturdy wooden cleats complement the rustic aesthetic and provide critical support. Don’t skimp on fasteners; use long, strong wood screws (2.5-3 inches) and appropriate wall anchors if attaching to drywall, ensuring your shelves can handle substantial loads.
Essential Tools for the Job
You don’t need a professional workshop to build great shelves. Basic woodworking tools will suffice. Gather a measuring tape, pencil, speed square, circular saw or miter saw for precise cuts, a drill/driver with various bits, a level, and a stud finder. Safety gear, such as gloves and eye protection, is always a must to prevent accidents during construction.

Step-by-Step Construction Guide
Cutting & Preparing Wood
Measure and cut all your shelf boards and support pieces according to your design. If using reclaimed wood, give it a good cleaning and light sanding to remove splinters while preserving its character. For new wood, sand all surfaces and edges to ensure a smooth, safe finish.
Assembling Supports
- Option A (Wooden Cleats): If using wooden cleats, cut them to the desired length (e.g., 10-12 inches for each shelf end). Locate wall studs using your stud finder. Mark precise heights for each shelf. Pre-drill pilot holes in the cleats and then screw them securely into the wall studs using long wood screws. Use a level to ensure they are perfectly horizontal.
- Option B (Metal Brackets): For metal brackets, mark their positions and heights. Secure them to wall studs using appropriate screws. If studs aren’t available for all bracket points, use heavy-duty toggle or molly bolts for maximum stability.
Attaching Shelves
Carefully place your cut shelf boards onto the installed supports. For wooden cleats, you can screw the shelves down from the top into the cleats for added stability. If using metal brackets, the shelf usually rests directly on them, but you can secure them with small screws from underneath for extra security. Ensure each shelf is level before fully fastening.
Finishing for Durability & Rustic Charm
The final step transforms raw wood into enduring, beautiful shelves. For a true rustic look, consider a dark wood stain (like walnut or espresso) or a whitewash technique to highlight grain. Follow staining with several coats of a durable polyurethane or tung oil finish. This seals the wood, protects it from moisture and spills common in a pantry, and makes cleaning easier. Ensure adequate drying time between coats for the best results.
Alternatively, a natural oil finish (like linseed oil) can enhance the wood’s inherent beauty while offering some protection. For an even more rugged look, you might skip extensive sanding on reclaimed pieces, letting their imperfections shine through, but still apply a protective sealant to ensure longevity and ease of cleaning.
Building your own durable, rustic pantry shelving is a rewarding project that combines functionality with aesthetic appeal. With careful planning, the right materials, and a bit of elbow grease, you can create a custom storage solution that will serve your family for years, all while adding a touch of timeless character to your home. Enjoy your beautifully organized pantry!