Simple canning methods for preserving summer garden vegetables?

Embrace the Harvest: Why Can Your Summer Garden Vegetables?
As summer peaks, home gardens overflow with an abundance of fresh, vibrant produce – juicy tomatoes, crisp cucumbers, tender beans, and sweet peppers. While enjoying them fresh is a delight, the season is fleeting. Canning offers a fantastic, time-honored way to capture these peak-season flavors, extending the enjoyment long after the growing season ends. It’s a deeply rewarding process that allows you to control ingredients, reduce food waste, and fill your pantry with wholesome, homemade goodness.

The Basics of Home Canning: High-Acid vs. Low-Acid Foods
Before diving into the process, it’s crucial to understand the fundamental distinction between high-acid and low-acid foods when it comes to canning safety. High-acid foods, which include most fruits, pickles (made with vinegar), and tomatoes (often with added acid like lemon juice or citric acid), can be safely preserved using the simpler water bath canning method. Low-acid foods, such as most common vegetables (green beans, corn, potatoes), meats, and poultry, require a pressure canner to reach temperatures high enough to destroy harmful bacteria. For simple, beginner-friendly methods, we will primarily focus on water bath canning.
Getting Started with Water Bath Canning
Water bath canning is ideal for high-acid foods and is relatively easy to master with the right equipment and adherence to proper steps. It’s an accessible entry point into the world of food preservation.
Essential Equipment for Water Bath Canning
- Large Canning Pot: A deep pot with a rack to hold jars off the bottom, allowing water to circulate. A standard stockpot can work if it’s deep enough and you have a makeshift rack.
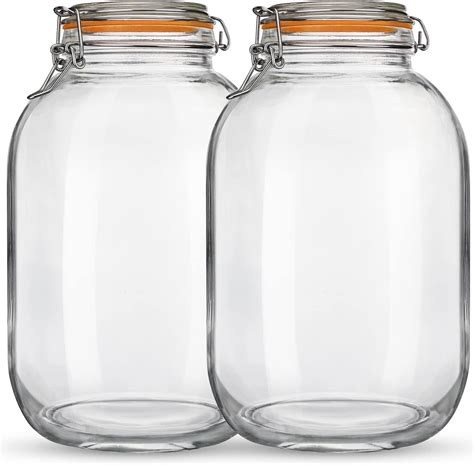
- Canning Jars: Mason-style glass jars designed for canning, complete with new lids and bands. Always use new lids for each canning session.
- Jar Lifter: Essential for safely placing hot jars into and removing them from boiling water.
- Canning Funnel: Helps prevent spills and keeps jar rims clean during filling.
- Headspace Tool & Bubble Remover: A simple tool to measure headspace and remove air bubbles from jars.
- Clean Towels: For wiping jar rims and cooling finished jars.

Step-by-Step Water Bath Canning Process
- Prepare Jars and Lids: Wash jars and bands in hot soapy water. Place new lids in a small saucepan with simmering water (do not boil) to soften the sealing compound. Keep jars hot until filling to prevent thermal shock.
- Prepare Your Food: Wash, chop, blanch, or cook your vegetables according to your chosen tested recipe. Ensure your produce is fresh and of high quality.
- Fill Hot Jars: Using a canning funnel, carefully fill hot jars with your prepared food and liquid, leaving the recommended headspace (typically 1/4 to 1/2 inch) as specified by your recipe.
- Remove Air Bubbles: Insert a clean, non-metallic tool (like a plastic spatula or wooden chopstick) into the jar, gently moving it around to release any trapped air bubbles. Adjust food and liquid to maintain proper headspace.
- Clean Rims and Seal: Wipe jar rims thoroughly with a clean, damp cloth to remove any food particles. Center a hot, prepared lid on each jar, then screw on the band fingertip tight (just until resistance is met, avoid overtightening).
- Process in Water Bath: Place filled jars on the rack in the canning pot. Ensure jars are covered by at least 1-2 inches of boiling water. Bring the water to a rolling boil and begin timing according to your recipe (remember to adjust for altitude).
- Cool and Check Seals: Once processing is complete, turn off the heat and let jars sit in the hot water for 5 minutes. Carefully remove jars with a jar lifter and place them on a clean towel on your counter, leaving space between them. Do not disturb for 12-24 hours. You’ll often hear satisfying “pings” as the lids seal.
- Store Properly: After 24 hours, check seals by pressing on the center of the lid – it should be concave and not flex. Remove bands, wipe jars clean, label with contents and date, and store in a cool, dark place.
Perfect Produce for Simple Water Bath Canning
Many summer garden staples are ideal candidates for water bath canning, especially when prepared into high-acid products:
- Tomatoes: Diced, crushed, pureed, or whole. Always add acid (lemon juice or citric acid) to ensure safety, even if they seem naturally acidic.
- Pickles: Cucumbers, green beans, carrots, peppers – transformed into delicious pickles with a vinegar-based brine.
- Salsas & Relishes: Homemade salsa from a blend of tomatoes, peppers, onions, and vinegar creates a delightful shelf-stable condiment.
- Fruit Jams & Jellies: While not strictly vegetables, excess berries and fruits from the garden are perfect for water bath canning into sweet preserves.
Safety First: Essential Canning Tips
Successful and safe canning hinges on adherence to precise guidelines. Never compromise on safety:
- Always Use Tested Recipes: Rely on current, reputable recipes from sources like the USDA, your local Extension office, or trusted canning books. Do not invent your own recipes for safety-critical steps.
- Cleanliness is Key: Sanitize all equipment, surfaces, and your hands thoroughly throughout the process.
- Correct Processing Times: Never shorten processing times, and always adjust for your altitude to ensure adequate heat penetration.
- Inspect Jars and Lids: Use only jars designed for canning, free of nicks or cracks. Always use brand-new, un-damaged lids for each canning session.
- Check Seals: A proper, airtight seal is paramount for food safety and long-term storage.
Enjoy Your Homemade Pantry Staples!
Once properly canned and stored, your summer garden vegetables will be ready to enjoy for months to come. Imagine savoring homemade tomato sauce in the depths of winter, or crisp pickled beans as a vibrant side dish. Canning is a gratifying way to extend the bounty of your garden, reduce food waste, and provide healthy, delicious food for your family. Start with simple water bath canning projects, meticulously follow the guidelines, and you’ll be canning like a seasoned pro in no time, turning your garden’s summer abundance into year-round joy.