How to adapt garden surplus into easy, delicious country-style preserves?

There’s a unique satisfaction that comes with harvesting your own produce, but a bountiful garden can sometimes lead to an overwhelming surplus. Rather than letting those sun-ripened tomatoes, sweet berries, or crisp cucumbers go to waste, embrace the time-honored tradition of country-style preserving. This guide will show you how to transform your garden’s generosity into delicious, shelf-stable delights that capture the essence of summer all year long.
Why Preserve? Beyond Waste Reduction
Preserving isn’t just about preventing waste; it’s about extending the season’s flavors, creating unique culinary staples, and connecting with a heritage of self-sufficiency. Imagine savoring homemade strawberry jam on toast in the dead of winter, or serving your own pickled green beans alongside a holiday meal. Country-style preserves often feature simpler ingredient lists, highlighting the natural taste of the produce, and allowing for creative flavor combinations that store-bought versions rarely offer.
Essential Tools for the Home Preserver
While the idea of canning might seem daunting, you don’t need a professional kitchen to get started. Basic equipment makes the process safe and efficient:
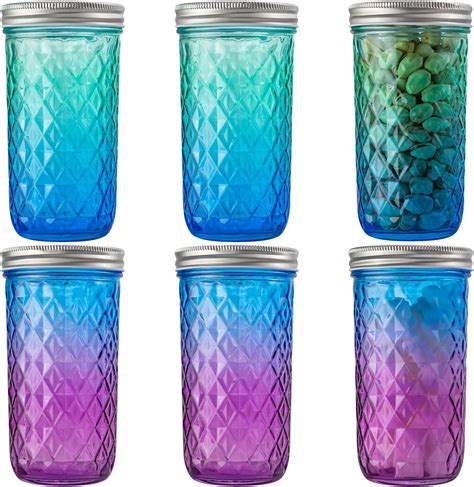
- Canning Jars: Mason jars with two-piece lids (lids and rings) are crucial. Ensure they are clean and sterilized.
- Large Stock Pot/Canning Pot: For water bath canning, deep enough to cover jars by at least an inch.
- Jar Lifter: To safely place and remove hot jars from boiling water.
- Funnel: Helps prevent spills when filling jars.
- Ladle: For transferring hot preserves into jars.
- Headspace Tool/Ruler: To ensure proper fill levels.
For some recipes, you might also need a food mill for purees or a jelly bag for clear jellies.

Key Principles for Delicious Country-Style Preserves
Achieving that rustic, homemade taste comes down to a few core principles:
- Freshness is King: Use the freshest, highest-quality produce. Overripe or damaged fruit won’t yield the best results.
- Balance Sweetness and Acidity: Sugar helps preserve and sets the texture, while acidity (from lemon juice, vinegar) is vital for safety and flavor balance, especially in low-acid foods.
- Understand Pectin: Pectin, a natural gelling agent, is present in varying degrees in fruits. High-pectin fruits (apples, citrus, cranberries) set easily, while low-pectin fruits (strawberries, peaches) often require added pectin or longer cooking times.
- Proper Sealing: Water bath canning is key for high-acid foods (most fruits, pickles with vinegar). This process creates a vacuum seal, ensuring shelf stability.
Popular Produce and Preserve Ideas
Your garden offers a treasure trove of preserving opportunities:
- Tomatoes: Transform them into rich tomato sauce, spicy chutney, or even a savory tomato jam.
- Berries (Strawberries, Raspberries, Blueberries): Perfect for classic jams, jellies, and fruit butters.
- Stone Fruits (Peaches, Plums, Apricots): Make delectable jams, compotes, or brandied fruits.
- Cucumbers: The quintessential pickling vegetable, from dill spears to bread-and-butter slices.
- Zucchini: Don’t let it overwhelm you! Use it in sweet relish or savory zucchini pickles.

Step-by-Step Guide: Making a Simple Berry Jam
Let’s walk through a basic recipe for a mixed berry jam – a perfect starting point for beginners.
Ingredients:
- 4 cups mixed berries (strawberries, raspberries, blueberries), hulled and washed
- 3 cups granulated sugar
- 1/4 cup lemon juice (freshly squeezed)
Instructions:
- Prepare Jars: Wash jars and lids in hot soapy water. Sterilize jars by boiling them for 10 minutes or running them through a dishwasher’s sanitizing cycle. Keep them hot until ready to fill.
- Combine Ingredients: In a large, heavy-bottomed pot, combine berries, sugar, and lemon juice. Bring to a boil over medium-high heat, stirring constantly to dissolve sugar.
- Cook the Jam: Reduce heat to medium-low and continue to boil, stirring frequently, for 15-25 minutes, or until the jam thickens and reaches the gelling point. (Test by placing a spoonful on a cold plate and drawing a finger through it; if it wrinkles, it’s ready.)
- Fill Jars: Carefully ladle hot jam into hot sterilized jars, leaving 1/4 inch of headspace. Wipe rims clean. Center new lids on jars and screw on bands until fingertip tight.
- Process Jars: Place filled jars in a boiling water canner, ensuring they are fully submerged by at least an inch of water. Bring to a rolling boil and process for 10 minutes (adjust for altitude if necessary).
- Cool and Store: Carefully remove jars from the canner and place them on a towel-lined counter, spaced apart, to cool completely for 12-24 hours. Check seals (lids should be concave and not flex when pressed). Unsealed jars can be refrigerated and used within a few weeks. Store sealed jars in a cool, dark place for up to a year.
Embracing the art of preserving is a rewarding journey that not only minimizes food waste but also fills your pantry with homemade goodness. Each jar tells a story of your garden’s bounty and your culinary creativity. So, gather your surplus, choose your favorite recipe, and start creating delicious country-style preserves that will delight your family and friends for months to come.