Safest home canning methods for beginners preserving summer garden bounty?

Embrace the Art of Home Canning Safely
There’s immense satisfaction in looking at a pantry stocked with jars of your own home-canned produce, especially when it’s from your very own summer garden bounty. Home canning is a rewarding way to preserve the freshest flavors of the season, ensuring you can enjoy peak-season fruits and vegetables all year long. However, for beginners, the world of canning can seem daunting, with safety often being the primary concern. The good news is that with the right knowledge and adherence to tested methods, home canning is a perfectly safe and enjoyable endeavor.
This guide will walk you through the safest and most effective canning methods suitable for beginners, focusing on the critical steps and equipment needed to ensure your preserved foods are not only delicious but also safe for consumption.
Why Canning Safety is Paramount
Before diving into methods, it’s crucial to understand why safety is non-negotiable in home canning. Improper canning can lead to food spoilage and, more critically, the growth of harmful bacteria like Clostridium botulinum, which produces toxins that cause botulism – a severe and potentially fatal foodborne illness. By following tested recipes and approved canning practices, you effectively eliminate these risks.
Water Bath Canning: Your Entry Point to Preservation
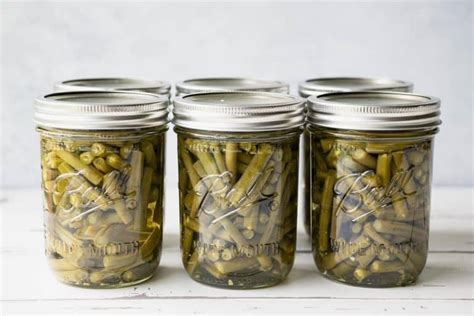
Water bath canning is the simplest method and an excellent starting point for beginners. It’s suitable for high-acid foods, meaning those with a pH of 4.6 or lower. This acidity, combined with the heat processing, prevents the growth of harmful bacteria. Foods ideal for water bath canning include:
- Fruits (peaches, berries, apples)
- Jams, jellies, and fruit butters
- Pickles and relishes (cucumbers, beans, peppers)
- Tomatoes (often require added acid like lemon juice or citric acid to ensure safety)
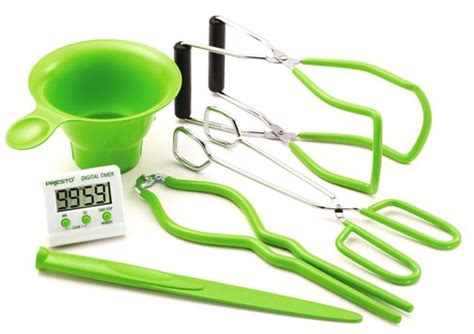
Essential Equipment for Water Bath Canning:
- Large Water Bath Canner: A large pot with a lid and a rack to keep jars off the bottom.
- Canning Jars: Glass jars specifically designed for canning (e.g., Ball, Kerr) with two-piece lids (new flat lids each time, screw bands can be reused).
- Jar Lifter: For safely moving hot jars.
- Canning Funnel: To minimize mess when filling jars.
- Headspace Tool/Bubble Remover: To ensure proper headspace and remove air bubbles.
- Timer: For accurate processing times.
Mastering Pressure Canning for Low-Acid Foods
For low-acid foods (pH above 4.6), such as most vegetables, meats, poultry, and soups, a pressure canner is absolutely essential. These foods require higher temperatures than a boiling water bath can achieve to destroy botulism spores. A pressure canner heats the contents of the jars to temperatures well above boiling point by creating a pressurized, steam-filled environment.
Foods Requiring Pressure Canning:
- Green beans, corn, peas, carrots, potatoes
- Meats (beef, pork, chicken)
- Fish and seafood
- Soups and stews
- Mixed vegetable dishes
Essential Equipment for Pressure Canning:
- Pressure Canner: Can be either a weighted-gauge or dial-gauge model. It’s crucial to have your dial gauge checked annually for accuracy.
- Canning Jars, Lids, Rings: Same as for water bath canning.
- Jar Lifter, Funnel, Headspace Tool: Also essential here.
While pressure canning might seem more intimidating, modern pressure canners are designed with safety features and are straightforward to use once you understand the basic principles. Always read your canner’s instruction manual thoroughly.

Crucial Safety Tips for New Canners
Regardless of the method, these fundamental safety tips are paramount:
- Use Tested Recipes: Always use up-to-date, scientifically tested recipes from reliable sources like the USDA Complete Guide to Home Canning, university extension offices (e.g., National Center for Home Food Preservation), or reputable canning jar manufacturers. Do not rely on old family recipes unless they have been verified against current standards.
- Check Equipment: Ensure your canner is in good working order. Have dial gauges checked annually. Inspect jars for cracks or chips. Use new flat lids every time.
- Maintain Cleanliness: Sterilize jars if processing for less than 10 minutes (though processing times typically cover sterilization). Always work with clean hands, tools, and surfaces.
- Follow Headspace Rules: Proper headspace (the empty space between the food and the lid) is critical for creating a vacuum seal and preventing spoilage.
- Remove Air Bubbles: Before placing lids, use a non-metallic utensil to remove air bubbles from jars, then re-check headspace.
- Process for Correct Time & Pressure: Never shorten processing times or reduce recommended pressure levels. Adjust for altitude if necessary.
- Check Seals: After cooling for 12-24 hours, check jar seals. The lid should be concave and not flex when pressed. Remove screw bands and store sealed jars without them.
Your Beginner’s Canning Toolkit
To get started, consider assembling a basic toolkit that covers both water bath and future pressure canning needs:
- Quality canning jars, lids, and rings (in pint and quart sizes)
- A large stockpot with a rack (can double as a basic water bath canner)
- Jar lifter
- Canning funnel
- Headspace tool/bubble remover
- Clean dish towels
- A reliable timer
- (Optional, but highly recommended for expansion) A reputable pressure canner

Preserve Your Bounty with Confidence
Starting your home canning journey with a focus on safety and reliable methods will set you up for success. Begin with water bath canning for high-acid foods like jams, pickles, or fruit, building your confidence and skill. Once comfortable, you can explore the world of pressure canning to preserve a wider variety of low-acid vegetables, meats, and complete meals.
Remember, the goal is not just to store food, but to store safe food. By adhering to tested guidelines and being meticulous in your process, you’ll soon be enjoying the delicious fruits (and vegetables!) of your labor, extending your summer garden’s bounty far into the colder months.