How to build a DIY compost bin for garden & kitchen waste?

Unleash the Power of Composting in Your Garden
Composting is an incredibly rewarding practice that transforms organic waste into nutrient-rich soil, often referred to as “black gold.” Not only does it enrich your garden beds naturally, but it also significantly reduces household waste sent to landfills. Building your own compost bin is a straightforward and cost-effective DIY project that empowers you to take control of your organic waste stream. This guide will walk you through the steps to construct a sturdy and efficient compost bin suitable for both garden debris and kitchen scraps.

Why Build Your Own Compost Bin?
- Eco-Friendly: Divert food and yard waste from landfills, reducing methane emissions.
- Soil Improvement: Create a natural fertilizer that improves soil structure, water retention, and nutrient availability.
- Cost Savings: Reduce the need for store-bought fertilizers and soil amendments.
- Customizable: Design a bin that fits your space and composting needs perfectly.
Choosing Your Compost Bin Style
There are several popular DIY compost bin designs, each with its own advantages:
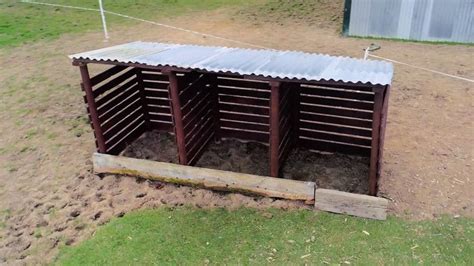
- Pallet Bins: Sturdy, durable, and often made from free or inexpensive reclaimed pallets. Excellent aeration.
- Wire Mesh Bins: Lightweight, easy to assemble, and highly breathable. Good for smaller spaces or quick setups.
- Wood & Hardware Cloth Bins: Offers a more refined look and can be customized to any size.
For this guide, we will focus on building a robust three-sided or four-sided pallet compost bin, which offers excellent capacity and durability.
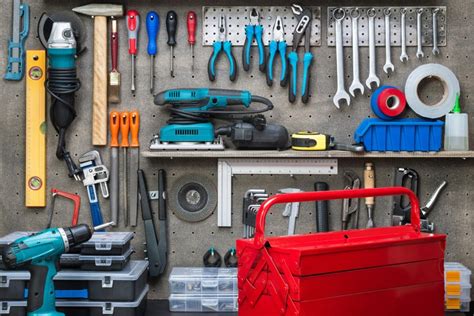
Materials and Tools You’ll Need
Materials:
- 4-5 wooden pallets (standard size, untreated is best)
- Heavy-duty zip ties or screws (2-3 inches long)
- Washers (if using screws, for better grip on pallet wood)
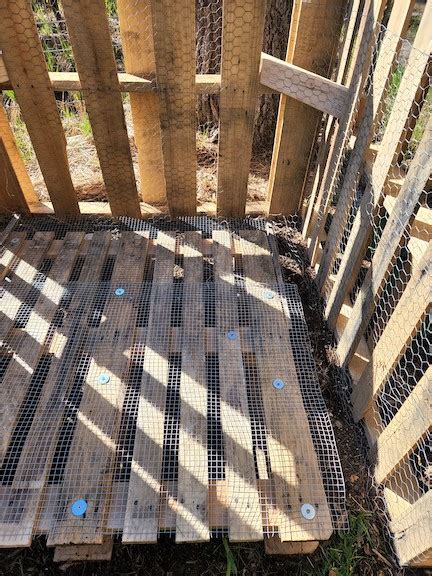
- Optional: Hardware cloth or chicken wire (to line gaps and prevent pests)
- Optional: Tarp or plywood (for a lid)
Tools:
- Drill/Impact Driver
- Saw (if you need to cut pallets)
- Measuring tape
- Work gloves
- Pencil or marker
Step-by-Step: Building Your Pallet Compost Bin
Step 1: Select Your Site
Choose a level, well-drained spot in your garden, ideally in partial shade to prevent your compost from drying out too quickly. Make sure it’s accessible for adding waste and turning the pile, and not too close to your house due to potential odors (though a well-managed compost bin should smell earthy, not foul).
Step 2: Prepare Your Pallets
Inspect your pallets. If any planks are loose or broken, repair or remove them. Ensure they are untreated wood, especially if you plan to use the compost on edible plants. You might need to remove some central blocks from one pallet if you plan for a removable front panel later.
Step 3: Assemble the Back Wall
Stand two pallets upright side-by-side to form the back wall of your bin. Connect them securely using heavy-duty zip ties or by drilling pilot holes and screwing them together. Use at least 4-6 connection points per joint for stability.
Step 4: Add the Side Walls
Now, stand a third pallet perpendicular to one end of your assembled back wall. Align its edge with the edge of the back wall pallet and secure it in place with zip ties or screws. Repeat this process for the fourth pallet on the other side, creating a three-sided structure.
Step 5: Create a Removable Front (Optional but Recommended)
For easier access to turn your compost or harvest finished material, consider making the front panel removable. You can do this by:
- Method A (Simple): Simply lean a fifth pallet against the open front. When you need access, just pull it away.
- Method B (Hinged): Attach two hinges to one side of the front pallet and the adjacent side pallet. Use a latch on the other side.
- Method C (Sliding Boards): If you removed central blocks from the front-facing ends of your side pallets, you can slide individual wooden planks into the gaps to form a front wall.
Step 6: Add a Lid (Optional)
A lid helps retain moisture and heat, speeding up the composting process, and can deter pests. You can use another pallet, a piece of plywood, or even a tarp as a lid. Ensure it’s heavy enough not to blow away or can be secured.
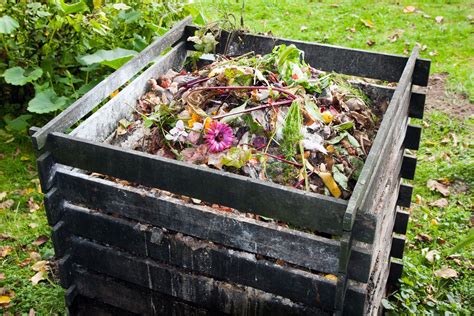
Filling and Maintaining Your Compost Bin
What to Compost:
- Greens (Nitrogen-rich): Fresh grass clippings, fruit and vegetable scraps, coffee grounds, tea bags, plant trimmings.
- Browns (Carbon-rich): Dry leaves, shredded cardboard, newspaper, straw, wood chips, dried plant stalks.
Aim for a good balance, roughly 50/50 of greens to browns, by volume. Too many greens can lead to a smelly, slimy pile; too many browns will slow decomposition.
What Not to Compost:
- Meat, bones, fish, dairy products, oily foods (attract pests, create odors).
- Diseased plants (can spread pathogens).
- Pet waste (contains harmful bacteria).
- Chemically treated wood or plants.
Compost Maintenance:
- Moisture: Your compost pile should feel like a damp sponge. Water it if it’s too dry, or add dry browns if it’s too wet.
- Aeration: Turn your compost regularly (weekly or bi-weekly) with a pitchfork or compost aerator. This introduces oxygen, which is crucial for beneficial microbes.
- Layering: Try to layer greens and browns as you add them to the bin.
Troubleshooting Common Composting Issues
- Smelly Pile: Usually a sign of too much green material or not enough aeration. Add browns and turn the pile.
- No Activity: Could be too dry, too many browns, or not enough nitrogen. Add water, more greens, and turn.
- Pests: Ensure you’re not adding prohibited items like meat or dairy. A lid can also help.
Conclusion
Building a DIY compost bin is a rewarding project that pays dividends in a healthier garden and a reduced environmental footprint. With a little effort, you can turn your kitchen and garden waste into a valuable resource, closing the loop on your home’s organic materials. Get started today and watch your garden thrive!