

DIY plans for a small-scale root cellar for real food storage?
Embrace Self-Sufficiency: Building Your Small-Scale Root Cellar
In an age where food resilience and sustainable living are more valued than ever, the humble root cellar is experiencing a well-deserved resurgence. Far from being an archaic relic, a well-designed small-scale root cellar offers an ingenious, energy-efficient solution for storing homegrown produce and other staples without relying on refrigeration. For anyone looking to extend their harvest, reduce food waste, and gain greater control over their food supply, building a DIY root cellar is a rewarding and practical project.

Why a Root Cellar? The Benefits of Passive Food Storage
A root cellar leverages the earth’s natural insulating properties to maintain a consistently cool, humid environment ideal for storing many fruits, vegetables, and even canned goods. This passive cooling method significantly reduces electricity consumption compared to extra refrigerators or freezers. Beyond energy savings, it preserves the nutritional integrity and flavor of your harvest for months, bridging the gap between growing seasons and ensuring a steady supply of fresh, healthy food.
Before grabbing your shovel, thoughtful planning is crucial. Consider your storage needs, the available space, and your budget. A small-scale root cellar doesn’t require vast acres; it can be integrated into an existing basement, a sheltered spot in your yard, or even a modified trench.
Key Design Considerations for Your DIY Root Cellar
Successful root cellar operation hinges on three primary environmental factors: temperature, humidity, and ventilation.
- Temperature: Aim for a consistent range between 35-50°F (2-10°C). The cooler end is best for most root vegetables, while fruits like apples prefer slightly warmer temperatures.
- Humidity: A high humidity level (85-95%) prevents produce from drying out. This is often achieved naturally by the earth itself, but can be augmented with damp sand or gravel floors.
- Ventilation: Fresh air circulation is vital to prevent ethylene gas buildup (which can spoil produce) and to regulate temperature and humidity. A simple intake and exhaust vent system is usually sufficient.

Choosing the Right Location and Materials
The ideal location for an outdoor root cellar is shaded, well-drained, and easily accessible. Avoid areas prone to flooding or with a high water table. If you have an existing basement, a dedicated corner can be walled off and insulated to create an indoor root cellar.
Material Choices:
- Walls: Concrete blocks, poured concrete, salvaged stone, or treated lumber are common choices. Earth-bermed walls offer excellent insulation.
- Floor: A packed earth floor is ideal for humidity control. If you opt for concrete, consider covering part of it with sand or gravel that can be dampened.
- Roof: An earthen roof provides superior insulation and temperature stability. Otherwise, a well-insulated wooden roof with a waterproof membrane is necessary.
- Shelving: Durable, rot-resistant wood like cedar or plastic shelving is recommended. Ensure good airflow around shelves.
Step-by-Step Construction Outline
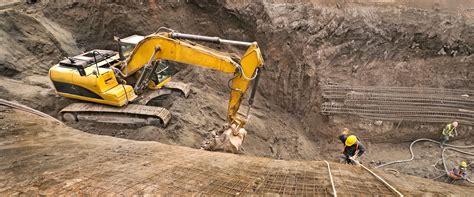
- Excavation: Dig out your chosen area, ensuring sufficient depth for subterranean insulation and head room. Consider trenching for a partially buried design if a full underground cellar isn’t feasible.
- Foundation & Floor: Lay a sturdy foundation and either pour a concrete slab (with provisions for an earthen section) or simply level and compact the earth floor.
- Walls: Construct your chosen walls. If using concrete blocks, reinforce them appropriately. Ensure they are plumb and level.
- Roof & Insulation: Install roof supports and construct your roof. For an earthen roof, a strong underlying structure is critical to support the weight of soil and insulation. Insulate thoroughly to prevent heat transfer.
- Ventilation System: Install an intake vent (low to the ground, bringing in cool air) and an exhaust vent (high up, expelling warmer, stale air). Both should be screened to prevent pest entry.
- Door: A well-insulated, airtight door is essential to maintain internal conditions.
- Interior Finishing: Install shelves, bins, and any necessary lighting (LEDs are best as they produce minimal heat).

Optimizing Your Root Cellar for Storage Success
Once built, how you utilize your root cellar makes all the difference. Different produce has different ideal storage conditions. For instance, root vegetables like carrots, potatoes, and beets thrive in high humidity and cool temperatures. Apples prefer slightly less humidity but still cool conditions, while onions and garlic need cool, dry air.
- Separate Produce: Keep ethylene-producing fruits (like apples) away from ethylene-sensitive vegetables (like potatoes) to prevent premature spoilage.
- Cleanliness: Ensure all produce is clean and dry before storing. Remove any damaged items.
- Regular Checks: Periodically inspect your stored food, removing anything that shows signs of spoilage to prevent it from affecting others.
- Labeling: Label bins or shelves to easily track what you have and when it was stored.

Conclusion: A Step Towards Food Independence
Building a small-scale root cellar is a tangible step towards greater food independence and sustainability. It’s a project that connects you with traditional methods of food preservation, reduces your reliance on external energy, and provides access to fresh, healthy produce long after the growing season ends. With careful planning and a bit of elbow grease, you can create a functional and efficient root cellar that will serve your household for years to come, turning your harvest into a year-round bounty.