
Best tips for safely canning garden produce for winter storage?

Why Home Canning is a Great Way to Preserve
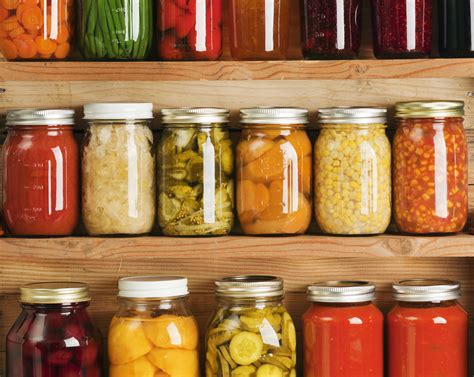
As gardeners, we often find ourselves with an abundance of fresh produce during peak season. While sharing with neighbors is wonderful, canning allows you to extend the enjoyment of your harvest far beyond the growing season, providing nutritious, homegrown food all winter long. Beyond the sheer pleasure of eating your own preserved foods, home canning can be a cost-effective way to stock your pantry and reduce food waste. However, safety is paramount when it comes to canning to prevent spoilage and potential health risks.
Successful and safe canning hinges on understanding a few fundamental principles and adhering strictly to tested recipes and guidelines. It’s not just about sealing food in jars; it’s a science that requires precision and attention to detail. Let’s delve into the best practices to ensure your canned goods are both delicious and safe for consumption.

Essential Equipment for Safe Canning
Before you even pick your first tomato for canning, ensure you have the right tools. Investing in proper canning equipment is crucial for safety and efficiency:
- Canning Jars: Use only mason jars specifically designed for canning. They are tempered to withstand the heat and pressure of the canning process. Always inspect jars for chips or cracks.
- New Lids: Canning lids are designed for one-time use to ensure a proper seal. Rings can be reused if they are not rusty or bent.
- Canners: Depending on the acidity of your food, you’ll need either a boiling water canner (for high-acid foods like fruits, pickles, and tomatoes with added acid) or a pressure canner (for low-acid foods like vegetables, meats, and poultry).
- Canning Utensils: A jar lifter, canning funnel, head space tool, and bubble remover are invaluable for safe handling and proper preparation.
Understanding Acidity: High-Acid vs. Low-Acid Foods
This is perhaps the most critical distinction in canning safety. Different types of food require different canning methods due to their acidity levels, which determine the environment for bacterial growth:
- High-Acid Foods (pH 4.6 or below): These include most fruits, fruit juices, jams, jellies, pickles, and tomatoes (which often require added acid like lemon juice or citric acid to ensure safety). These foods can be safely processed in a boiling water canner.
- Low-Acid Foods (pH above 4.6): These include most vegetables, meats, poultry, seafood, and soups. These foods must be processed in a pressure canner to reach temperatures high enough to destroy Clostridium botulinum spores, which can cause botulism, a serious and often fatal illness.
Never try to can low-acid foods in a boiling water canner, as it will not reach the necessary temperature to kill harmful bacteria.
Key Safety Tips and Best Practices
- Follow Tested Recipes ONLY: Use current, tested recipes from reputable sources like the National Center for Home Food Preservation (NCHFP), university extension offices, or USDA-approved canning books. Do NOT invent your own recipes or reduce processing times.
- Proper Jar Preparation: Wash jars, lids, and bands in hot, soapy water and rinse thoroughly. Jars should be kept hot until filled to prevent thermal shock.
- Fresh, High-Quality Produce: Start with fresh, unblemished produce. Overripe or spoiled ingredients can affect the final product’s quality and safety.
- Accurate Headspace: Leave the recommended amount of headspace (the space between the food and the lid) in each jar. Too little can result in siphoning (food boiling out), and too much can lead to poor seals.
- Remove Air Bubbles: After filling, use a non-metallic utensil to remove air bubbles from around the food in the jar. This ensures even heat distribution and a better seal.
- Wipe Jar Rims Clean: Before placing lids, wipe the jar rims with a clean, damp cloth to remove any food particles that could prevent a proper seal.
- Tighten Bands Correctly: Screw bands fingertip-tight. Over-tightening can prevent air from escaping during processing, leading to buckling of lids and seal failure.

Processing and Post-Processing Checks
Processing
Follow the processing time and pressure/temperature specified in your chosen recipe precisely. Adjust for altitude if necessary, as higher altitudes require increased processing times or pressure.
Cooling and Sealing
Once processing is complete, remove jars from the canner and place them on a towel-lined surface, ensuring they are not touching each other, in a draft-free area. Allow them to cool undisturbed for 12-24 hours. You’ll likely hear the satisfying ‘ping’ as lids seal.
Checking Seals
After 12-24 hours, check the seals. Press down on the center of each lid. If it doesn’t flex, the jar is sealed. You can also remove the band and gently lift the jar by the lid; if the lid holds, it’s sealed. Any unsealed jars must be reprocessed within 24 hours (with new lids) or refrigerated and consumed within a few days.
Storage and When to Discard
Store sealed jars in a cool, dark, dry place without the bands. Storing without bands prevents ‘false seals’ and allows you to easily identify spoilage. Properly canned foods typically last for one year, though quality may decline over time.
Discard immediately if:
- The lid is bulging or unsealed.
- Food shows signs of mold, discoloration, or smells off.
- Liquid is cloudy or bubbly.
When in doubt, throw it out! Your health is not worth the risk.

Enjoying Your Winter Bounty
Canning can be an incredibly rewarding skill, allowing you to enjoy the literal fruits of your labor all year long. By following these best practices for safety and quality, you’ll soon have a pantry stocked with delicious, homemade goodness that will bring a taste of summer to your winter table.