


Foolproof method for canning garden green beans safely?
The Essential Guide to Safe Green Bean Canning
Canning fresh green beans from your garden is a rewarding way to preserve the taste of summer for months to come. Imagine enjoying tender, home-grown green beans even in the dead of winter! However, canning green beans isn’t just about sealing them in a jar; it’s about doing it safely to prevent foodborne illnesses. Unlike high-acid foods such as pickles or jams, green beans are a low-acid vegetable, which means they require a specific method of preservation to eliminate the risk of botulism.
Why Pressure Canning is Non-Negotiable
For low-acid foods like green beans, a pressure canner is not optional – it’s absolutely essential. A boiling water bath canner reaches a maximum temperature of 212°F (100°C), which is insufficient to destroy the spores of Clostridium botulinum, the bacterium responsible for botulism. A pressure canner, however, reaches much higher temperatures, typically 240°F (116°C) or higher, which is hot enough to neutralize these dangerous spores and ensure your canned goods are safe for consumption.

Gathering Your Canning Arsenal
Before you begin, gather all the necessary equipment. Having everything ready streamlines the process and ensures you can work efficiently and safely:
- Pressure Canner: A dial-gauge or weighted-gauge pressure canner in good working condition.
- Canning Jars: Mason-type canning jars (pint or quart size) with no chips or cracks.
- Lids and Bands: New self-sealing lids and clean screw bands. Bands can be reused, but lids are one-time use.
- Jar Lifter: To safely move hot jars.
- Canning Funnel: To prevent spills when filling jars.
- Bubble Remover/Headspace Tool: A plastic utensil to remove air bubbles and measure headspace.
- Clean Cloths: For wiping jar rims.
- Large Pot: For blanching (if hot packing) or heating water.
- Basic Kitchen Utensils: Knives, cutting board, large bowls.
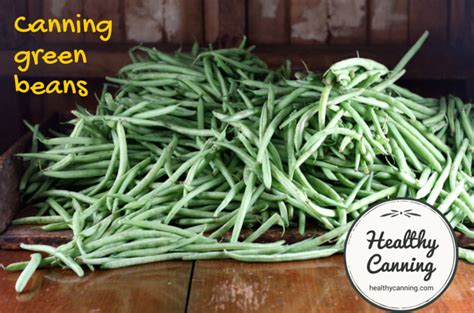
Preparing Your Green Beans
The quality of your canned beans starts with the freshness and preparation of your produce. Select young, tender green beans that are free from blemishes or disease. Avoid over-mature beans with bulging seeds, as these can become tough.
- Wash Thoroughly: Rinse beans under cold running water to remove any dirt or debris.
- Snap and Trim: Snap off the stem and blossom ends of each bean. You can leave them whole, snap them into 1-inch pieces, or cut them French-style, depending on your preference.

Choosing Your Pack Method: Raw vs. Hot
There are two primary methods for packing green beans into jars:
Raw Pack
This method involves packing raw, unprepared green beans tightly into jars. The beans will shrink during processing, so pack them as snugly as possible without crushing. Raw packing is quicker for preparation, but the beans tend to float more in the jar and may have a slightly softer texture.
Hot Pack
For hot packing, you first blanch the green beans in boiling water for 3-5 minutes. This pre-shrinks the beans, allowing you to pack more into each jar and reduce floating. Hot packing generally results in a better texture and appearance for the final product.
Regardless of the packing method, add 1 teaspoon of canning salt to quart jars, or ½ teaspoon to pint jars (optional, for flavor, not preservation). Then, fill the jars with boiling water, leaving 1 inch of headspace at the top. Use a bubble remover to release any trapped air bubbles, adding more boiling water if necessary to maintain the 1-inch headspace.
The Pressure Canning Process: Step-by-Step
This is the most critical stage for safety.
- Prepare Jars: Wipe the rims of each jar with a clean, damp cloth to remove any food particles. This ensures a proper seal. Place new lids on the jars, and screw on the bands finger-tight.
- Load Canner: Place the filled jars on the rack inside your pressure canner. Make sure they are not touching. Add 2-3 inches of hot water to the canner (or as directed by your canner’s manual).
- Vent the Canner: Secure the canner lid. Turn the heat to high. Allow steam to escape steadily from the vent pipe for a full 10 minutes. This purges air from the canner, preventing false pressure readings.
- Build Pressure: After venting, place the weighted gauge or pressure regulator on the vent pipe, or close the petcock. Allow the pressure to rise to the recommended PSI (pounds per square inch) for your altitude and canner type (typically 10 PSI for weighted gauge at sea level, consult charts for dial gauge and altitude adjustments).
- Process: Once the desired pressure is reached, begin timing. For green beans: Pints require 20 minutes, Quarts require 25 minutes. Adjust heat to maintain a steady pressure.
- Cool Down: When processing time is complete, turn off the heat. Allow the canner to cool naturally until the pressure returns to zero. Do NOT rush this process by opening the vent or cooling with water, as this can cause liquid to siphon out of jars and compromise seals.
- Remove Jars: Once pressure is at zero, wait another 10 minutes before removing the weighted gauge or opening the petcock. Carefully unlatch and remove the canner lid, tilting it away from your face to avoid steam. Using a jar lifter, remove the hot jars and place them on a towel or cooling rack, ensuring they are not touching.

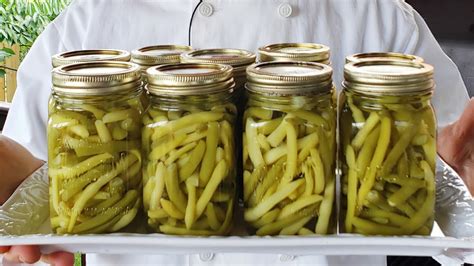
Cooling, Sealing, and Storing Your Harvest
Allow the jars to cool undisturbed for 12-24 hours. As they cool, you should hear a satisfying ‘ping’ sound as the lids seal. Do not retighten bands during this time.
- Check Seals: After 12-24 hours, remove the screw bands. Press the center of each lid. If it is concave and doesn’t spring back, the jar is sealed. If a lid did not seal, refrigerate and consume the contents within a few days, or reprocess within 24 hours using a new lid.
- Clean Jars: Wash sealed jars with warm, soapy water to remove any residue.
- Label and Store: Label your jars with the contents and date. Store them in a cool, dark, dry place, ideally between 50-70°F (10-21°C). Properly canned green beans can last for at least a year.
Essential Safety Reminders
- Always use current, tested recipes from reputable sources like the National Center for Home Food Preservation (NCHFP) or USDA.
- Never use a boiling water bath canner for green beans or any other low-acid food.
- Always adhere to recommended processing times and pressures for your altitude.
- Inspect jars before opening: discard any jars with a bulging lid, leaks, or off-odors, as these are signs of spoilage.
By following these steps carefully, you can confidently and safely preserve your garden’s bounty of green beans, enjoying healthy, delicious meals from your pantry all year long. Happy canning!