


Safest DIY method for canning homegrown tomatoes to preserve your harvest?
Harvesting a bountiful crop of homegrown tomatoes is one of summer’s greatest joys. But with an abundance of ripe, juicy fruit, the question quickly turns to preservation. Canning is an excellent way to capture that fresh, garden flavor to enjoy all year round. However, when it comes to canning, safety is paramount. This guide will walk you through the safest DIY method for canning tomatoes, focusing on the essential steps to protect your family from foodborne illnesses while preserving your delicious harvest.
Understanding Canning Safety: Why Acid Matters
The biggest concern with home canning is botulism, a serious foodborne illness caused by a toxin produced by Clostridium botulinum bacteria. These bacteria thrive in low-acid, oxygen-free environments, making improperly canned foods a potential risk. Tomatoes are unique because they are borderline low-acid foods, meaning their acidity can vary. To ensure safety for water bath canning, which is generally simpler for beginners than pressure canning, tomatoes must be acidified.
Water bath canning is suitable only for high-acid foods (pH 4.6 or below). While some tomatoes are naturally acidic enough, adding acid is a non-negotiable safety measure to guarantee a safe pH level, allowing the water bath canner to effectively destroy spoilage organisms and prevent botulinum toxin formation.

Essential Equipment for Safe Tomato Canning
Having the right tools makes the canning process smoother and safer. Here’s what you’ll need:
- Water Bath Canner: A large pot with a lid and a rack to keep jars off the bottom.
- Canning Jars: Mason-type jars (pint or quart size) with self-sealing lids and bands. Always use new lids.
- Jar Lifter: For safely placing and removing hot jars from the canner.
- Canning Funnel: To minimize spills when filling jars.
- Headspace Tool/Ruler: For accurately measuring headspace.
- Bubble Remover/Plastic Knife: To remove air bubbles from jars.
- Large Pot: For blanching tomatoes and preparing the tomato product.
- Clean Towels: For wiping jar rims and cooling jars.
- Lemon Juice or Citric Acid: Essential for acidification.
Step-by-Step: The Safest Water Bath Method for Tomatoes
Step 1: Prepare Your Tomatoes
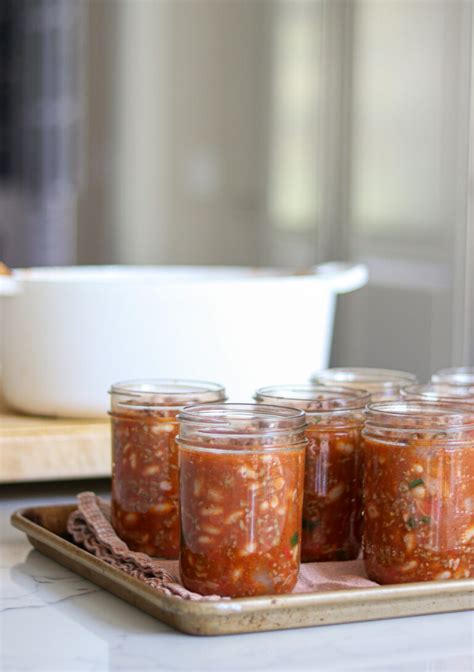
Choose firm, ripe, unblemished tomatoes. Avoid overripe or spoiled fruit. Wash them thoroughly. To peel, blanch tomatoes in boiling water for 30-60 seconds, then immediately transfer to an ice bath. The skins should slip off easily. Core and quarter your tomatoes. You can can them whole, halved, crushed, or diced. For crushed tomatoes, simmer them gently to reduce some liquid.
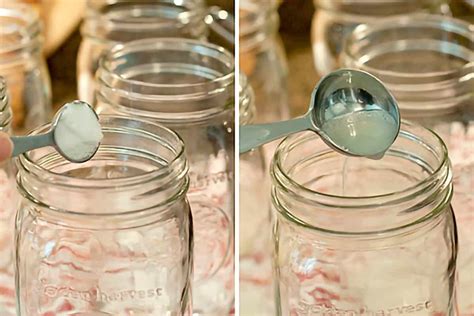
Step 2: Acidification is Non-Negotiable
This is the most critical safety step. For each quart jar, add 2 tablespoons of bottled lemon juice or ½ teaspoon of citric acid directly to the jar before filling with tomatoes. For pint jars, use 1 tablespoon of bottled lemon juice or ¼ teaspoon of citric acid. Do not use fresh lemon juice, as its acidity can vary. Bottled lemon juice or citric acid provides a consistent, reliable level of acidity.
Step 3: Prepare Jars and Lids
Wash canning jars, lids, and bands in hot, soapy water. Rinse well. Heat jars in hot (not boiling) water to prevent thermal shock when filling with hot tomatoes. Lids should be prepared according to manufacturer instructions, usually by simmering in hot water.
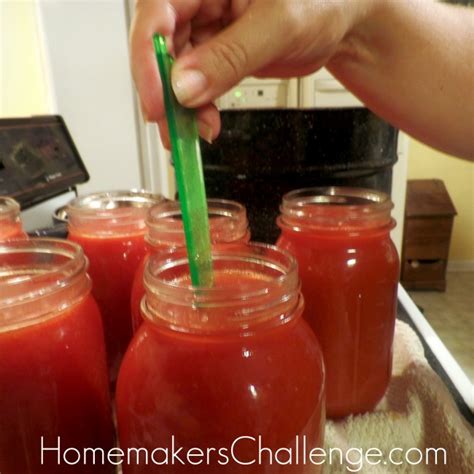
Step 4: Fill and Vent Jars
Carefully fill hot jars with your prepared tomatoes, leaving ½ inch of headspace (the space between the food and the rim of the jar). If canning whole or halved tomatoes, pack them tightly, then add hot cooking liquid or boiling water, still maintaining ½ inch headspace. Use a bubble remover tool or a plastic knife to dislodge any trapped air bubbles by running it around the inside of the jar. Wipe the rims of the jars clean with a damp cloth – any food particles can prevent a proper seal. Place a prepared lid on each jar, then screw on the bands finger-tight (just until resistance is met, no overtightening).
Step 5: Process in Water Bath Canner
Place filled, lidded jars into the rack of your water bath canner. Ensure the water level covers the tops of the jars by at least 1-2 inches. Cover the canner with its lid and bring the water to a rolling boil. Once boiling, begin timing the process. Process pint jars for 35 minutes and quart jars for 45 minutes. Adjust processing time for your altitude (check USDA guidelines for specific adjustments).
Step 6: Cool and Check Seals
Once processing time is complete, turn off the heat and carefully remove the canner lid. Let the jars stand in the hot water for 5 minutes before removing them with a jar lifter. Place the hot jars on a clean towel or cooling rack, ensuring there’s space between them for air circulation. Let them cool undisturbed for 12-24 hours. As they cool, you’ll hear the satisfying ‘pop’ as the lids seal.

After cooling, check seals by pressing the center of each lid. If it doesn’t flex, the jar is sealed. You can also remove the bands and try to lift the lid with your fingertips – if it stays put, it’s sealed. Any jars that haven’t sealed must be reprocessed with a new lid within 24 hours or refrigerated and consumed within a few days.
Important Safety Tips and Best Practices
- Always Follow Tested Recipes: Rely on reputable sources like the USDA Complete Guide to Home Canning or university extension services.
- Never Alter Acid Amounts: The specified amount of bottled lemon juice or citric acid is crucial for safety.
- Use New Lids: Lids are designed for single use to ensure a proper seal. Bands can be reused.
- Inspect Jars: Before use, check jars for chips, cracks, or imperfections.
- Proper Storage: Store sealed, processed jars in a cool, dark, dry place without the bands on. This prevents false seals and allows you to easily identify spoilage if a seal fails.
- Discard If Signs of Spoilage: If a jar shows signs of spoilage (e.g., bulging lid, mold, off-odor), discard it immediately without tasting.

Enjoy Your Preserved Harvest!
Canning homegrown tomatoes safely is a rewarding skill that extends the enjoyment of your garden’s bounty far beyond the summer months. By adhering to these safe canning practices, especially the critical step of acidification, you can confidently stock your pantry with delicious, home-canned tomatoes, ready to be transformed into sauces, soups, and stews all year long.