


Easy DIY root cellar ideas for storing garden harvests?
As gardeners, we often face the joyous dilemma of an abundant harvest. How do we keep our hard-earned produce fresh and delicious for as long as possible without relying solely on refrigeration or canning? The answer lies in the ancient art of root cellaring. A root cellar provides a naturally cool, humid, and dark environment—ideal conditions for extending the shelf life of many fruits and vegetables. The good news is, you don’t need a professional contractor to build one; many effective solutions can be created with simple DIY methods.
Why Consider a DIY Root Cellar?
Building your own root cellar offers numerous advantages. Firstly, it’s incredibly cost-effective, often utilizing repurposed materials or existing spaces. Secondly, it’s sustainable, reducing your reliance on energy-intensive appliances. Finally, it gives you complete control over the design, allowing you to tailor it perfectly to your storage needs and available space. Whether you have a small backyard or a sprawling homestead, there’s a DIY root cellar solution for you.

Key Principles for a Successful Root Cellar
Regardless of the design you choose, a successful root cellar adheres to a few core principles:
- Temperature: Aim for a consistent temperature between 35-50°F (2-10°C). This slows down respiration and spoilage.
- Humidity: High humidity (85-95%) prevents produce from drying out.
- Ventilation: Good airflow is crucial to prevent the buildup of ethylene gas (which can accelerate ripening) and to maintain stable temperatures.
- Darkness: Light can cause some vegetables to sprout or turn green (like potatoes).
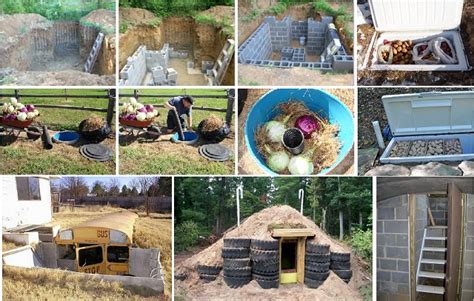
Easy DIY Root Cellar Ideas
1. The Buried Trash Can or Container Cellar
This is perhaps one of the simplest and most accessible DIY options, perfect for small harvests. Dig a hole deep enough to bury a sturdy, food-grade plastic trash can, barrel, or even an old cooler. Ensure it has drainage holes at the bottom. Line the bottom with straw or sand, add your produce (layered with more straw or damp newspaper to maintain humidity), and cover with a tight-fitting lid. Insulate the lid with a layer of straw or soil to keep it cool. Mark the spot clearly!
2. Basement or Crawl Space Corner Conversion
If you have an unheated basement or a crawl space, you might already have the makings of a root cellar. Choose the coolest, darkest corner, ideally against an exterior wall. Insulate the area with foam board or straw bales to create a separate room. Ensure it has a vent to the outside for airflow. Adding shelves or bins for organized storage will make it highly functional.
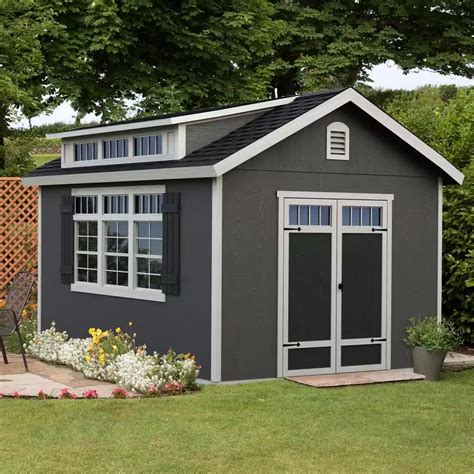
3. Modified Shed or Outbuilding
An existing garden shed, lean-to, or even a robust doghouse can be transformed. The key is insulation and proper ventilation. Insulate the walls, floor, and ceiling thoroughly. Add an intake vent near the bottom and an exhaust vent near the top for convection. Consider burying part of the structure for extra thermal stability if possible. Bins filled with sand or sawdust can help maintain humidity for certain crops.
4. Earth Mound or Clamp Cellar
This age-old method involves creating a mound of earth over your stored produce. Choose a well-drained spot. Lay down a bed of straw, place your produce in a pile (e.g., potatoes, carrots), cover with more straw, and then mound soil over the top, making it thick enough to insulate against frost. You can add a simple ventilation pipe. This is excellent for root crops and requires minimal materials.
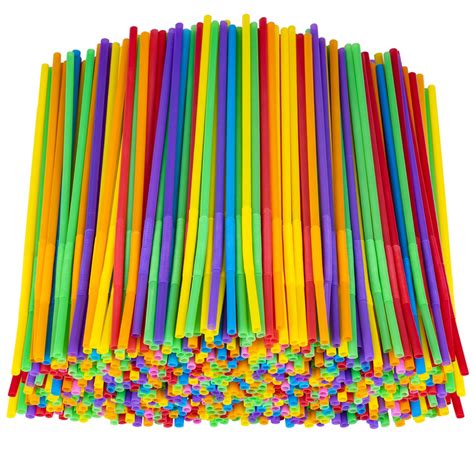
5. Straw Bale Cellar
For a temporary or larger-scale, low-cost option, construct a “room” using stacked straw bales. This provides excellent insulation. You can add a simple roof (tarp or plywood) and an access door. Digging down slightly for the floor will add to the cooling effect. Ensure good air circulation within the straw bale structure.
What to Store in Your DIY Root Cellar
Root cellars are perfect for a wide variety of produce:
- Root Vegetables: Potatoes, carrots, beets, parsnips, turnips, radishes.
- Squash and Pumpkins: Cured winter squash and pumpkins do exceptionally well.
- Apples and Pears: Store separately from root vegetables as they release ethylene gas.
- Cabbage and Celery: Can be stored wrapped or in damp sand.
- Onions and Garlic: Prefer slightly cooler, drier conditions than most root crops.
Maintenance and Tips for Success
Once your DIY root cellar is built, a little maintenance goes a long way:
- Monitor Conditions: Use a thermometer/hygrometer to track temperature and humidity. Adjust ventilation as needed.
- Inspect Produce: Regularly check your stored items and remove any that show signs of spoilage to prevent it from spreading.
- Cleanliness: Keep the cellar clean to deter pests and diseases.

Start Preserving Today!
Embracing a DIY root cellar solution is a rewarding step towards self-sufficiency and enjoying your garden’s bounty year-round. With a little effort and creativity, you can create an effective storage solution that is both eco-friendly and economically sensible. Happy harvesting and storing!