


Easy DIY raised garden bed plans for beginner homesteaders?

Embarking on a homesteading journey can feel overwhelming, but starting small with a raised garden bed is an excellent way to get your hands dirty and see immediate results. Raised garden beds offer numerous benefits, especially for beginners, making gardening more manageable and successful. They provide better control over soil quality, drainage, and pest management, all while reducing physical strain. This guide will walk you through easy DIY plans to construct your first raised bed, helping you cultivate your own produce with confidence.
Why Raised Beds are Ideal for Beginner Homesteaders
Raised garden beds are a game-changer for new gardeners. One of their primary advantages is the ability to create optimal soil conditions from scratch. You can fill your bed with a custom blend of nutrient-rich soil, compost, and organic matter, bypassing any challenges with poor native soil. This superior soil environment leads to healthier plants, better drainage, and improved aeration, essential for strong root development.
Beyond soil control, raised beds often warm up faster in the spring, allowing for an earlier start to your planting season. They also help deter common garden pests like slugs and snails, which find it harder to access plants. Plus, their elevated design means less bending and kneeling, making gardening more accessible and enjoyable. For homesteaders looking to maximize efficiency and yield in a compact space, raised beds are an invaluable asset.

Essential Considerations Before Building
Before you grab your tools, take a moment to plan. First, choose the right location for your raised bed. Most vegetables require at least 6-8 hours of direct sunlight per day, so a south-facing spot is often ideal. Ensure easy access to a water source and consider proximity to your home for convenience in harvesting and maintenance. Think about the size and shape that best fits your available space and your gardening ambitions. Common dimensions are 4×8 feet or 4×4 feet, as these allow easy reach to the center from either side.
Next, decide on your materials. For beginners, durability and ease of construction are key. Untreated wood, such as cedar, redwood, or even untreated pine, is a popular choice due to its natural appearance and relatively easy workability. Cedar and redwood are naturally rot-resistant and last longer but come at a higher cost. Avoid chemically treated lumber (like CCA-treated wood) for food gardens, as chemicals can leach into the soil.
Simple Material Options for Your DIY Raised Bed
Wood Frames: Classic and Versatile
Building a wooden raised bed is straightforward and offers a clean, classic look. You’ll typically need lumber (2×6 or 2×8 boards are common), screws or nails, a drill, and a saw. Cedar is a fantastic option because it withstands weather well without chemical treatment, ensuring your garden remains organic. Pine is a more budget-friendly choice, though it may not last as long unless treated with a food-safe preservative or lined internally.
For a basic rectangular bed, you’ll simply cut your boards to length, form a rectangle, and secure the corners. You can use corner brackets for extra stability or just screw the boards directly into each other. If you’re building a larger bed, consider adding a vertical support post in the middle of longer sides to prevent bowing over time.

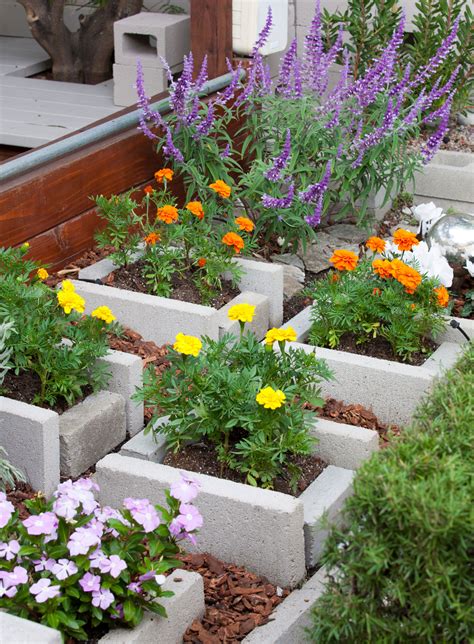
Alternative: Cinder Block or Stone Beds
For an even quicker setup, consider using cinder blocks, bricks, or natural stones. These materials require no cutting or drilling, making them incredibly beginner-friendly. Simply arrange them in the desired shape, stacking them one or two layers high to create your bed walls. Cinder blocks offer built-in pockets that can even be filled with soil and planted with herbs or flowers, adding an extra dimension to your garden. While they might not offer the same aesthetic as wood for everyone, their ease of use and longevity are undeniable.
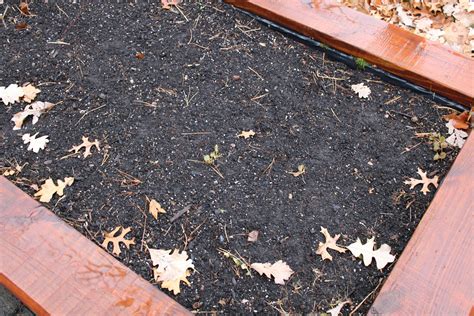
Step-by-Step: Building a Basic Wooden Raised Bed (Example)
- Gather Your Materials: Purchase four 8-foot long 2×8 boards (for a 4×8 foot bed), wood screws (3-inch deck screws work well), a drill with appropriate bits, a measuring tape, and a saw (manual or power).
- Measure and Cut: Cut two of your 8-foot boards down to 4 feet each. You will now have two 8-foot boards and two 4-foot boards.
- Assemble the Frame: Lay out your boards on a level surface to form a rectangle. The shorter 4-foot pieces will fit between the longer 8-foot pieces.
- Secure the Corners: Using your drill, attach the boards at each corner. Drive two or three screws through the end of the longer board into the end grain of the shorter board. Ensure the corners are flush and square.
- Level and Position: Move your assembled frame to its final location. Use a level to ensure the bed is sitting evenly on the ground. If necessary, dig out small amounts of soil or add sand to level it.
- Optional Bottom Protection: If you’re concerned about burrowing pests or weeds from below, lay a layer of hardware cloth (small mesh wire) or landscape fabric at the bottom of the bed before filling.

Filling Your Raised Bed for Optimal Growth
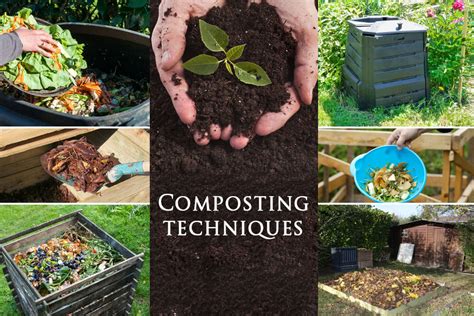
Once your raised bed is built, the next crucial step is filling it properly. A common and highly effective method is the ‘lasagna layering’ technique. This involves adding different organic materials in layers to create a rich, self-composting environment that will nourish your plants for years. Start with a coarse base layer of small branches, straw, or untreated wood chips for drainage. Follow this with layers of leaves, grass clippings (avoiding treated lawns), shredded newspaper, aged manure, and compost.
The top 6-12 inches of your bed should consist of a high-quality raised bed soil mix, often a blend of topsoil, compost, and perlite or vermiculite for drainage. This ensures your plants have immediate access to nutrient-rich, well-draining soil where their roots can establish quickly. The lower layers will continue to break down over time, enriching the entire bed.
Planting and Maintenance Tips for Success
With your raised bed ready, it’s time to plant! For beginners, consider easy-to-grow vegetables like lettuce, spinach, radishes, bush beans, or cherry tomatoes. Pay attention to spacing requirements for each plant to ensure they have enough room to thrive. Water deeply and consistently, especially during dry spells, as raised beds can dry out faster than in-ground gardens.
Mulching the surface of your soil with straw, wood chips, or shredded leaves will help retain moisture, suppress weeds, and regulate soil temperature. Regularly check your plants for signs of pests or diseases and address them promptly. Each season, top off your raised bed with a fresh layer of compost to replenish nutrients. With these simple practices, your raised garden bed will provide a bountiful harvest and be a rewarding addition to your homestead.
Conclusion: Start Your Homesteading Journey Today
Building a DIY raised garden bed is an empowering first step into homesteading and self-sufficiency. It’s a project that is both achievable for beginners and incredibly rewarding, transforming a simple space into a thriving food source. By following these easy plans and tips, you’ll not only grow delicious, fresh produce but also cultivate a deeper connection to your land and the satisfaction of growing your own food. So, gather your materials, get inspired, and start building your dream garden today!