


DIY ideas for affordable, effective herb drying racks for homestead kitchens?

Preserving the bountiful harvest from your garden is a cornerstone of homesteading, and drying herbs is one of the simplest yet most rewarding methods. Not only does it allow you to enjoy your favorite flavors year-round, but it also saves money and ensures you have a supply of organic goodness. While commercial herb drying racks exist, creating your own is incredibly satisfying, often more affordable, and perfectly tailored to your kitchen space and needs.
Why DIY Your Herb Drying Rack?
For homesteaders, the “do-it-yourself” philosophy is more than a hobby; it’s a way of life. Building your own herb drying rack fits perfectly into this ethos for several reasons. Firstly, it’s significantly more cost-effective. You can often repurpose materials you already have lying around, turning potential waste into a valuable kitchen tool. Secondly, DIY allows for complete customization. Whether you have a tiny corner or ample wall space, you can design a rack that fits perfectly, maximizing efficiency without compromising aesthetics. Lastly, there’s an immense sense of accomplishment in crafting something functional with your own hands, deeply connecting you to the food you grow and consume.

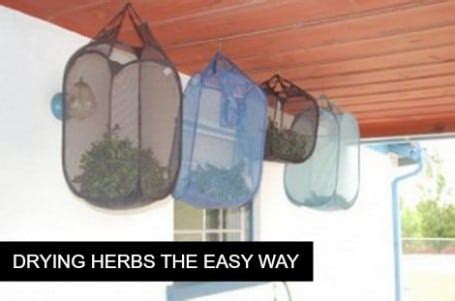
Simple Hanging Racks: The Easiest Start
If you’re new to herb drying or just need a quick solution, a simple hanging rack is your go-to. These require minimal materials and can be set up in minutes.
Twine and Clothespins
- Materials: A length of natural twine or strong string, small spring-loaded clothespins (wooden ones are charming), and two points to tie the string between (e.g., hooks, cabinet handles, or even chair backs).
- How to: Stretch the twine taut across your chosen space. Use clothespins to attach bundles of herbs (tied together at the stem with a rubber band or twine) upside down, ensuring good airflow between each bundle.
Repurposed Coat Hangers
- Materials: Wire or wooden coat hangers, rubber bands or twine.
- How to: Simply tie small bundles of herbs onto the bottom bar of a coat hanger. You can hang multiple hangers from a single curtain rod, clothesline, or even a branch for a rustic look. This method is great for smaller batches or if you have limited horizontal space.

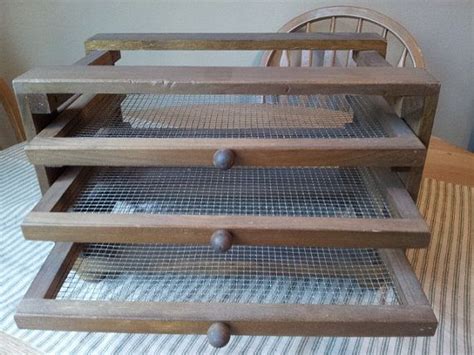
Multi-Tier Screen Drying Racks: For Larger Harvests
When your herb garden is overflowing, multi-tier screen racks offer more surface area and greater efficiency. These are ideal for leaves, small flowers, or herbs that might fall apart if hung.
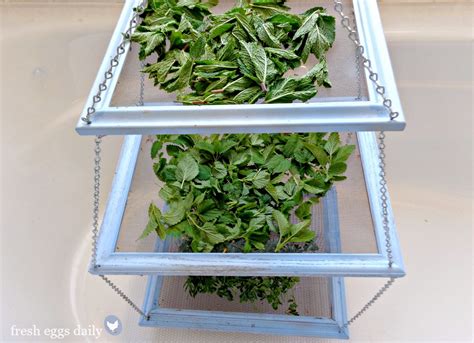
Old Window Screens or Picture Frames
- Materials: Old window screens (ensure they are clean and free of chemicals), or old picture frames, fine mesh screen material (like food-grade hardware cloth or cheesecloth), staples, and small blocks of wood or spacers.
- How to: If using window screens, simply stack them with spacers in between. For picture frames, remove the glass/backing and staple the mesh tightly across the frame opening. Create several such frames. Use small wooden blocks or even tin cans between each layer to allow for airflow when stacking.
PVC Pipe or Scrap Wood Frames with Mesh
- Materials: PVC pipes and connectors, or scrap wood strips, fine mesh screen (food-grade nylon or stainless steel), zip ties or staples.
- How to: Assemble simple square or rectangular frames from PVC pipe or wood. Cut the mesh to size and secure it tightly to each frame using zip ties (for PVC) or staples (for wood). Stack these frames, using small spacers or building a tiered stand, to create a multi-level drying system.
Pallet Wood or Reclaimed Wood Racks: Rustic Charm
Embrace the homestead aesthetic by building racks from reclaimed wood, like old pallets or barn wood. This adds character to your kitchen while being eco-friendly.
Wall-Mounted Pallet Section
- Materials: A section of a cleaned, heat-treated (HT stamped, not MB treated) pallet, small nails or screws, cup hooks.
- How to: Carefully dismantle a pallet to get a sturdy plank or section. Clean it thoroughly. Mount it horizontally on a kitchen wall. Screw in cup hooks along the bottom edge, evenly spaced, to hang herb bundles. You can also add a small shelf on top for jars or decorative items.
Ladder-Style Drying Rack
- Materials: Two long pieces of scrap wood for vertical supports, several shorter pieces for rungs, nails/screws, and optional dowels.
- How to: Build a small, narrow ladder. Instead of wide steps, create thin rungs from dowels or small wood strips. Herbs can be draped over the rungs or hung from them using twine. This freestanding option can be moved easily and leaned against a wall.
Essential Considerations for Effective Drying
Regardless of the rack design you choose, success hinges on a few critical factors:
- Good Airflow: This is paramount to prevent mold. Ensure plenty of space around each herb bundle or layer on screens. Avoid overcrowded racks.
- Warm, Dry Location: A warm, well-ventilated room is ideal. Avoid humid bathrooms or kitchens with constant steam. Attics, spare rooms, or even a porch (if protected from dew/rain) can work.
- Darkness (or Indirect Light): While some light won’t hurt, direct sunlight can bleach herbs and reduce their potency and color. A darker spot helps retain flavor and vibrant greens.
- Cleanliness: Always start with clean herbs and ensure your rack materials are spotless. Dust and debris can contaminate your harvest.
- Patience: Drying takes time, usually 1-3 weeks depending on the herb and humidity. Test for dryness by seeing if leaves crumble easily.
Conclusion
Crafting your own herb drying rack is a rewarding homestead project that enhances your kitchen’s functionality and aesthetic. From simple hanging solutions to elaborate multi-tier screen racks, the possibilities are limited only by your imagination and available materials. Embrace the spirit of DIY, experiment with different designs, and soon you’ll be enjoying your homegrown herbs all year long, infused with the satisfaction of a job well done.