


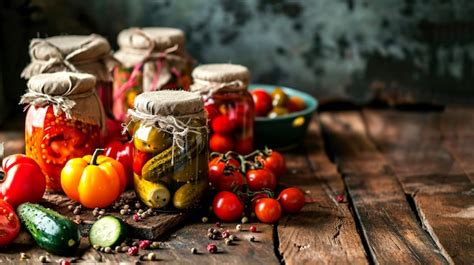
Best DIY method for safely canning garden vegetables without special equipment?

Preserve Your Harvest: DIY Water Bath Canning Explained
There’s immense satisfaction in harvesting fresh vegetables from your garden. Even greater is the joy of preserving that bounty to enjoy long after the growing season ends. Many assume canning requires expensive, specialized equipment, but for high-acid foods, a simple water bath canning method using items you likely already own is both safe and effective. This guide will walk you through the best DIY approach to safely can your garden vegetables without needing a pressure canner or dedicated water bath canner.
Understanding Water Bath Canning
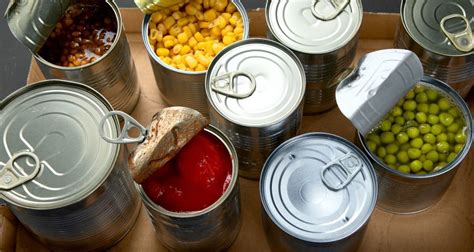
Water bath canning is a method of preserving high-acid foods by processing filled jars in boiling water. The high acidity of the food, combined with the heat, destroys spoilage organisms and creates a vacuum seal, making the food shelf-stable. This method is perfect for fruits, jams, jellies, pickles, and most tomato products (often with added acidity). It is crucial to understand that water bath canning is NOT suitable for low-acid vegetables like green beans, corn, potatoes, or meat, as it doesn’t reach temperatures high enough to kill botulism spores. For low-acid foods, a pressure canner is required.
Essential “Non-Special” Equipment for DIY Canning
Forget the fancy gadgets! Here’s what you’ll need, much of which is probably already in your kitchen:
- Large Pot with Lid: A stockpot deep enough to cover your canning jars by at least an inch or two of water, plus space for a rolling boil.
- Canning Jars, Lids, and Bands: New lids are essential for a proper seal. Bands can be reused.
- Jar Lifter (or Tongs with Rubber Bands): A dedicated jar lifter is convenient, but sturdy tongs with thick rubber bands wrapped around the gripping ends can work in a pinch to safely remove hot jars.
- Canning Funnel (or Large Kitchen Funnel): To prevent spills and keep jar rims clean.
- Non-Metallic Utensil (or Chopstick/Spatula): For removing air bubbles from jars.
- Clean Towels: For wiping jar rims and cooling jars.
- Timer: Accuracy is key for processing times.
- Ruler: To measure headspace.

Step-by-Step DIY Water Bath Canning
1. Prepare Your Jars and Lids
Wash jars, lids, and bands in hot soapy water and rinse thoroughly. Keep jars hot (e.g., in hot water or a warm oven) until filling to prevent thermal shock. Follow lid manufacturer instructions for preparing lids; often, they are simmered (not boiled) in hot water.
2. Prepare Your Produce
Wash and prepare your vegetables according to a tested canning recipe. This might involve chopping, blanching, or making a pickling brine. Remember to only use fresh, high-quality produce.
3. Fill the Jars
Carefully fill hot jars with your prepared food and any liquid (brine, syrup, etc.), leaving the specified headspace (usually 1/2 inch to 1 inch, depending on the recipe). Headspace is crucial for creating a proper vacuum seal.
4. Remove Air Bubbles and Clean Rims
Slide your non-metallic utensil around the inside of the jar to release trapped air bubbles. Add more liquid if necessary to maintain proper headspace. Wipe the jar rims thoroughly with a clean, damp cloth to remove any food particles that could prevent a seal.
5. Apply Lids and Bands
Center a hot lid on each jar. Apply a band and tighten it fingertip-tight – just enough to feel resistance, do not overtighten. Overtightening can prevent air from escaping during processing, leading to buckling lids or seal failure.
6. Process in Water Bath
Place a rack or an extra canning band at the bottom of your large pot (to prevent jars from touching the bottom and cracking). Carefully place the filled jars onto the rack. Add hot water to the pot until the jars are covered by at least 1-2 inches. Bring the water to a rolling boil. Once boiling, start your timer for the processing time specified in your recipe. Adjust for altitude if necessary.

7. Cool and Check Seals
Once processing is complete, turn off the heat and let the jars sit in the hot water for 5 minutes. Then, using your jar lifter or modified tongs, carefully remove the hot jars and place them on a clean towel on your countertop, away from drafts. Do not disturb them for 12-24 hours. As they cool, you’ll likely hear “pings” as the lids seal. After cooling, check seals by pressing the center of each lid; it should be concave and not flex when pressed. If a lid does not seal, refrigerate the contents and consume within a few days, or reprocess within 24 hours with a new lid (after reheating the food and jar).
Safety First: Crucial Canning Tips
- Always Use Tested Recipes: Never guess at processing times or ingredients. Rely on reputable sources like the National Center for Home Food Preservation (NCHFP) or USDA guidelines.
- Acidity Matters: Water bath canning is ONLY for high-acid foods (pH 4.6 or lower). This includes most fruits, jams, jellies, pickles, and tomatoes (with added acid like lemon juice or citric acid if needed).
- Proper Headspace: Incorrect headspace can lead to seal failures or spoilage.
- Cleanliness is Key: Sanitize everything that touches your food and jars.
- Check Seals Thoroughly: A proper seal is essential for food safety and long-term storage.
- Store Properly: Store sealed jars in a cool, dark, dry place without the bands on (this helps detect seal failures).
Enjoy Your Home-Canned Goodness!
Canning your garden vegetables doesn’t have to be complicated or require a significant investment in specialized gear. With a few common kitchen items and a commitment to following safe, tested methods, you can successfully preserve the delicious flavors of your harvest for months to come. Embrace the satisfaction of DIY food preservation and enjoy your garden’s bounty all year round!