


What simple lighting tricks do you use to make homemade food and country scenes shine?

Harnessing the Magic of Light for Everyday Photography
Light is the most crucial ingredient in any stunning photograph, whether you’re capturing the intricate details of a home-cooked meal or the expansive beauty of a rural landscape. You don’t need fancy, expensive equipment to achieve professional-looking results. Often, the best tools are already at your disposal: natural light and a few household items. By understanding how to manipulate light, you can transform ordinary scenes into extraordinary visual stories.
The Unbeatable Power of Natural Light
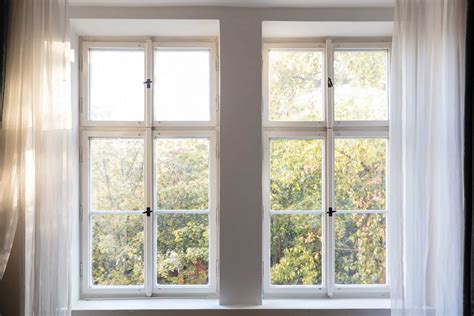
For both food and country scenes, natural light is often your best friend. For food photography, positioning your setup near a window is key. Direct sunlight can be too harsh, creating overexposed highlights and deep shadows. Instead, look for soft, diffused window light, perhaps from a north-facing window, or use sheer curtains to soften the light from a brighter window. This gentle illumination will beautifully highlight textures and colors without creating harsh distractions.
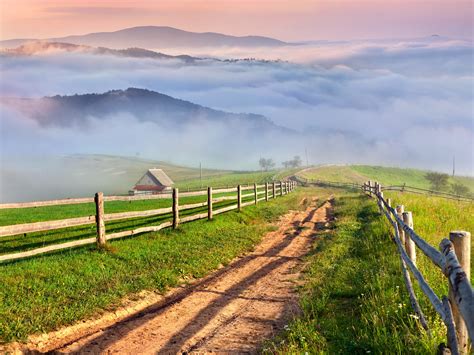
When photographing country scenes, the ‘golden hour’ – the hour after sunrise and before sunset – provides the most magical light. Its warm, soft glow adds depth, long shadows, and a beautiful color palette to landscapes. The ‘blue hour’ – the period of twilight each morning and evening when the sun is significantly below the horizon – offers a cool, ethereal mood, perfect for capturing silhouettes or urban landscapes at dawn or dusk.

Simple Tools for Diffusing and Reflecting Light
Beyond natural light, a few simple, often free, tools can dramatically improve your lighting:
- Diffusers: A sheer white curtain, a thin white sheet, or even parchment paper can be placed between your light source (like a strong window) and your subject to soften harsh light. This creates a more even, flattering illumination, especially for food.
- Reflectors: White foam core boards, large pieces of white cardstock, or even a sheet of aluminum foil (crinkled then smoothed for a softer reflection) can bounce light back onto your subject. This is invaluable for filling in shadows, making your food look brighter and more appealing, or adding a sparkle to a landscape feature.
- Shadow Creators: Sometimes, you want to block light to create mood or depth. A black foam core board can be used on the opposite side of your light source to deepen shadows and add contrast, particularly effective for dramatic food shots.
Food Photography: Making Dishes Look Delicious
For homemade food, good lighting is about making the dish appear appetizing. Aim for side lighting or backlighting. Side lighting from a window highlights textures and gives the food depth. Backlighting, where the light source is behind the food, creates a beautiful rim light that makes steam more visible and adds a glowing edge. Just be sure to use a reflector in front of the food to bounce some light back and prevent the front from being underexposed.
Avoid direct overhead light or the camera’s built-in flash, as these tend to flatten the food and create harsh, unflattering shadows. Instead, experiment with different angles relative to your light source. Think about how the light falls on the hero elements of your dish – a glossy sauce, crisp crust, or fresh herbs – and adjust your setup to enhance them.
Country Scenes: Capturing the Landscape’s Soul
When shooting country scenes, think about how light interacts with the elements. Early morning or late afternoon light creates long, dramatic shadows that can add interest and depth to fields, trees, and rolling hills. Use these shadows as leading lines to guide the viewer’s eye through the frame. Backlighting a landscape during golden hour can create stunning silhouettes of trees or buildings against a vibrant sky, evoking a strong sense of mood.
Overcast days, while lacking dramatic light, offer a soft, even light that’s excellent for capturing details and vibrant colors without harsh shadows. This diffuse light is perfect for close-ups of flowers, textured barn wood, or forest scenes where consistent illumination is desired. Look for opportunities to use the environment itself – a gap in the clouds for a dramatic sunbeam, or the reflection of light on water.
Final Simple Tips to Illuminate Your Shots
- Observe the Light: Before you even pick up your camera, take a moment to observe how light is falling on your subject. Where are the highlights? Where are the shadows?
- Experiment: Don’t be afraid to move your subject, yourself, or your light source (if artificial) to see how it changes the photo.
- Keep it Clean: Ensure your scene is uncluttered. Great light can’t fix a messy composition.
- Practice: The more you experiment with different lighting scenarios, the more intuitive it will become.
Mastering simple lighting tricks is a powerful step towards elevating your homemade food and country scene photography. With a keen eye, a bit of creativity, and a few inexpensive aids, you can make your subjects truly shine.