


How do I make my homemade sourdough bread consistently light & airy?

Baking sourdough bread at home is a rewarding journey, but consistently achieving that coveted light and airy crumb can feel like chasing a moving target. While natural variations are part of the charm, understanding and mastering a few key principles will significantly improve your results, transforming dense loaves into beautifully open-textured masterpieces.
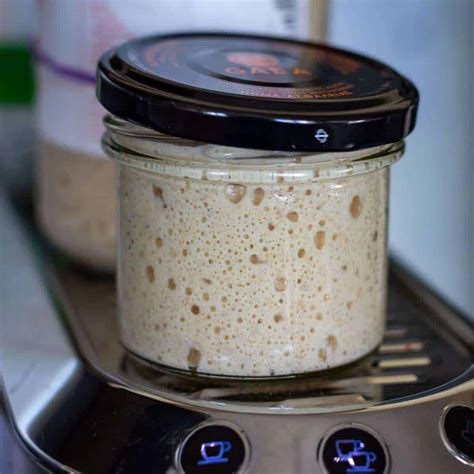
The Foundation: A Vibrant Sourdough Starter
Your starter is the heart of your sourdough. A strong, active starter is paramount for good oven spring and a light crumb. Ensure your starter is fed regularly and robust. It should reliably double or even triple in size within 4-6 hours after feeding, be full of bubbles, and pass the float test (a small spoonful floats in water) before you use it.
Using your starter at its peak activity ensures maximum leavening power. An underfed or over-fermented starter will struggle to lift the dough, leading to a denser loaf. Consistency in feeding schedule and ratios is key to maintaining its vigor.
Hydration is Key
Higher hydration levels often correlate with a more open and airy crumb. Water allows for greater extensibility in the dough, which translates to larger air pockets. However, managing high-hydration dough can be challenging for beginners. Start with a hydration level you’re comfortable with (e.g., 70-75%) and gradually increase as your confidence grows.
The type of flour also plays a role. Strong bread flours with higher protein content can absorb more water, allowing for higher hydration without making the dough unmanageable. Whole wheat or rye flours will absorb more water than white flour due to their bran content, so adjust accordingly.
Master the Dough Development: Autolyse and Gentle Handling
Autolyse/Fermentolyse: Begin by mixing just your flour and water (autolyse) or flour, water, and starter (fermentolyse) and letting it rest for 30 minutes to an hour. This step allows the flour to fully hydrate and enzymes to begin breaking down starches, which kickstarts gluten development without active kneading.
Gentle Stretch and Folds: Instead of aggressive kneading, sourdough benefits from gentle stretch and folds. Over several intervals (e.g., 4-6 sets every 30-45 minutes during the first few hours of bulk fermentation), this technique builds gluten strength and introduces air into the dough without tearing delicate gluten strands. Handle the dough softly, preserving the precious air pockets that contribute to an open crumb.

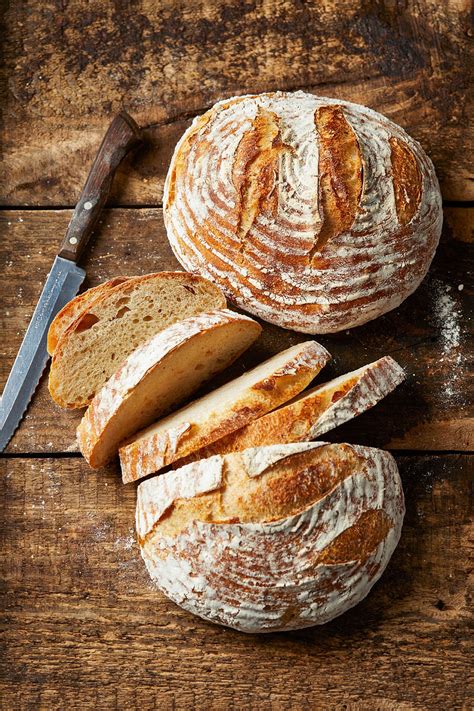
Precision in Fermentation: Bulk Proofing & Cold Proof
Bulk Fermentation (First Rise): This is arguably the most critical stage. Under-proofed dough will be dense and tight, while over-proofed dough will collapse and be difficult to shape, leading to a flat loaf with an inconsistent crumb. Learn to read your dough: look for visible signs of fermentation like increased volume (30-50% rise for most recipes), a domed surface, and jiggle. Temperature significantly affects timing, so pay more attention to the dough’s activity than strict clock times.
Cold Proofing (Second Rise): After shaping, a long cold proof (8-18 hours in the refrigerator) not only deepens flavor but also strengthens the dough’s structure. The cold slows down yeast activity, making the dough easier to score and handle, and helps maintain its shape during baking, contributing to a better rise and crumb structure.
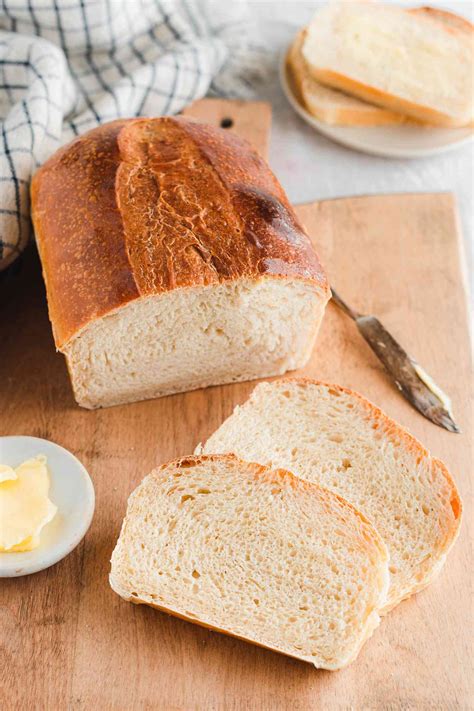
Shaping and Baking for Success
Gentle Shaping: When shaping, focus on building good surface tension without degassing the dough too much. A tight skin around the exterior helps the loaf hold its shape and allows for a strong oven spring. Be efficient but gentle.
Baking Environment: Baking in a preheated Dutch oven or on a baking stone with steam is crucial. The initial burst of steam prevents the crust from setting too quickly, allowing the dough to expand maximally (oven spring). Bake covered at a high temperature (e.g., 450-500°F / 230-260°C) for the first 20-25 minutes, then uncover and reduce the temperature slightly to allow the crust to brown.
Proper Scoring: A well-executed score guides the bread’s expansion. Experiment with different scoring patterns, but ensure it’s deep enough to allow the dough to open up, promoting a lighter interior.
Conclusion
Achieving consistently light and airy sourdough bread is a journey of continuous learning and refinement. Pay close attention to your starter’s health, experiment with hydration, practice gentle dough handling, master fermentation cues, and optimize your baking environment. Each loaf offers an opportunity to learn and improve. With patience and practice, you’ll soon be enjoying beautifully open-crumbed sourdough that’s a true testament to your baking skill.