


Easiest DIY build for a backyard composting bin from scrap wood?
Building your own composting bin is one of the most rewarding and environmentally friendly DIY projects you can tackle. Not only does it divert organic waste from landfills, but it also creates nutrient-rich soil for your garden. The best part? You don’t need expensive materials or advanced carpentry skills. With a few pieces of scrap wood and basic tools, you can have a functional compost bin in an afternoon.
Why Build Your Own Composter?
Composting at home offers a multitude of benefits. It reduces household waste, enriches your garden soil, and saves you money on store-bought fertilizers. A DIY bin from scrap wood is particularly advantageous because it’s incredibly cost-effective, utilizes materials that might otherwise be discarded, and allows you to customize the size and design to fit your backyard space. This simple slatted design ensures proper aeration, which is crucial for efficient composting.
Gathering Your Materials: What You’ll Need
The beauty of this project lies in its flexibility. Look around your garage, shed, or even ask neighbors if they have any of the following:
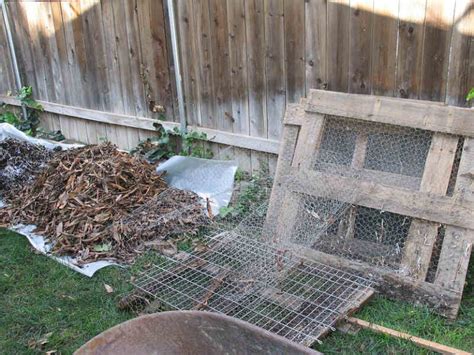
- Scrap Wood: Pallet wood, old fence pickets, decking scraps, treated lumber offcuts, or even sturdy plywood pieces work well. Aim for pieces that are relatively uniform in width for the slats, and four sturdier posts for the corners.
- Fasteners: Weather-resistant screws (galvanized or stainless steel) or sturdy nails. Approximately 1.5 to 2 inches long should suffice.
- Optional: Hinges if you want a lid or a removable front panel.

Essential Tools for the Job
You likely have most of these in your toolbox:
- Measuring tape and pencil
- Hand saw, circular saw, or jigsaw (for cutting wood to size)
- Drill/driver (for screws) or hammer (for nails)
- Safety glasses and gloves
- Square (for ensuring straight cuts and corners)
Step-by-Step Guide: The Simple Slatted Bin
This design focuses on a four-sided, slatted structure, ideal for good airflow and easy construction.
Step 1: Planning and Cutting Your Posts
Decide on the desired size of your compost bin. A common size is roughly 3×3 feet square and 3 feet high for good volume without being too cumbersome. Cut four sturdy pieces of scrap wood to your desired height (e.g., 3 feet) to serve as your corner posts.

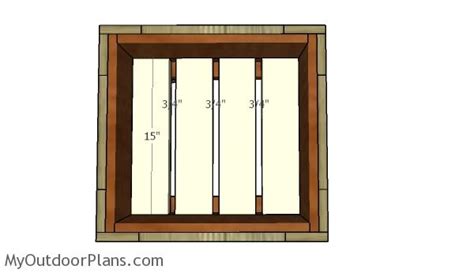
Step 2: Assembling the Sides
Next, cut your lighter scrap wood (slats) to the desired length for each side (e.g., 3 feet). You’ll need enough slats to create four sides. Lay two of your posts parallel on a flat surface. Begin attaching the slats horizontally between the posts, leaving a gap of 1/2 to 1 inch between each slat for airflow. Use two screws or nails at each end of the slat, securing it firmly to the post. Repeat this process until you have two complete side panels. You can choose to leave one side partially open or with removable slats for easier access to the compost.
Step 3: Joining the Sides
Stand up one of your assembled side panels. Take two of your remaining posts and attach them perpendicular to the first panel’s posts, forming an ‘L’ shape. Then, attach another set of slats between these two new posts to create a third side. Continue this until all four sides are assembled, forming a sturdy box. Ensure all corners are square for stability.

Step 4: Adding the Front (Optional or Simpler Version)
For the fourth side, you have a few options: you can either build it just like the other three, or create a simpler, removable front. For a removable front, simply cut slats to fit and stack them between the front two posts without fastening, allowing them to be lifted out when you need to turn or access the compost. If you want a more permanent front, simply attach the slats as you did for the other sides.
Tips for an Efficient Composting Bin
- Placement: Choose a well-drained spot in your yard that’s easily accessible but not in direct, scorching sunlight all day.
- Balance Greens and Browns: Composting works best with a mix of ‘greens’ (nitrogen-rich, like food scraps and grass clippings) and ‘browns’ (carbon-rich, like dry leaves, wood chips, and shredded paper).
- Moisture: Your compost pile should feel like a wrung-out sponge. Add water if it’s too dry, or more browns if it’s too wet.
- Turn Regularly: Turning the compost with a pitchfork every week or two introduces air, which speeds up decomposition.

Conclusion
Building a backyard composting bin from scrap wood is an accessible, eco-friendly, and highly functional project. It requires minimal investment in time and money, yet yields tremendous benefits for your garden and the environment. So gather your scrap wood, unleash your inner DIY enthusiast, and start turning your kitchen and garden waste into valuable black gold!