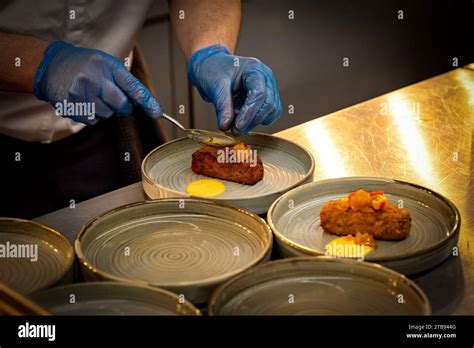


Share your best “behind scenes” food photography lighting hack for rustic homemade recipes.

Capturing the hearty, unpretentious beauty of rustic homemade recipes requires more than just a delicious dish; it demands lighting that tells a story of warmth, comfort, and authenticity. Forget the sterile, perfectly lit studio setups. For that beloved rustic charm, we often chase natural, soft, and sometimes even dramatic light. But what happens when the perfect window light isn’t available, or it’s too harsh? That’s where a simple, “behind-the-scenes” hack comes into play, elevating your food photography with minimal effort and cost.
Embracing and Enhancing Natural Light
The cornerstone of rustic food photography is often natural light. It offers a softness and realism that artificial lights struggle to replicate, creating shadows and highlights that emphasize texture—crucial for depicting crusty bread, bubbling stews, or flaky pastry. However, natural light can be unpredictable. Too direct, and it creates harsh, unappealing shadows. Too dim, and your photos lack vibrancy.
The goal isn’t just to find natural light, but to sculpt it. We want to diffuse it, direct it, and sometimes even block it to achieve that coveted painterly quality. This doesn’t require expensive studio equipment; quite the opposite. Your best tools are likely already in your home.

The “Window Whisperer” Hack: DIY Diffusers & Reflectors
My go-to lighting hack for rustic recipes is what I call the “Window Whisperer” method, focusing on modifying existing window light. It involves three simple, everyday items:
1. The Sheer Curtain Diffuser
If your window light is too bright or direct, creating harsh hotspots and dark shadows, a simple white sheer curtain is your best friend. Hang it over your window. It acts as a large, softbox, diffusing the sunlight and spreading it evenly. This softens highlights and lifts shadows, giving your rustic dishes a gentle, inviting glow without losing their textural appeal. No sheer curtains? A thin white bed sheet or even parchment paper taped over the window can work in a pinch.
2. The Foam Board Duo: White for Fill, Black for Contrast
Once you’ve diffused your main light source, you need to control the shadows and highlights. This is where foam boards shine.
- White Foam Board (Reflector): Position a white foam board opposite your main light source, slightly angled towards your food. This bounces light back into the shadows, subtly filling them in and revealing more detail without flattening the image. It’s perfect for adding a bit of lift to the underside of a pie crust or the crevices of a rustic loaf.
- Black Foam Board (Negative Fill/Blocker): Sometimes, you want deeper, more dramatic shadows to enhance the rustic mood. A black foam board can achieve this. Position it to block ambient light from hitting certain areas, or use it as “negative fill” opposite your main light. Instead of reflecting light, it absorbs it, intensifying shadows and adding a moody depth, ideal for dishes like dark stews or hearty roasts.

3. The Crinkled Tinfoil “Grunge” Reflector
This is a more niche, but incredibly effective hack for adding specific texture and glint. Take a piece of tinfoil, crinkle it up significantly, then flatten it out partially, leaving many creases and folds. Glue or tape this onto a piece of cardboard or foam board. When used as a reflector, the uneven surface of the tinfoil creates multiple tiny reflections, adding sparkle, definition, and a slightly rugged, “grunge” texture to elements like shiny sauces, glistening meat, or the uneven crust of a homemade bread. It’s particularly effective for emphasizing the “imperfect” beauty of rustic dishes.

Shaping the Light for Depth and Mood
Beyond diffusion and reflection, consider the angle of your main light. Side lighting (light coming from the side of your dish) or backlighting (light coming from behind) are often superior for rustic food. They enhance texture, create appealing shadows, and add depth, making the food look more three-dimensional and inviting.
Experiment with how close or far your diffusers and reflectors are to your subject. Small adjustments can drastically change the mood. For instance, moving your white reflector further away will create softer fill, while bringing it closer will brighten shadows more intensely. The black foam board, when used for negative fill, can be moved closer to create more dramatic, darker shadows.
Simple Tools, Big Impact
The beauty of these “behind-the-scenes” hacks is their simplicity and accessibility. You don’t need to invest in expensive strobes or LED panels. With a sheer curtain, some foam board, and a bit of tinfoil, you can transform ordinary window light into a versatile studio setup. These tools allow you to control the quality, direction, and intensity of light, helping you tell the authentic, mouth-watering story of your rustic homemade recipes.
So next time you’re about to photograph that glorious homemade pie or a bubbling pot of stew, grab these simple props. Experiment, play with light, and watch your rustic dishes come to life with professional-looking charm and depth, all from the comfort of your kitchen.