
Best methods for homemade compost to enrich garden soil?

Unlock Your Garden’s Potential with Homemade Compost
Composting is a time-honored practice that transforms organic waste into a dark, crumbly, nutrient-rich soil amendment. Often called ‘black gold’ by gardeners, homemade compost improves soil structure, enhances water retention, provides essential nutrients, and promotes beneficial microbial activity, leading to healthier, more vibrant plants. Far from being a complex chore, composting is an accessible and rewarding way to enrich your garden soil naturally and sustainably.
The Unbeatable Benefits of Compost for Your Garden
Before diving into the ‘how-to,’ it’s worth understanding the profound impact compost has on garden soil. Compost acts as a slow-release fertilizer, preventing nutrient runoff and consistently feeding your plants. It improves aeration in heavy clay soils and boosts water retention in sandy soils. Furthermore, compost introduces a diverse array of microorganisms that help plants absorb nutrients and even suppress diseases. It’s truly a foundational element for any thriving garden.
Choosing Your Composting Method
There are several effective ways to make compost at home, each with its own advantages. The best method for you will depend on the space available, the amount of organic waste you produce, and your desired composting speed.
Cold Composting (Passive Composting)
This is the simplest method, requiring minimal effort. You simply pile up organic materials and let nature take its course. It’s a slow process, often taking six months to two years to produce finished compost, but it’s perfect for gardeners with less urgency or a steady, smaller stream of waste. Simply add greens (nitrogen-rich materials like grass clippings and food scraps) and browns (carbon-rich materials like dry leaves and wood chips) to a designated area, and occasional turning can speed up decomposition slightly.
Hot Composting (Active Composting)
For those who want usable compost faster, hot composting is the answer. This method involves creating a larger pile with a specific ratio of ‘greens’ to ‘browns’ (roughly 1 part green to 2-3 parts brown by volume), keeping it consistently moist, and turning it regularly to aerate. The goal is to generate internal heat (130-160°F or 55-70°C) which rapidly breaks down materials and kills weed seeds and pathogens. With consistent effort, finished compost can be ready in as little as 1-3 months.
![[Beautyleg] No.1394 Kang Kaile Kaylar Photo Album - V2PH](/images/aHR0cHM6Ly90czQuZXhwbGljaXQuYmluZy5uZXQvdGg/aWQ9T0lQLl9HdTRjZkwwT0FsWTNOVWpfZ2h4cVFIYUxIJnBpZD0xNS4x.webp)
Vermicomposting (Worm Composting)
Ideal for small spaces, apartments, or anyone looking to compost kitchen scraps efficiently, vermicomposting uses specialized worms (usually red wigglers) to break down organic matter into nutrient-rich worm castings. A simple worm bin, either store-bought or DIY, is filled with bedding material, and the worms are added along with food scraps. This method produces excellent fertilizer quickly and can be done indoors or outdoors, provided temperatures are moderate.
What to Compost (and What Not To!)
Knowing what goes into your compost pile is crucial for success and preventing pests.
Compost-Friendly Materials (Greens & Browns):
- Greens (Nitrogen-rich): Fruit and vegetable scraps, coffee grounds, tea bags, grass clippings, fresh plant trimmets, eggshells (crushed).
- Browns (Carbon-rich): Dry leaves, shredded newspaper, cardboard, wood chips, straw, sawdust, pine needles.
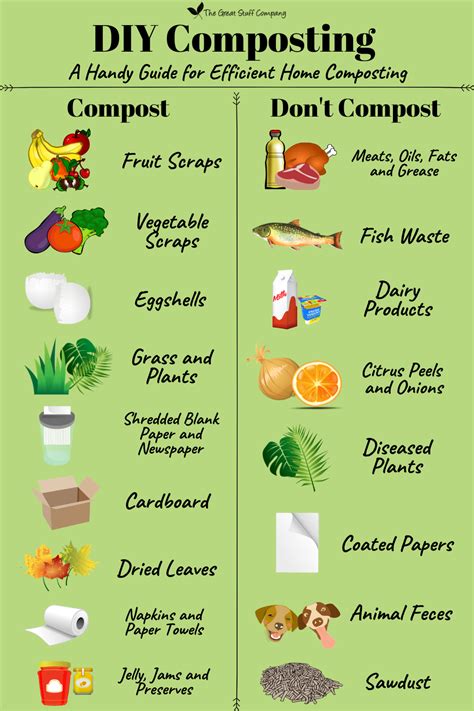
Materials to Avoid:
- Meat, bones, dairy products, oils, and fats (attract pests and create odors).
- Diseased plants (can spread pathogens).
- Weeds with seeds (can introduce new weeds to your garden).
- Pet waste (can contain harmful pathogens).
- Treated wood (contains chemicals).
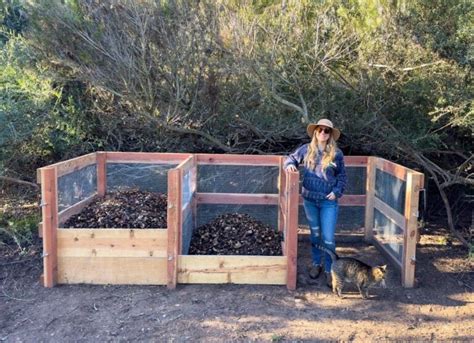
Setting Up Your Compost Pile or Bin
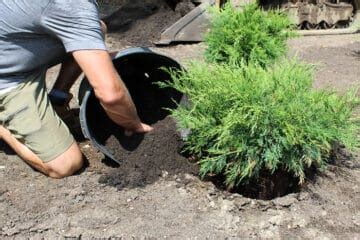
Whether you opt for a simple pile, a bin, or a tumbler, a few setup considerations are universal. Choose a spot that is well-drained, convenient to your kitchen and garden, and ideally partially shaded to prevent drying out. Start your pile with a layer of coarse brown material for aeration, then alternate layers of greens and browns, chopping larger pieces to speed up decomposition. Keep the pile consistently moist, like a wrung-out sponge, but not waterlogged.
Maintaining Your Compost for Success
Once your compost system is established, maintenance is key. For hot composting, regular turning (every few days to weekly) is essential to aerate the pile and redistribute moisture and microbes. Ensure the pile remains moist; if it’s too dry, decomposition slows down, and if it’s too wet, it can become anaerobic and smelly. Patience is also a virtue; a healthy compost pile will eventually yield a dark, earthy-smelling product that is ready to be incorporated into your garden beds.
Reap the Rewards of Your Homemade ‘Black Gold’
Homemade compost is a powerhouse for garden health. By choosing a method that suits your lifestyle and consistently feeding your pile the right materials, you’ll soon be harvesting rich, dark compost that will transform your garden soil. Not only will your plants thrive, but you’ll also be reducing landfill waste and embracing a more sustainable gardening practice. Happy composting!