


How to make perfect flaky pie crust from scratch using real farm ingredients?

There’s nothing quite like the aroma of a homemade pie baking in the oven, and the secret to its success often lies in the crust. A truly perfect pie crust is flaky, tender, and melts in your mouth – a dream that becomes a reality when you start from scratch with high-quality, real farm ingredients. Forget store-bought shortcuts; making your own crust is a rewarding process that elevates any pie from good to absolutely sublime.
The Magic of Real Farm Ingredients
The foundation of a perfect flaky pie crust isn’t just technique; it’s the quality of your ingredients. Real farm ingredients bring unparalleled freshness and flavor. Think rich, creamy butter from grass-fed cows, freshly milled flour with excellent protein structure, and crisp, pure water. These elements are alive with natural goodness, translating directly into a more flavorful and textural crust that simply can’t be replicated with highly processed alternatives.
Using butter from a local dairy means you’re getting fat with superior taste and a higher fat content, which contributes significantly to flakiness. Similarly, choosing a good quality, unbleached all-purpose flour, perhaps even locally milled, can make a surprising difference in how your dough handles and bakes.

Essential Ingredients for Your Flaky Crust
Simplicity is key, but quality is paramount. Here’s what you’ll need:
- 2 ½ cups All-Purpose Flour: Opt for unbleached. If you can find locally milled flour, even better!
- 1 teaspoon Fine Sea Salt: Balances the richness and enhances flavor.
- 1 cup (2 sticks) Unsalted Butter: Must be very cold, preferably straight from the fridge, and cut into ½-inch cubes. European-style butter with a higher fat content is excellent here.
- ½ cup to ¾ cup Ice Water: Crucial for keeping the butter cold and preventing gluten development. Have extra ice cubes handy for your water.
Tools for Success
While a food processor makes quick work of crust making, a pastry blender or even your own hands can achieve fantastic results. You’ll also need:
- Large mixing bowl
- Measuring cups and spoons
- Rolling pin
- Plastic wrap
- A clean, lightly floured work surface
Step-by-Step Guide to Flaky Perfection
Step 1: Chill Your Ingredients
This is non-negotiable! Place your cut butter cubes back in the freezer for at least 15-20 minutes. Ensure your water is icy cold. Cold ingredients prevent the butter from melting prematurely, which is essential for creating those coveted flaky layers.
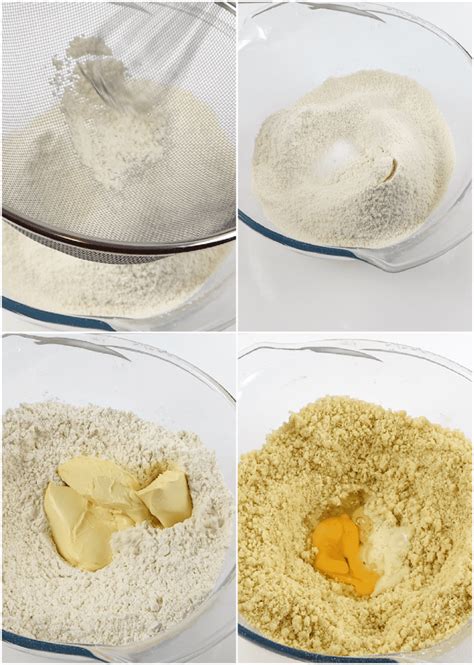
Step 2: Combine Dry Ingredients
In your large mixing bowl, whisk together the flour and salt. If using a food processor, pulse them together a few times.
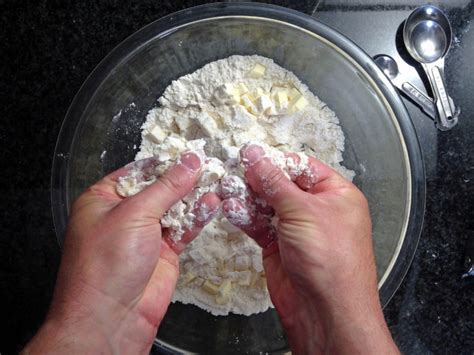
Step 3: Cut in the Fat
Add the super-cold butter cubes to the flour mixture. Using a pastry blender, your fingertips (working quickly!), or pulsing in a food processor, cut the butter into the flour until the mixture resembles coarse meal with some pea-sized pieces of butter remaining. These pieces are what create the flakiness!
Step 4: Add Ice Water Gradually
Sprinkle 1/2 cup of ice water over the mixture, a tablespoon at a time, gently tossing with a fork or pulsing briefly in the food processor until the dough just begins to come together. Be careful not to add too much water; the dough should be moist enough to hold together when squeezed, but not sticky. You might not need all the water, or you might need a tiny bit more.
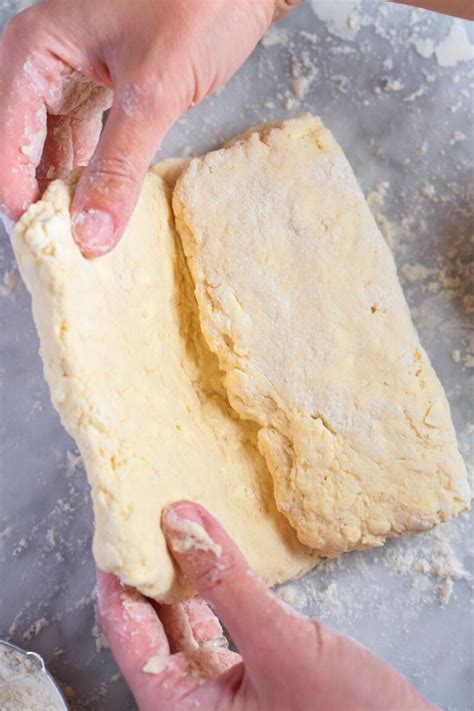
Step 5: Form and Chill the Dough
Turn the shaggy dough out onto a clean surface. Divide it into two equal portions (for a double-crust pie) or one larger portion (for a single-crust pie). Gently form each portion into a disk, wrap tightly in plastic wrap, and refrigerate for at least 30 minutes, or preferably 2 hours. This chilling period allows the gluten to relax and the butter to firm up again, making the dough easier to roll.
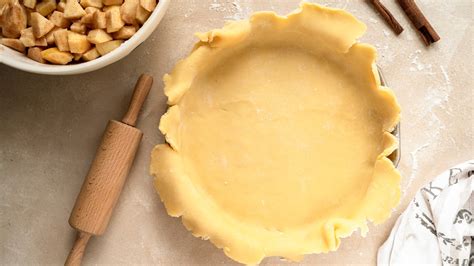
Step 6: Roll It Out
On a lightly floured surface, roll out one disk of dough from the center outwards, rotating it frequently to prevent sticking and cracking, until it’s about 1/8 inch thick and a uniform circle. Carefully transfer the rolled dough to your pie plate, trim the edges, and crimp as desired. Repeat with the second disk if making a double-crust pie.
Tips for Pie Crust Perfection
- Keep Everything Cold: This is the golden rule. Cold butter equals steam in the oven, which equals flakiness.
- Don’t Overwork the Dough: Too much handling develops gluten, leading to a tough crust. Work quickly and gently.
- Use a Light Touch: Your hands are warm; minimize direct contact when incorporating butter or forming the dough.
- Proper Hydration: Use just enough water. Too little will result in a dry, crumbly dough; too much makes it tough.
- Resting Time is Key: Don’t skip the chilling steps. They are vital for flavor, texture, and ease of handling.
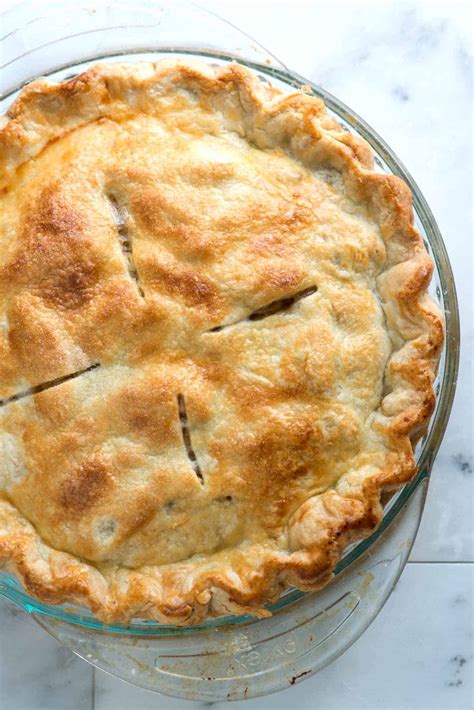
Crafting a perfect flaky pie crust from scratch, especially with real farm ingredients, is a rewarding culinary journey. It imbues your pies with a depth of flavor and an irresistible texture that store-bought crusts can only dream of. So roll up your sleeves, embrace the process, and get ready to enjoy the most delicious homemade pie you’ve ever tasted!