


Practical DIY plans for a budget-friendly, predator-proof chicken coop?
Why Build Your Own Predator-Proof Chicken Coop?
For backyard chicken enthusiasts, providing a safe, comfortable, and affordable home for your flock is paramount. Commercial coops can be expensive, and many lack adequate predator protection. Building your own not only saves money but allows you to customize features and, most importantly, incorporate robust defenses against common predators like raccoons, foxes, and hawks. This guide will walk you through practical, budget-friendly DIY plans to create a fortress for your feathered friends.
Essential Design Principles for Security and Affordability
A successful chicken coop balances cost-effectiveness with impenetrable security. Before you even draw up plans, consider these core principles:
- Material Sourcing: Prioritize reclaimed wood (pallets, old fence boards), salvaged roofing, and discounted hardware. New materials can be costly.
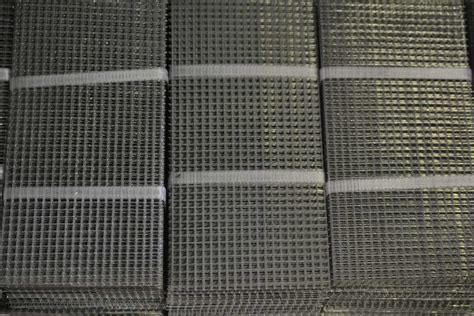
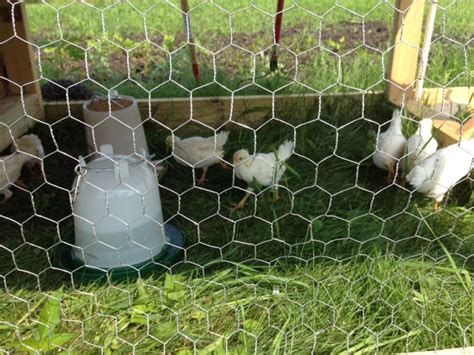
- Hardware Cloth, Not Chicken Wire: This is non-negotiable for predator proofing. Chicken wire keeps chickens in, but doesn’t keep predators out. Hardware cloth (1/2-inch or 1/4-inch galvanized steel mesh) is essential for windows, vents, and any openings.
- Secure Latches: Every door and access point needs sturdy, spring-loaded latches or barrel bolts that cannot be easily manipulated by clever paws. Double-latching is even better.
- Burying Skirt/Apron: Predators often dig. Extend hardware cloth horizontally outward from the coop base, buried 6-12 inches deep, to deter burrowing animals.
- Ventilation: Good airflow is crucial for chicken health, preventing respiratory issues. Design vents high up, covered with hardware cloth, that can be adjusted for seasonal changes.
- Ease of Cleaning: A removable droppings board under roosts and accessible nesting boxes make daily chores much easier, promoting hygiene.
Materials: Smart Sourcing for Savings
The biggest budget saver comes from smart material acquisition. Keep an eye out for:
- Pallets: Excellent source of free lumber. Disassemble carefully.
- Reclaimed Lumber: Check construction sites (with permission), salvage yards, or online marketplaces for old fence posts, decking, or structural wood.
- Used Roofing: Corrugated metal, shingles, or even sturdy tarp can be viable options if waterproof and securely fastened.
- Hardware Sales: Buy hardware cloth, screws, hinges, and latches during sales or in bulk.
The Predator-Proofing Checklist
Beyond the basics, think like a predator. Can they climb, chew, dig, or push their way in? Ensure:
- All gaps and cracks are sealed.
- Windows and vents are covered with hardware cloth, not screen.
- The run (if attached) is fully enclosed, including the top, with hardware cloth.
- The coop base is sturdy and sits firmly on the ground, or has a buried hardware cloth skirt.
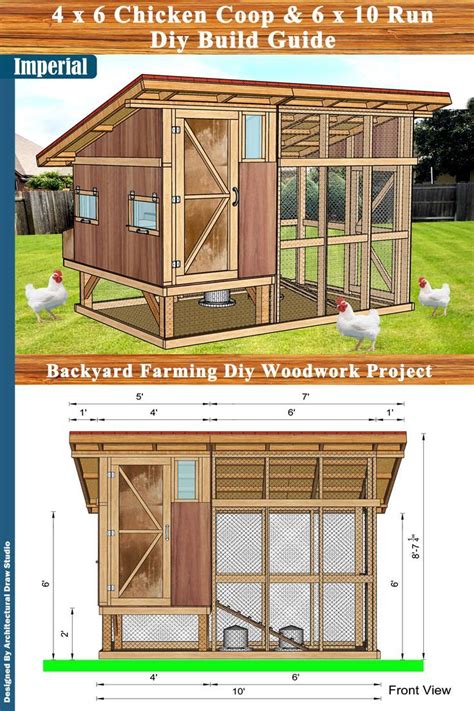
Step-by-Step Construction Guide (General Overview)
While specific plans vary, a typical DIY coop build follows these stages:
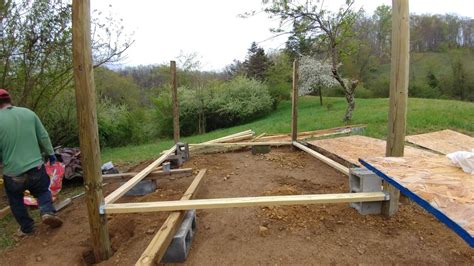
1. Foundation and Framing
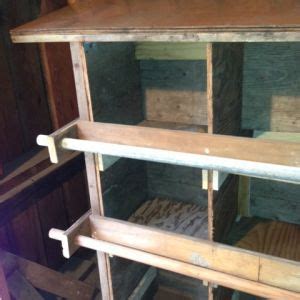
Start with a solid, level base. This could be treated lumber skids for mobility, concrete blocks, or even a gravel bed. Build your primary frame using sturdy 2x4s or salvaged equivalent, ensuring it’s square and plumb. This frame will define the coop’s footprint and height. Remember to account for roosting bars (at least 2-3 feet high) and nesting boxes.
2. Walls, Roof, and Ventilation
Sheath the frame with your chosen wall material (plywood, reclaimed planks). Cut openings for doors, windows, and vents. Install your roofing material, ensuring it’s waterproof and extends slightly beyond the walls to prevent water runoff. Crucially, cut vent openings high up on the coop walls, covering them with hardware cloth. Consider a ridge vent or soffit vents for continuous airflow.
3. Predator-Proofing the Exterior
Now, install the hardware cloth. Staple it securely (every 4-6 inches) over all window and vent openings, and along the interior or exterior of the run frame. For the buried skirt, dig a shallow trench around the coop/run perimeter, lay hardware cloth flat on the trench bottom, and extend it vertically up the coop wall, burying the horizontal portion. Fill the trench with dirt and rocks. Install all latches, ensuring they are heavy-duty and difficult for predators to open.
4. Installing Interior Amenities
Inside, install roosting bars (smooth, rounded edges for comfort) at varying heights. Build or acquire nesting boxes (one for every 3-4 hens is usually sufficient), placing them in a darker, quieter corner of the coop. Add a droppings board beneath the roosts for easy cleaning. Consider a feeder and waterer that can be suspended or placed on a stand to prevent bedding contamination.
Ongoing Maintenance and Security Checks
Even the best-built coop needs regular checks. Periodically inspect your coop for:
- Loose hardware cloth.
- Gnawed wood or new holes.
- Weak latches or hinges.
- Gaps created by shifting ground or weather.
- Signs of attempted break-ins (scratches, digging).
Promptly repair any vulnerabilities. Regular cleaning also allows for close inspection of the coop’s integrity.
Conclusion
Building a budget-friendly, predator-proof chicken coop is a rewarding DIY project that ensures the safety and well-being of your flock for years to come. By focusing on smart material sourcing, prioritizing hardware cloth over chicken wire, and implementing robust security measures, you can create a secure haven for your chickens without breaking the bank. Happy building!