


What are simple, safe methods for drying garden herbs at home?

Preserving the bounty of your garden is a cornerstone of country living, and drying herbs is one of the simplest and most rewarding ways to extend their flavor and fragrance beyond the growing season. Whether you’re a seasoned gardener or just starting out, knowing how to safely and effectively dry your homegrown herbs can elevate your culinary creations and even provide natural remedies.
Air Drying: The Classic, Low-Tech Method
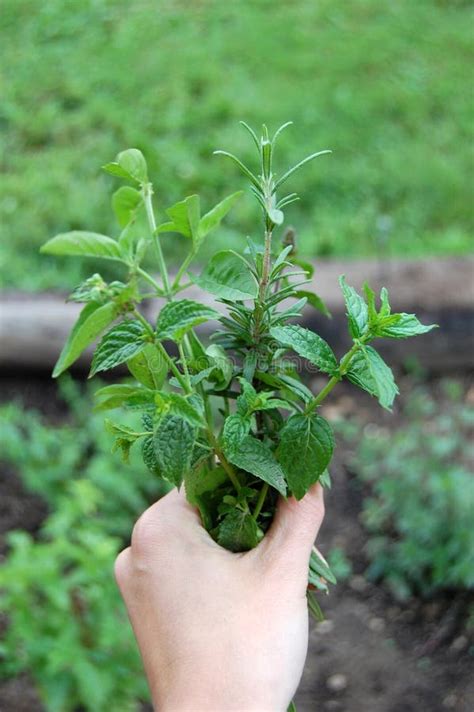
Air drying is perhaps the most traditional and simplest method for preserving herbs, requiring little more than good air circulation and patience. This method works best for sturdy, low-moisture herbs like rosemary, thyme, oregano, marjoram, and bay leaves.
To air dry, first harvest your herbs in the morning after the dew has evaporated but before the midday sun is too strong. Gently rinse them if necessary and pat them completely dry. Remove any damaged leaves or stems. For hanging, gather small bundles (about 4-6 stems) and tie them securely at the base with twine or a rubber band. Hang them upside down in a warm, dry, well-ventilated area away from direct sunlight. A pantry, attic, or even a covered porch can work well.
Alternatively, for herbs with smaller leaves or those that tend to crumble easily, you can spread them in a single layer on screens or racks. Ensure there’s good airflow around and under the herbs. Depending on humidity and temperature, air drying can take anywhere from a few days to a couple of weeks.

Using a Food Dehydrator: Efficient & Controlled
For those who want a more controlled and often faster drying process, a food dehydrator is an excellent investment. Dehydrators circulate warm, dry air, making them highly efficient and reducing the risk of mold growth.
Prepare your herbs by washing and thoroughly drying them. Remove leaves from tougher stems for more even drying. Spread the herbs in a single layer on the dehydrator trays, ensuring no pieces overlap. Set the temperature to a low setting, typically between 95-115°F (35-46°C). Drying time varies greatly by herb type and moisture content, but generally ranges from 1 to 4 hours.
Check your herbs regularly; they are fully dried when they are brittle and easily crumble between your fingers.

Oven Drying: A Quick Option for Sturdier Herbs
If you don’t have a dehydrator, your oven can serve as a suitable alternative for drying herbs, though it requires careful monitoring to prevent ‘cooking’ them. This method works best for sturdier herbs.
Preheat your oven to its lowest possible temperature, ideally 100-150°F (38-65°C). Line a baking sheet with parchment paper and spread a single layer of clean, dry herb leaves or small sprigs. Place the tray in the oven, propping the oven door slightly ajar with a wooden spoon to allow moisture to escape and prevent the oven from getting too hot.
Check the herbs every 15-30 minutes, turning them occasionally, until they are crisp and crumble easily. This process can take several hours, so patience is key.

Microwave Drying: For Small, Fast Batches
For a quick solution to dry small batches of herbs, especially for immediate use, your microwave can be surprisingly effective. This method is best for individual leaves or very small sprigs.
Place a single layer of clean, dry herb leaves between two paper towels on a microwave-safe plate. Microwave on high for 30 seconds. Remove and check for dryness. If not fully dry, rearrange the herbs and microwave in 15-20 second increments, checking after each burst. Herbs will become brittle when fully dried. Be careful not to burn them.

Essential Preparation & Storage Tips
No matter which drying method you choose, proper preparation and storage are crucial for maintaining the quality and potency of your dried herbs.
Harvesting and Cleaning
Always harvest herbs in the morning after the dew has evaporated, selecting fresh, vibrant leaves and stems free from pests or disease. Gently rinse them under cool water if needed, then pat them thoroughly dry with a clean cloth or paper towels. Excess moisture is the enemy of successful drying, as it can lead to mold.
Checking for Dryness
A truly dry herb will be brittle and crumble easily between your fingers. If there’s any flexibility or softness, it needs more drying time. Improperly dried herbs can develop mold during storage.
Storage
Once completely dry, remove the leaves from the stems (if not already done) and store them whole or lightly crushed in airtight containers like glass jars or sealed bags. Keeping them whole helps to preserve their essential oils and flavor longer. Store containers in a cool, dark, dry place away from direct sunlight and heat, which can degrade their quality. Don’t forget to label your containers with the herb name and drying date!
Drying garden herbs at home is a simple, safe, and immensely satisfying way to capture the essence of your garden and infuse your cooking with fresh flavors year-round. By following these straightforward methods, you can enjoy the delicious benefits of your harvest long after the growing season has ended, truly embracing the spirit of country living.