


What are the best beginner DIY raised garden bed plans for real food growing?

Why Raised Garden Beds are Ideal for Beginner Food Growers
Starting a garden can feel daunting, but raised garden beds offer a fantastic entry point for beginners, especially those looking to grow their own real food. Raised beds provide numerous advantages: they allow for better soil control, improved drainage, easier weed management, and reduce the need for bending and kneeling. They also warm up faster in spring, extending your growing season, and can be placed almost anywhere, even on less-than-ideal soil or paved surfaces.
For those new to gardening, a raised bed simplifies many of the common challenges, letting you focus on the joy of watching your food grow.
Key Considerations Before You Build
Before you grab your tools, a little planning goes a long way to ensure your raised bed is a success. Thinking through these points will save you time and effort later on.
Location and Sunlight
Most vegetables and fruits require at least 6-8 hours of direct sunlight per day. Observe your yard throughout the day to find the sunniest spot. Ensure the location is also accessible for watering and harvesting.
Size and Dimensions
For beginners, a common and manageable size is 4×8 feet or 4×4 feet. The width should be no more than 4 feet so you can comfortably reach the center from either side without stepping into the bed. A depth of 10-12 inches is usually sufficient for most vegetables, though root crops like carrots and potatoes appreciate 18-24 inches.
Material Choices
The material you choose impacts cost, durability, and aesthetics. Common beginner-friendly options include:
- Untreated Wood: Cedar, redwood, or Douglas fir are naturally rot-resistant and safe for food. Pine is cheaper but will degrade faster. Avoid treated lumber (ACQ, CCA) as chemicals can leach into the soil.
- Corrugated Metal: Durable, long-lasting, and modern looking. Can get hot in direct sun, so consider shading the sides or using lighter colors.
- Concrete Blocks or Bricks: Very durable and permanent, but can be heavy to work with and might alter soil pH slightly.
- Recycled/Repurposed Materials: Pallets (ensure they are ‘HT’ heat-treated, not ‘MB’ methyl bromide treated), tires (controversial due to potential chemical leaching), or old plastic containers.

Top Beginner-Friendly DIY Raised Garden Bed Plans
Let’s explore some simple designs that even a novice builder can tackle.
The Simple Wood Box
This is by far the most popular and easiest plan. It’s essentially a bottomless box. You’ll need:
- Untreated lumber (e.g., 2x10s or 2x12s for the sides, cut to desired length)
- Corner bracing (e.g., 2x2s or 4x4s for internal corner supports)
- Wood screws (exterior grade)
- A drill, saw, and measuring tape
The construction involves cutting your lumber to length, then screwing the sides together at the corners, reinforcing with internal corner posts if desired for extra stability.
Corrugated Metal Beds
While often bought as kits, you can DIY a corrugated metal bed by purchasing metal roofing panels and using wood or metal posts for support at the corners and along the length. Ensure sharp edges are covered for safety. This option offers a sleek look and excellent durability.
Repurposed Materials
Think creatively! Old tires can be stacked (though check local regulations and your comfort with potential chemical leaching). Cinder blocks can be stacked to form walls, leaving their internal holes for planting small herbs or flowers. Large wooden pallets, if certified heat-treated (look for ‘HT’ stamp), can be disassembled and rebuilt into smaller beds.

Step-by-Step: Building a Basic Wood Raised Bed (4×8 ft)
Here’s a common and straightforward plan for a 4×8 foot raised bed using 2×10 untreated lumber.
- Gather Materials: You’ll need two 8-foot 2×10 boards, two 4-foot 2×10 boards, and four 10-inch 2×2 or 4×4 posts for corner bracing. Also, exterior wood screws (2.5-3 inches long), a drill, a measuring tape, and a saw (if you need to cut boards).
- Prepare the Site: Clear the area where the bed will go. Level the ground as much as possible to prevent uneven settling. Lay down a layer of cardboard directly on the ground to suppress weeds and break down over time.
- Assemble the Sides: Lay out one 8-foot board and one 4-foot board in an ‘L’ shape. Place a 2×2 or 4×4 corner post flush with the end of the 8-foot board and against the 4-foot board. Predrill pilot holes and then screw the boards into the corner post. Repeat this for all four corners until you have a rectangular frame.
- Check for Squareness: Measure the diagonals of your bed. If they are equal, your bed is square. Make any necessary adjustments.
- Position the Bed: Carefully move your assembled bed to its final location on top of the cardboard.
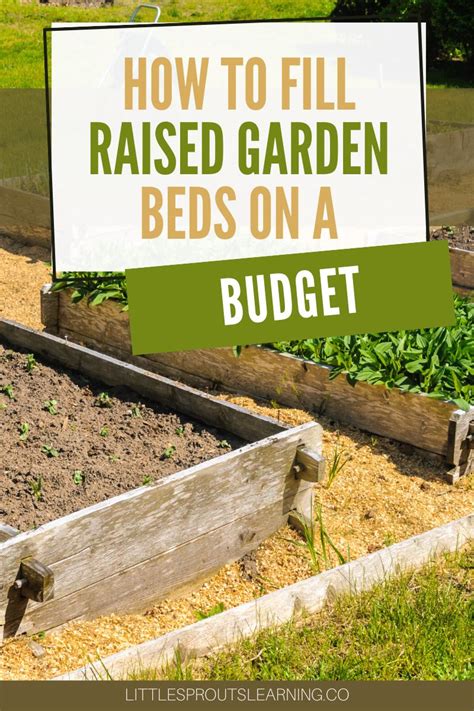
Filling Your Raised Bed for Optimal Growth
The way you fill your raised bed is crucial for success. Don’t just dump in topsoil!
Layering for Success (The Lasagna Method)
This method creates a nutrient-rich, well-draining environment. A common layering approach (often called ‘Lasagna Gardening’) involves:
- Bottom Layer (Drainage & Carbon): Branches, twigs, wood chips, straw, or a layer of cardboard (if not already used as a weed barrier). This helps with drainage and adds slow-release carbon.
- Middle Layers (Nitrogen & Carbon): Alternating layers of ‘greens’ (grass clippings, kitchen scraps, manure, spent coffee grounds, fresh leaves) and ‘browns’ (more straw, shredded newspaper, dried leaves, peat moss).
- Top Layer (Growing Medium): A good quality raised bed mix, which is typically a blend of compost, topsoil, and perlite or vermiculite for drainage and aeration. You can buy this or mix your own. Aim for at least 6-8 inches of this final growing medium.
Wet each layer thoroughly as you build it. This layering approach mimics natural soil building and provides a rich, fertile home for your plants.
Planting and Maintenance Tips
- Companion Planting: Research beneficial plant pairings (e.g., tomatoes with basil, carrots with rosemary) to deter pests and improve growth.
- Watering: Raised beds dry out faster than in-ground gardens. Check soil moisture daily, especially during hot weather. Drip irrigation or soaker hoses are excellent for efficient watering.
- Mulching: Apply a layer of straw, wood chips, or shredded leaves on top of the soil around your plants. This helps retain moisture, suppress weeds, and regulate soil temperature.
- Fertilizing: While your initial fill is rich, plants are heavy feeders. Supplement with compost tea, organic granular fertilizers, or liquid feeds throughout the growing season.
- Crop Rotation: Even in a raised bed, rotating crops each season helps prevent pest buildup and nutrient depletion.
Conclusion
Building your own raised garden bed for growing real food is an incredibly rewarding DIY project for beginners. With a bit of planning and these straightforward plans, you can create a productive and beautiful garden space. Enjoy the process of building, planting, and ultimately harvesting fresh, healthy food right from your backyard!