


How to build a simple, predator-proof DIY chicken coop for backyard layers?

Why Build Your Own Predator-Proof Coop?
Owning backyard chickens is a rewarding experience, providing fresh eggs, natural pest control, and delightful companionship. However, protecting your flock from predators is paramount. A well-built, predator-proof coop is the cornerstone of a healthy and safe chicken keeping journey. While pre-made coops are available, building your own allows for customization, often at a lower cost, and ensures superior security tailored to your specific environment and local threats.
This guide will walk you through the essential considerations and steps to construct a simple yet highly secure DIY chicken coop, ensuring your feathered friends are safe from raccoons, foxes, hawks, and other common culprits.

Planning Your Secure Coop Design
Before you lift a single hammer, thoughtful planning is crucial. Consider the size of your flock, local climate, and available space. Aim for at least 2-4 square feet per chicken inside the coop and 8-10 square feet per chicken in an attached run.
Key Features for Security & Comfort:
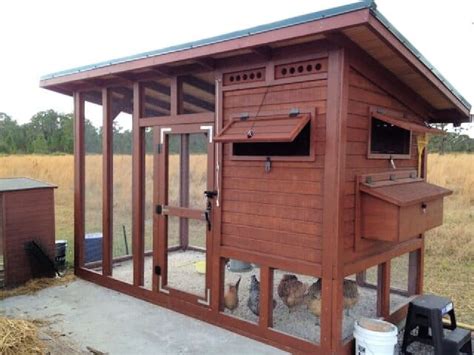
- Strong Foundation: Elevating the coop off the ground helps prevent predators from digging underneath and keeps the coop drier.
- Ventilation: Adequate airflow is vital for chicken health. Incorporate vents near the roofline, covered with hardware cloth.
- Roosts: Chickens need roosting bars to sleep on, positioned higher than the nesting boxes.
- Nesting Boxes: Provide one nesting box for every 3-4 hens. Make them easily accessible from the outside for egg collection.
- Easy Cleaning: Design features like a removable droppings board or a large access door will make cleaning much easier.
Predator-Proofing Strategies
This is where your DIY coop truly shines. Generic chicken wire offers little protection; you need robust materials and smart design.
Essential Predator-Proofing Measures:
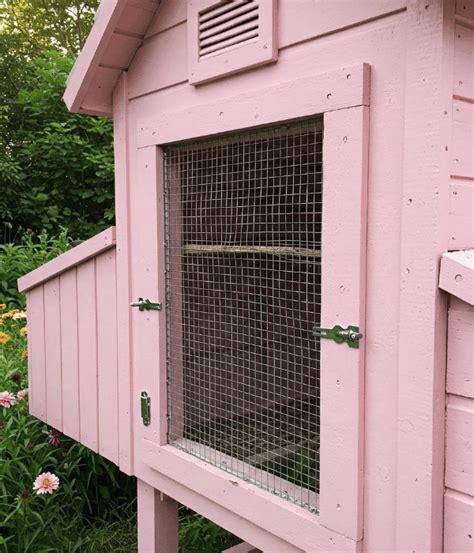
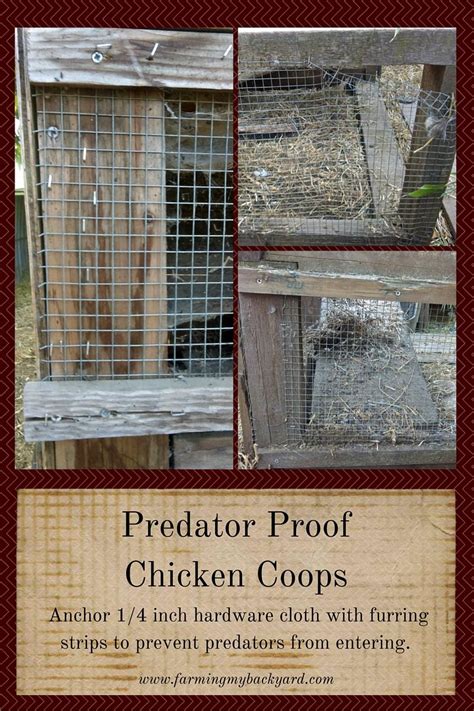
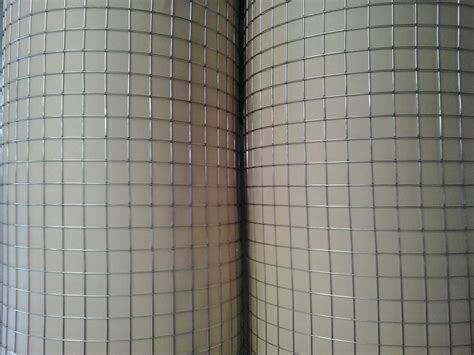
- Hardware Cloth, Not Chicken Wire: Hardware cloth (1/2-inch or 1/4-inch galvanized steel mesh) is critical. It’s strong enough to deter raccoons, foxes, and weasels, unlike flimsy chicken wire. Secure it with heavy-duty staples or screws with washers.
- Digging Prevention: Predators are expert diggers. Extend your hardware cloth at least 12-18 inches underground around the perimeter of the run, or create an “apron” by laying hardware cloth flat on the ground for 12-18 inches outwards from the coop walls and burying it.
- Secure Latches: Use heavy-duty, spring-loaded latches or barrel bolts that require two actions to open. Avoid simple hooks. For extra security, consider adding a padlock.
- Solid Walls & Roof: Use sturdy plywood, repurposed wood, or thick lumber for walls. The roof should be solid (e.g., corrugated metal, shingles) to prevent aerial attacks and provide weather protection. Ensure all gaps are sealed.
- Elevated Coop: As mentioned, raising the coop on sturdy legs (at least 12-18 inches high) makes it harder for digging predators to access.
Materials and Tools You’ll Need
Gathering your materials beforehand will streamline the building process.
Basic Materials:
- Lumber (2x4s, 2x2s for framing; plywood or OSB for walls, floor, roof)
- Hardware cloth (1/2-inch or 1/4-inch mesh)
- Roofing material (corrugated metal, asphalt shingles, tar paper)
- Heavy-duty latches/barrel bolts
- Screws, nails, staples (heavy-duty)
- Exterior-grade paint or sealant
- Hinges for doors and access panels
- Optional: Predator-proof automatic chicken door
Tools:
- Circular saw or hand saw
- Drill/driver
- Staple gun
- Measuring tape, pencil, square
- Wire cutters
- Safety gear (gloves, eye protection)
Basic Construction Steps
While specific plans vary, the general sequence remains consistent.
- Build the Base & Frame: Construct a sturdy rectangular base frame using 2x4s, ensuring it’s square and level. Add vertical studs for walls.
- Install Flooring: Attach a plywood floor to the base.
- Frame the Roof: Build a simple pitched or lean-to roof frame, designed to shed water effectively.
- Attach Siding & Roof Sheathing: Secure plywood or OSB panels to the walls and roof frame.
- Install Roofing Material: Apply tar paper, then your chosen roofing material (shingles or corrugated metal).
- Cut Openings: Create openings for the main access door, chicken pop door, and ventilation.
- Apply Hardware Cloth: This is a critical step. Cover all openings, including windows and ventilation holes, with hardware cloth. Extend it into the ground or create an apron around the run. Secure it tightly every few inches.
- Build & Install Doors: Construct sturdy doors for human access and the chicken pop door. Attach them with strong hinges and install predator-proof latches.
- Interior Fit-Out: Install roosting bars, nesting boxes, and a droppings board. Ensure they are secure and easy to clean.
- Weatherproof & Paint: Seal all exposed wood with exterior-grade paint or sealant to protect against weather.

Maintaining Your Secure Coop
Once your coop is built, ongoing vigilance is key. Regularly inspect the hardware cloth for any damage, check latches for wear, and ensure no new gaps have appeared. Keep the area around the coop clear of debris that could offer cover to predators. With a well-planned, robustly built, and diligently maintained coop, your backyard layers will thrive safely, providing you with delicious fresh eggs for years to come.