

DIY root cellar tips for storing garden harvests without electricity?

In an age of rising energy costs and a growing desire for self-sufficiency, the ancient art of root cellaring is making a powerful comeback. For avid gardeners, a well-designed root cellar offers an ingenious, electricity-free solution for preserving the season’s hard-earned harvest, keeping vegetables and fruits fresh for months. Imagine crisp apples, firm potatoes, and vibrant carrots waiting for you deep into winter, all without a single watt of power. This guide will walk you through the essential tips for building and utilizing your own DIY root cellar, transforming your garden’s abundance into year-round sustenance.
Why Embrace a Root Cellar for Your Harvest?
The primary appeal of a root cellar lies in its simplicity and sustainability. Unlike modern refrigeration, which relies on continuous energy input, a root cellar harnesses the earth’s natural coolness and consistent humidity to create ideal storage conditions. This method not only reduces your carbon footprint and utility bills but also enhances the flavor and nutritional value of stored produce by slowing down respiration and spoilage. It’s an investment in food security, ensuring a readily available supply of fresh, whole foods throughout the non-growing season.

Choosing the Optimal Location
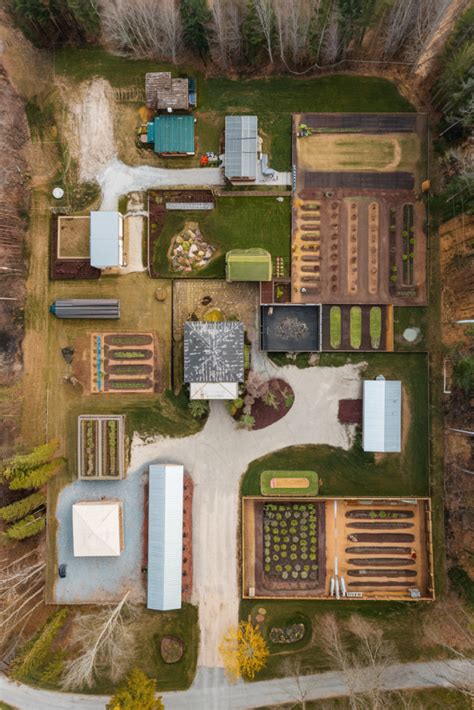
The success of your root cellar begins with its placement. Look for a spot that is naturally cool, shaded, and well-drained. Proximity to your home is convenient, but prioritize stable temperatures over accessibility. Avoid areas prone to flooding or standing water. A north-facing slope can offer natural insulation and consistent cool temperatures. Consider existing structures like an unused basement corner, an old shed, or even a dug-out area beneath a porch if conditions are right.
Essential Design Principles for Success
A functional root cellar manipulates three key environmental factors: temperature, humidity, and ventilation. Understanding and controlling these elements is paramount to successful food preservation.
Temperature Control: The Core Principle
Most root crops thrive in temperatures between 32°F and 50°F (0°C to 10°C). Consistency is crucial; dramatic fluctuations can lead to spoilage. The earth itself is an excellent insulator, maintaining stable temperatures below the frost line. For above-ground options, robust insulation (straw bales, sawdust, rigid foam) and careful thermal mass planning are essential.
Humidity Management: Preventing Dehydration
Different crops require varying humidity levels, but most root vegetables prefer high humidity (85-95%) to prevent shriveling. A dirt floor is often the best solution for natural humidity. If you have a concrete floor, consider adding a layer of damp sand, sawdust, or gravel, or periodically misting the air. Good moisture retention is vital for preserving crispness.
Ventilation Systems: Airflow for Longevity
Adequate airflow prevents the buildup of ethylene gas (a ripening agent), mold, and off-odors. A passive ventilation system, utilizing a low intake vent and a high exhaust vent, is ideal. The “chimney effect” draws in fresh, cool air and expels warmer, stale air without electricity. Screens on vents are necessary to keep pests out.
Darkness is Key
Light encourages sprouting in potatoes, onions, and garlic, and can degrade the quality of other stored produce. Ensure your root cellar is as dark as possible to prolong the dormancy and freshness of your harvest.
Types of DIY Root Cellars
There’s no single perfect root cellar design; the best option depends on your climate, budget, and available resources.
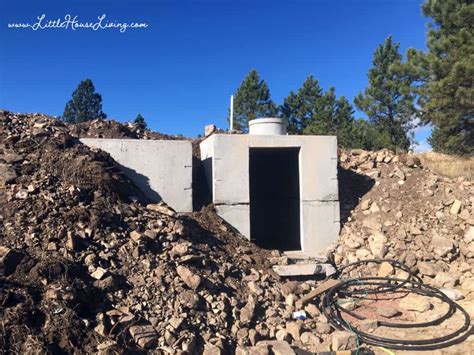
Underground/Buried Root Cellar
This is the traditional, most effective type, leveraging the earth’s constant temperature. It can be a simple dug-out pit, a repurposed cistern, or a more elaborate structure built into a hillside. Earth berming provides excellent insulation against temperature swings.
Above-Ground Insulated Cellar
Suitable for areas where digging is difficult or impractical. These require significant insulation (e.g., double walls packed with sawdust, straw bales, or high-density foam) to mimic the earth’s insulating properties. They still benefit from being built into a shaded area or having an earth berm around them.
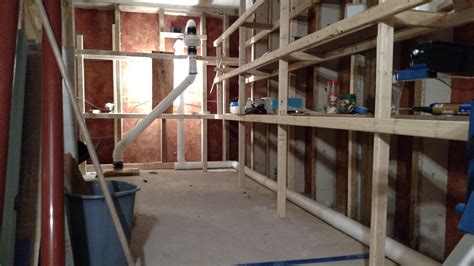
Modified Basement or Shed
If you have an unheated basement corner or an outbuilding, you can adapt it into a root cellar. Insulate the walls, ceiling, and even the floor of the designated area. Add a dirt or sand floor for humidity and ensure proper ventilation. This is often the easiest and least labor-intensive option.
Building Your Root Cellar: Practical Considerations
When constructing your root cellar, focus on durable, natural materials. Concrete, wood, stone, and even repurposed plastic barrels can form the structure. Ensure good drainage around the exterior to prevent water intrusion. Inside, sturdy shelving made from slatted wood or wire allows for air circulation around stored items. Labeling shelves can help you keep track of your bounty.
What to Store and How to Prepare It
Not all produce is suitable for root cellaring, and preparation is key. Good candidates include:
- Root Vegetables: Potatoes, carrots, beets, turnips, parsnips, rutabagas. Cure potatoes and sweet potatoes for a few weeks before storing. Remove green tops from carrots and beets to prevent moisture loss.
- Squash and Gourds: Winter squash (butternut, acorn, spaghetti), pumpkins. Cure in a warm, sunny spot for 1-2 weeks before storing in a slightly warmer, drier part of the cellar.
- Apples: Store separately from other produce, as they release ethylene gas which can accelerate ripening.
- Cabbage: Can be stored whole or as heads wrapped in newspaper.
- Onions and Garlic: Require cooler, drier conditions than most root vegetables. Store in mesh bags or braided.
Always store only blemish-free, healthy produce. Any damaged or diseased items can quickly spoil the entire batch. Clean off excess dirt but avoid washing before storage, as moisture can encourage mold.
Maintenance and Tips for Long-Term Success
Regularly inspect your stored produce for any signs of spoilage, rot, or pests. Remove any compromised items immediately to prevent them from affecting healthy ones. Monitor the temperature and humidity, making adjustments to ventilation if necessary. With a little planning and ongoing care, your DIY root cellar will provide a steady supply of homegrown goodness, connecting you more deeply to your food and the rhythms of nature, all without a power cord in sight.