


Secret to tender, flavorful pot roasts from tougher cuts on a wood stove?
Mastering the Art of Wood Stove Pot Roasts
Transforming a humble, tougher cut of meat into a fork-tender, deeply flavorful pot roast is a culinary triumph. When you introduce the unique, consistent heat of a wood stove into the equation, you unlock an ancient secret to unparalleled richness and depth. Far from being a mere heating appliance, a wood stove, with its steady, radiant warmth, is an ideal instrument for slow cooking, perfectly suited to coaxing the best out of cuts like chuck, round, or brisket.
The Unrivaled Benefits of Wood Stove Cooking
Wood stoves offer a distinct advantage over conventional ovens for pot roasts. Their radiant, even heat envelops the cooking vessel, promoting a gentle, consistent simmer that is difficult to replicate. This extended, low-temperature cooking breaks down tough connective tissues into gelatin, resulting in a succulent texture. Furthermore, the ambient warmth of the stove can subtly infuse a rustic, hearth-smoked essence into your dish, adding another layer of complex flavor that modern appliances simply can’t achieve.
Choosing Your Champion Cut
Forget the prime cuts for pot roast; the magic happens with less expensive, tougher muscles. Opt for:
- Chuck Roast: Rich marbling and abundant connective tissue make it a classic choice, yielding incredible tenderness and flavor.
- Bottom Round Roast: Leaner but benefits immensely from slow, moist cooking, becoming wonderfully tender.
- Brisket: While often smoked, braising brisket in a wood stove creates a melt-in-your-mouth experience similar to its smoked counterpart, but with a different flavor profile.
Preparation: The Foundation of Flavor
The journey to a perfect pot roast begins long before it settles onto the wood stove. Proper preparation is paramount:
- Sear for Success: Pat your meat dry and sear it aggressively on all sides in a heavy, oven-safe pot (like a Dutch oven) over high heat (either on a burner or directly on the hottest part of your wood stove top). This develops a rich brown crust – the Maillard reaction – which builds foundational flavor. Remove the meat and set aside.
- Build a Flavor Base: In the same pot, sauté aromatic vegetables like chopped onions, carrots, and celery until softened. Add minced garlic for the last minute.
- Deglaze and Deepen: Pour in a splash of red wine, beer, or beef broth to deglaze the pot, scraping up all those flavorful browned bits from the bottom. Stir in a tablespoon of tomato paste for umami depth.
- Liquid Gold: Return the seared meat to the pot. Add enough beef broth (or a mix of broth and red wine/beer) to come about two-thirds of the way up the sides of the roast. Don’t submerge it completely.
- Herb and Spice It Right: Add bay leaves, fresh rosemary, thyme sprigs, salt, and freshly ground black pepper. A pinch of smoked paprika can enhance the rustic feel.

The Wood Stove Braise: Low and Slow Perfection
This is where the wood stove shines. Your goal is a gentle, consistent simmer, not a rolling boil. Place your Dutch oven, with its tight-fitting lid, into the lowest, coolest part of your wood stove’s firebox or on a less active area of the stovetop. The key is maintaining a consistent, low heat – typically in the range of 275-325°F (135-160°C). Depending on the size and cut of meat, this can take anywhere from 3 to 5 hours.
- Monitor Heat: Periodically check the simmer; it should be just bubbling gently. Adjust the pot’s position on the stove or stoke the fire minimally if needed.
- Resist Peeking: Opening the lid releases precious heat and moisture. Resist the urge to peek too often.
- Flip (Optional): Some prefer to flip the roast halfway through to ensure even cooking, but if the liquid level is adequate, it’s often unnecessary.
Achieving Ultimate Tenderness and Flavor
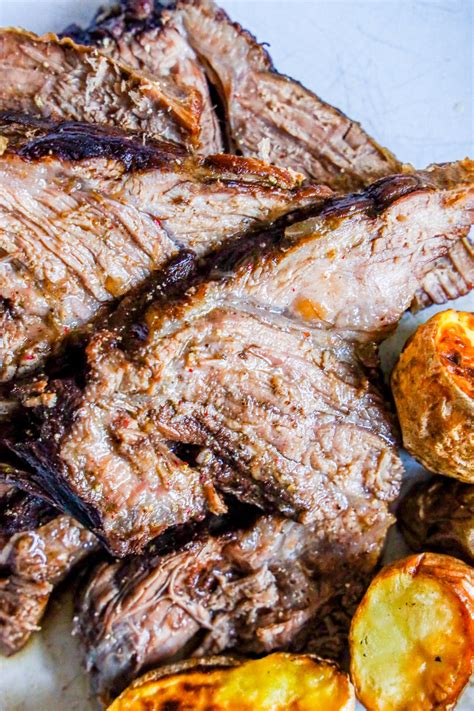
The pot roast is done when it can be easily shredded with a fork. Once cooked, carefully remove the meat from the pot and let it rest on a cutting board, covered loosely with foil, for at least 15-20 minutes. This allows the juices to redistribute, ensuring maximum tenderness.
While the meat rests, you can refine your sauce. Skim off any excess fat from the braising liquid. For a thicker gravy, you can make a slurry of cornstarch and water and whisk it into the simmering liquid until thickened. Taste and adjust seasonings – a splash of red wine vinegar or a squeeze of lemon juice at the end can brighten all the flavors.

Serving Your Masterpiece
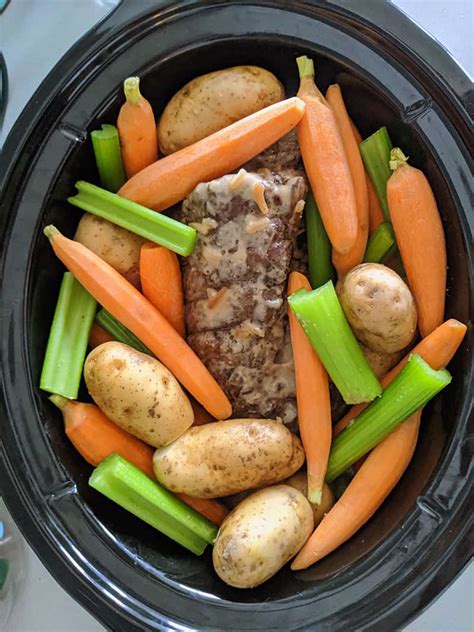
Shred or slice the pot roast against the grain. Serve it bathed in its glorious sauce, alongside roasted potatoes, root vegetables (which can be added to the pot during the last hour of cooking), or creamy mashed potatoes. Garnish with fresh parsley or chives for a pop of color and freshness.
Mastering pot roast on a wood stove is a journey that rewards patience and attention to detail. The resulting dish is more than just a meal; it’s a testament to timeless cooking techniques, delivering profound flavors and an unforgettable tenderness that only true slow cooking can achieve.