


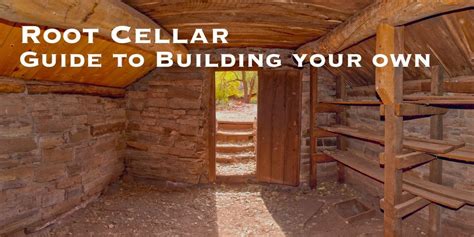
How to DIY build a simple root cellar for preserving garden harvests?
A root cellar is a time-tested, energy-efficient way to preserve your garden’s bounty without refrigeration. By leveraging the earth’s natural coolness and humidity, a simple DIY root cellar can keep vegetables like potatoes, carrots, apples, and onions fresh for months. This guide will walk you through the steps to build your own, ensuring a sustainable food supply long after the growing season ends.
Why Build a Root Cellar?
The primary benefit of a root cellar is its ability to extend the shelf life of your harvest. Unlike modern refrigeration, which can dry out produce, a root cellar maintains a consistently cool and humid environment (typically 35-50°F / 2-10°C and 85-95% humidity). This natural environment prevents spoilage, preserves nutrients, and keeps your vegetables crisp and flavorful.
Beyond food preservation, building a root cellar reduces food waste, decreases your reliance on energy-intensive appliances, and connects you more deeply with sustainable living practices. It’s a low-cost, low-tech solution for food security that’s surprisingly effective.
Planning Your Simple Root Cellar
Careful planning is crucial for a successful root cellar. Consider the following factors:
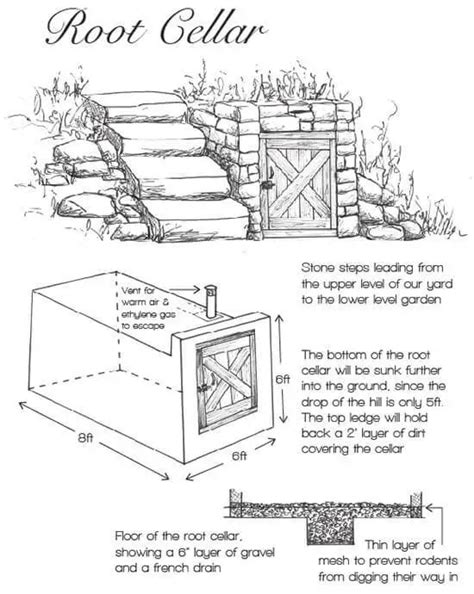
- Location: Choose a shaded spot, ideally on the north side of a building or under dense trees, to minimize temperature fluctuations. Good drainage is essential to prevent water accumulation.
- Size: Determine how much produce you typically harvest to decide on the appropriate size. Even a small barrel can store a significant amount.
- Ventilation: Proper airflow is vital to prevent mold and rot. You’ll need an intake vent near the bottom and an exhaust vent near the top to create a convection current.
- Insulation: The earth itself provides excellent insulation, but additional layers (straw, rigid foam, soil) will help maintain stable temperatures.
Choosing Your Root Cellar Style
For a simple DIY project, there are a few accessible designs:
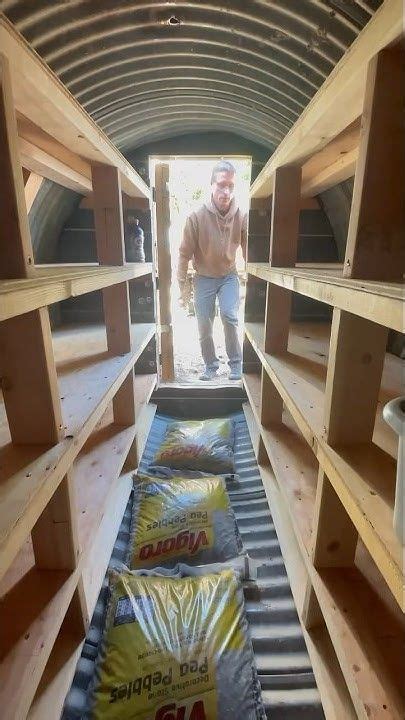
Buried Barrel or Container Method
This is one of the easiest and most common methods. It involves burying a large, food-grade barrel, plastic tote, or even an old chest freezer (with the lid removed or modified for ventilation) partially or fully underground. It’s ideal for smaller harvests and can be built in a single afternoon.
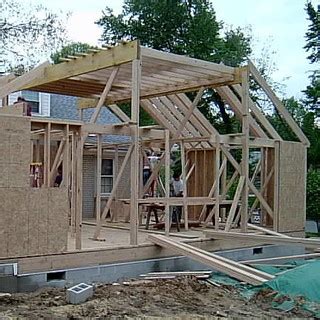
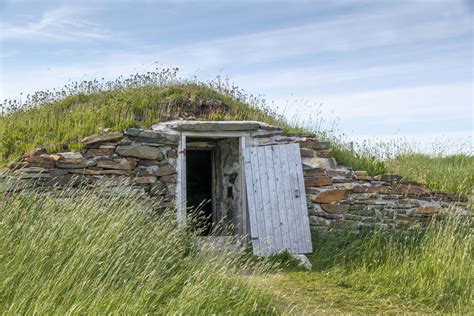
Earth-Mounded or Trench Cellar
For slightly larger needs, a simple trench lined with straw and topped with an earth mound offers good results. This can be more labor-intensive but provides more storage space and excellent natural insulation.
Step-by-Step Construction Guide (Buried Barrel Method)
This guide focuses on the buried barrel method, a popular choice for its simplicity and effectiveness.
Materials You’ll Need:
- A large, food-grade plastic barrel or sturdy plastic tote (55-gallon is common)
- PVC pipes (1.5-2 inches diameter) for ventilation (2 pieces, 2-3 feet long each)
- Hardware cloth or fine mesh screen to cover vents
- Shovel, pickaxe (if soil is tough)
- Gravel or sand for drainage
- Straw or leaves for insulation
- Plywood or treated lumber for a lid
- Heavy rocks or soil for weighting down the lid
1. Dig the Pit
Dig a hole slightly wider and deeper than your barrel. The depth should allow the barrel to be mostly, if not fully, submerged. Ensure the bottom of the pit is level and compact.
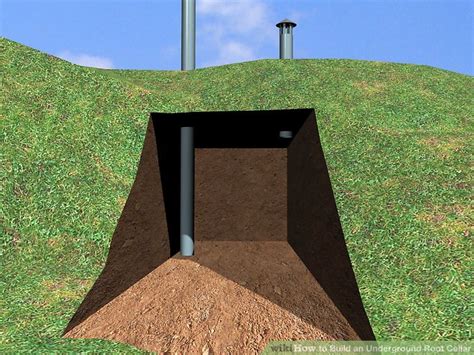
2. Prepare the Barrel and Drainage
Drill several small holes in the bottom of the barrel for drainage. Place a 3-6 inch layer of gravel or sand at the bottom of your pit for additional drainage. Place the barrel into the pit.
3. Install Ventilation
Drill two holes near the top of the barrel for your PVC vent pipes. One should be near the bottom of the barrel (for intake) and the other near the top (for exhaust), offset from each other. Position the intake pipe so it extends down towards the bottom of the barrel’s interior. Secure hardware cloth over the exterior openings of the pipes to keep pests out.
4. Backfill and Insulate
Backfill around the barrel with the excavated soil, compacting it firmly. As you backfill, add layers of straw or leaves around the barrel for extra insulation. Leave the top rim of the barrel slightly exposed or just flush with the ground level, depending on your lid design.
5. Create the Lid
Construct a sturdy, insulated lid for the barrel. A simple design can be a piece of treated plywood cut to size, topped with a layer of rigid foam insulation, and covered with another layer of plywood or even more soil for camouflage and insulation. Ensure the lid fits snugly to prevent pests and maintain temperature. You can add a handle for easy access and weigh it down with rocks.
Maintaining and Using Your Root Cellar
Once built, a root cellar requires minimal maintenance. Monitor the temperature and humidity, especially during extreme weather. You might need to add a bucket of water or damp sand to increase humidity, or open the vents briefly on cool days to lower the temperature.
When storing produce, ensure it is clean and dry. Avoid storing damaged or diseased items, as they can quickly spoil healthy produce. Store different types of produce separately if possible, as some (like apples) release ethylene gas that can ripen or spoil others (like potatoes). Check your stored goods periodically and remove any items showing signs of spoilage.
Conclusion
Building a simple root cellar is a rewarding DIY project that offers a sustainable and effective way to preserve your garden’s harvest. With minimal investment and effort, you can enjoy fresh, homegrown produce throughout the year, reducing waste and enhancing your food independence.