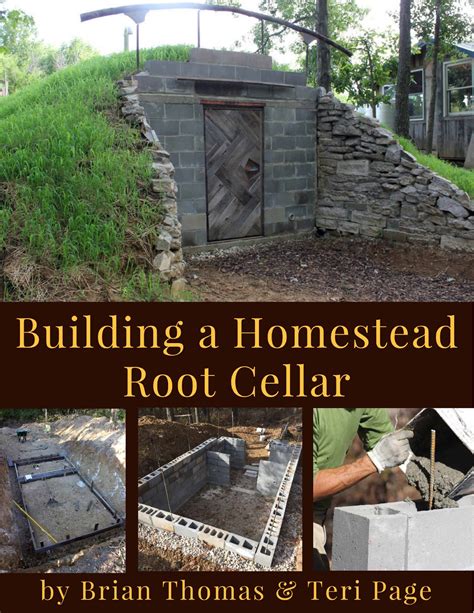


Best DIY root cellar plans for preserving your garden harvest?

Why Build a Root Cellar? Benefits of Underground Storage
The concept of a root cellar is as old as agriculture itself, a time-tested method for preserving produce long before the advent of refrigeration. For modern gardeners and homesteaders, a DIY root cellar offers an invaluable, off-grid solution to extend the bounty of your harvest. These simple, natural storage solutions leverage the earth’s consistent temperature and humidity to keep vegetables and fruits fresh for months, significantly reducing food waste and grocery bills.
Beyond practical savings, building a root cellar connects you to sustainable living practices. It’s an eco-friendly approach that requires no electricity, making it resilient and self-sufficient. Imagine enjoying crisp carrots, firm potatoes, and sweet apples from your garden deep into winter, all thanks to a carefully designed underground space.
Key Considerations Before You Start
Before digging in, careful planning is crucial for a successful root cellar. Location is paramount; choose a spot with good drainage to prevent water accumulation, ideally in a shaded area to maintain cooler temperatures. Consider your soil type – sandy soil drains well but offers less insulation, while clay soil holds moisture but can be prone to poor drainage.
Determine the size based on your typical harvest and storage needs. A small backyard garden might only need a buried barrel, while a larger farm might require a walk-in cellar. Crucially, all root cellars need proper temperature (ideally 35-45°F / 2-7°C), humidity (85-95% RH), and ventilation to function effectively. Without these, your stored produce is likely to spoil.
Popular DIY Root Cellar Designs
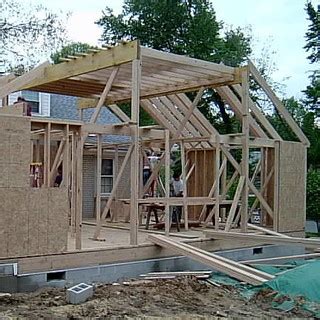
1. The Earth-Mound (or Hillside) Root Cellar
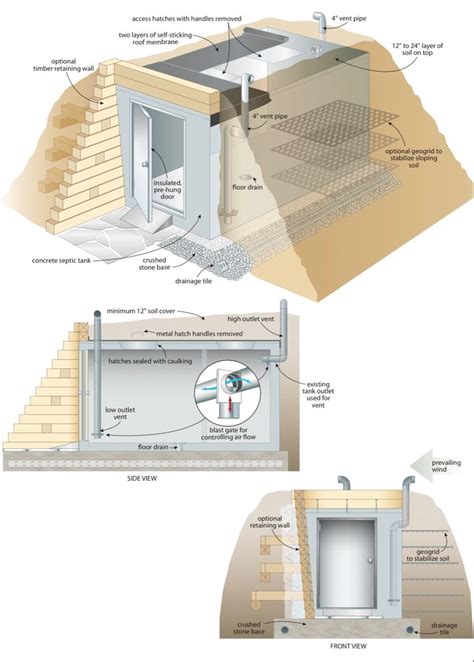
One of the most classic and effective designs involves creating an insulated structure, often with a simple wooden frame, and then burying it with a mound of earth. If you have a natural hillside, you can dig into it to create a more integrated structure. These cellars benefit from natural insulation provided by the surrounding soil, which helps maintain stable temperatures year-round. Construction typically involves a sturdy frame, a waterproof roof, and then covering the entire structure with several feet of earth, often planted with grass to prevent erosion.
2. Buried Trash Can (or Barrel) Root Cellar
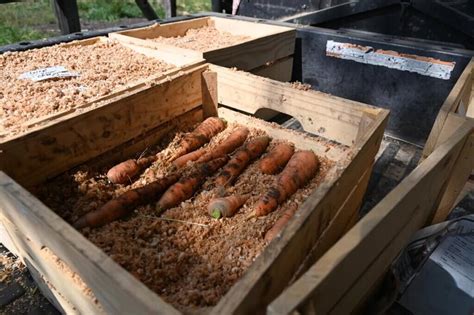
For smaller harvests or limited space, a buried trash can or barrel offers a quick and easy solution. Dig a hole slightly larger than your container in a well-drained area. Place a layer of gravel at the bottom for drainage, then position a sturdy, food-grade plastic trash can or barrel with drainage holes. Fill around the container with soil, leaving the lid accessible. Ensure you have a vent pipe or two extending from the container to above ground for air circulation. This method is excellent for storing smaller quantities of root vegetables like carrots, beets, or potatoes.

3. In-Ground Pit Root Cellar
A more basic approach, the in-ground pit involves simply digging a hole, lining it to protect produce from soil contact (e.g., with hardware cloth or straw), and then covering it with a wooden lid or straw bale. This is a very rustic method, often used for overwintering specific crops like carrots or cabbage directly in the garden bed. While simple, it requires careful monitoring for pests and moisture, and may not provide as consistent conditions as more elaborate designs.
4. Basement Root Cellar Conversion
If you have a basement, you might already have the perfect foundation for a root cellar. Look for a cool, dark corner away from heat sources like furnaces or water heaters. You’ll need to wall off a section with insulated walls, ideally using a material like concrete or pressure-treated lumber, to create a separate room. Ensure it has its own ventilation system – typically an inlet vent near the floor and an outlet vent near the ceiling – to circulate fresh, cool air. Maintaining proper humidity often involves simply having an earthen floor or placing pans of water within the space.
5. Pallet-Constructed Root Cellar
Utilizing repurposed materials like wooden pallets can make your root cellar project more affordable and sustainable. Pallets can form the basic framework for walls, which are then insulated with straw, sawdust, or other natural materials, and typically covered with earth. This method is versatile, allowing for various sizes and configurations, and is particularly appealing for those looking to build with reclaimed resources. Proper waterproofing and pest control will be key considerations for this design.

Essential Elements for a Successful Root Cellar
- Temperature Control: Aim for consistent cool temperatures (just above freezing).
- Humidity Control: Most root vegetables need high humidity to prevent shriveling.
- Ventilation: Essential for fresh air circulation, preventing mold, and removing ethylene gas.
- Darkness: Prevents sprouting and maintains produce quality.
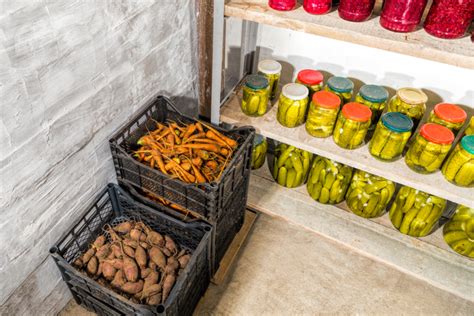
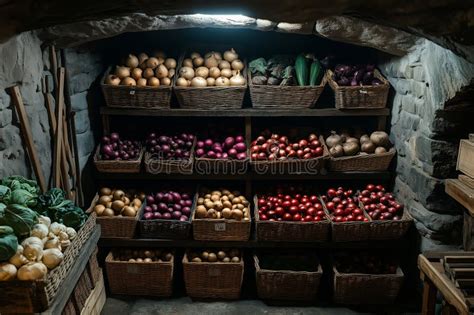
- Shelving and Storage: Use slatted shelves, bins, or crates for good air circulation around produce.
Tips for Storing Produce
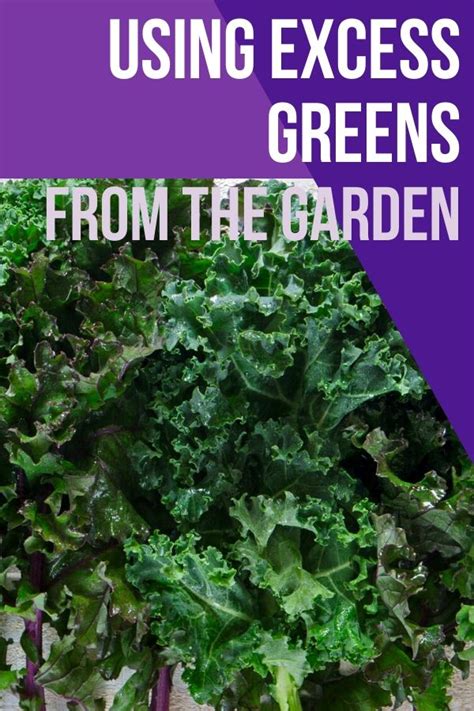
Not all produce stores equally well, and some require specific conditions. Root vegetables like potatoes, carrots, beets, and parsnips thrive in root cellars. Apples can also be stored but should be kept separate from potatoes, as apples release ethylene gas which can cause potatoes to sprout. Curing certain vegetables, like winter squash and sweet potatoes, before storage significantly extends their shelf life. Store items in layers of damp sand, sawdust, or peat moss to maintain humidity and prevent contact. Regular checks are important to remove any spoiling items before they affect others.
Conclusion
Building a DIY root cellar is a rewarding project that empowers you to take control of your food preservation. Whether you opt for a simple buried barrel or a more elaborate basement conversion, the principles remain the same: harness the earth’s natural properties to keep your garden’s bounty fresh. Embrace this ancient wisdom and enjoy the taste of your harvest long after the growing season has ended, all while contributing to a more sustainable lifestyle.