


Safest beginner canning method for excess garden tomatoes and produce?
Embracing Your Garden’s Bounty: The Beginner’s Guide to Safe Canning
As summer draws to a close or mid-season harvests overflow, many home gardeners find themselves with a delightful dilemma: what to do with an abundance of fresh produce? Canning is an age-old tradition that allows you to enjoy your homegrown fruits and vegetables long after the growing season ends. For those new to the art of preservation, the thought of canning can feel intimidating, but with the right method and knowledge, it’s a rewarding and perfectly safe endeavor.
When it comes to beginner-friendly canning, especially for the likes of tomatoes and other high-acid produce, the water bath canning method stands out as the safest and most accessible starting point.
Why Water Bath Canning is Perfect for Beginners
Water bath canning is ideal for high-acid foods – those with a pH of 4.6 or lower. This category includes most fruits, fruit preserves, pickles, relishes, and yes, properly acidified tomatoes. The high acidity, combined with the heat processing in a boiling water bath, effectively destroys spoilage organisms and harmful bacteria like Clostridium botulinum, making your preserves safe for pantry storage.
Unlike pressure canning, which is required for low-acid foods (like most vegetables, meats, and poultry) and involves specialized equipment to reach much higher temperatures, water bath canning is simpler to execute and requires less specialized gear. This simplicity makes it a less daunting entry point for first-time canners eager to preserve their garden’s yield.
Essential Equipment for Water Bath Canning
Before you dive in, ensure you have the necessary tools for a smooth and safe canning process. Most items are readily available or might already be in your kitchen:
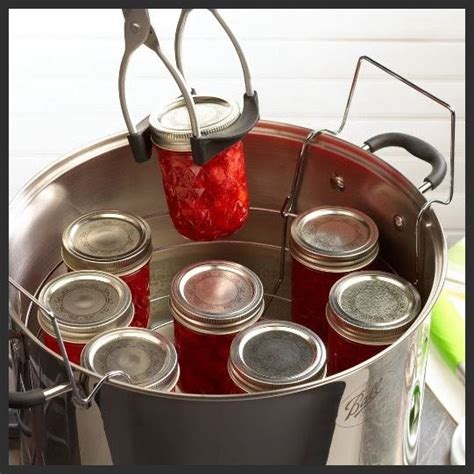
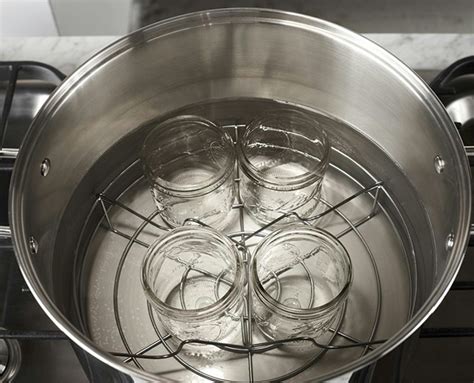
- Water Bath Canner with Rack: A large pot deep enough to fully submerge jars by at least an inch, equipped with a rack to keep jars off the bottom and prevent rattling.
- Canning Jars, Lids, and Bands: Always use standard canning jars (e.g., Ball, Kerr) designed for canning. New lids are essential for each use, while bands can be reused.
- Jar Lifter: A must-have tool for safely placing hot jars into and removing them from the canner.
- Canning Funnel: Helps prevent spills and keeps jar rims clean when filling.
- Headspace Tool/Bubble Remover: Essential for measuring the correct headspace and releasing trapped air bubbles.
- Non-Metallic Spatula or Chopstick: For removing air bubbles from filled jars.
- Clean Cloths: For wiping jar rims before sealing.
- Timer: Crucial for accurate processing times.
- Acid (for tomatoes): Bottled lemon juice or citric acid to ensure adequate acidity for tomatoes.
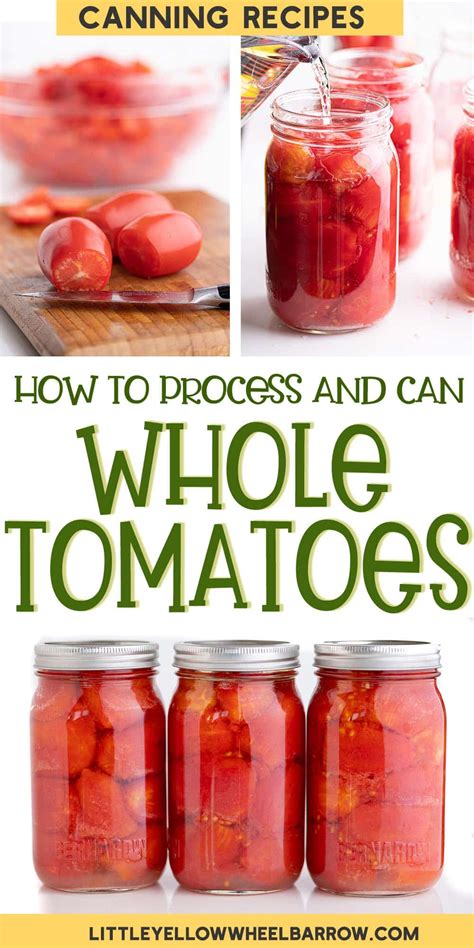
Step-by-Step: Canning Diced Tomatoes (A Beginner’s Project)
Tomatoes are a staple for many gardeners, and canning them is an excellent first project. Here’s a simplified overview for canning diced tomatoes:
- Prepare Jars and Lids: Wash jars, lids, and bands in hot soapy water. Sterilize jars by boiling them for 10 minutes, then keep them hot in the canner or a warm oven until ready to fill. Lids only need to be heated according to manufacturer’s instructions (often simmering, not boiling).
- Prepare Tomatoes: Wash ripe tomatoes thoroughly. Core and peel them (a quick blanch in boiling water then an ice bath makes peeling easy). Dice them as desired.
- Acidification is Key: For safety, add bottled lemon juice or citric acid directly to each jar before filling with tomatoes. For pints, use 1 tablespoon bottled lemon juice or 1/4 teaspoon citric acid. For quarts, use 2 tablespoons bottled lemon juice or 1/2 teaspoon citric acid. You may also add 1/2 teaspoon salt per pint or 1 teaspoon per quart for flavor, if desired.
- Fill Jars: Pack the prepared diced tomatoes into the hot jars, leaving 1/2 inch of headspace. Gently press down to remove air bubbles, adding a bit more tomato if needed to maintain headspace.
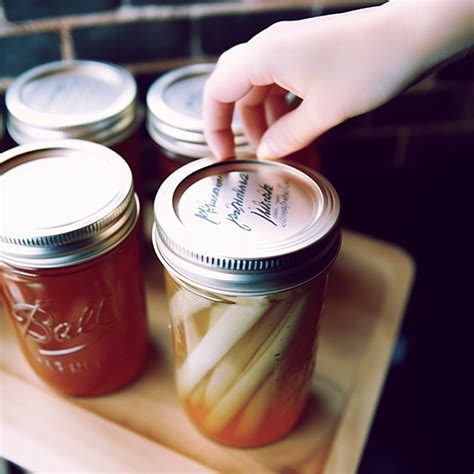
- Wipe Rims and Seal: Clean the jar rims thoroughly with a damp cloth. Place a hot lid on each jar, followed by a band, tightened fingertip-tight.
- Process in Water Bath: Carefully place the filled jars onto the rack in your water bath canner. Ensure water covers jars by at least 1-2 inches. Bring water to a rolling boil. Once boiling, start your timer for the recommended processing time (check a reliable recipe, as times vary by altitude and tomato preparation).
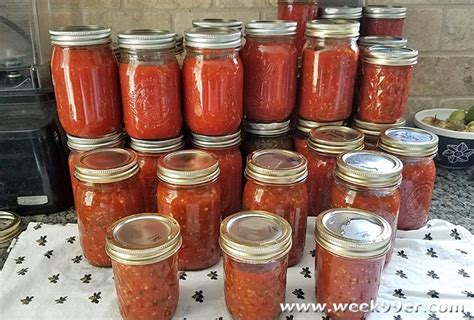
- Cool and Check Seals: After processing, turn off the heat and let jars sit in the canner for 5 minutes before carefully removing them with a jar lifter. Place jars on a towel-lined counter, spaced apart, to cool undisturbed for 12-24 hours. Once cool, check seals by pressing the center of the lid; it should not flex. Remove bands, wipe jars clean, label, and store in a cool, dark place.
Crucial Safety Tips and Common Pitfalls to Avoid
Adhering to safety guidelines is paramount in canning:
- Always Use Tested Recipes: Never guess! Rely on trusted sources like the USDA Complete Guide to Home Canning, the National Center for Home Food Preservation (NCHFP), or reputable canning jar manufacturers’ websites (Ball, Kerr).
- Do Not Alter Recipes: Especially important for acidity and processing times. Changing ingredient ratios, especially for vegetables, can compromise safety.
- Ensure Proper Headspace: The recommended space between the food and the jar lid is critical for creating a vacuum seal.
- Check Jar Seals: A properly sealed jar lid will be concave and won’t flex when pressed. If a jar doesn’t seal, refrigerate and consume its contents promptly.
- Discard Compromised Jars: If you find any jar with a bulging lid, leakage, mold, or an off-odor, discard its contents immediately without tasting.
Conclusion: Preserve with Confidence
Water bath canning is an empowering skill that connects you more deeply with your food and the rhythm of the seasons. By starting with high-acid foods like tomatoes, following tested recipes, and using the correct equipment, beginners can safely and successfully preserve their garden’s hard-earned bounty. Enjoy the satisfaction of opening a jar of summer’s goodness in the depths of winter, all thanks to your efforts and a reliable canning method.